Installation and Configuration Steps for a SQL Server Database
Install the SQL Server Software
About this task
When you prepare to install SQL Server on the Database Server, you should consider the following notes:
Procedure
- GE Digital APM requires mixed-mode authentication for SQL Server installations. The documentation and scripts supplied by GE Digital assume that the SQL Server instance allows mixed-mode authentication.
- The GE Digital APM database must be owned by the SQL Server login referenced in the GE Digital APM data source. Being a member of the SQL Server db_owner role is not sufficient. GE Digital provides a script to properly configure the SQL Server database for use with GE Digital APM.
- The database supplied by GE Digital (via a .bak file) was created with the SQL Server collation Latin1_General_CI_AS.
What to do next
Create the SQL Server Database
The following instructions provide details on locating the files that are needed for creating and configuring the SQL Server database. To create the database, you will restore a backup file that is included in your GE Digital APM distribution package. For example, the restore database option in SQL Server Management Studio could be used to create the database. Specific instructions on creating the SQL Server database are not included in this documentation.
Steps
- On the GE Digital APM Server machine, access the GE Digital APM distribution package, and then navigate to the Database folder.
- Open the file MI_DB_MASTER_<version>.zip, and then extract the contents of the file <version>.zip to a folder on the C: drive.Important: The name of the folder to which you extract the files must not contain any spaces.
- Open the file <version>.zip, then open the subfolder _Setup\NewInstall\SQLServer, and then locate the file MI_<version>.BAK.ZIP.
- Place the MI_<version>.BAK.ZIP file in a location where it can be referenced by the SQL Server service, and then restore the file.
The GE Digital APM database is created.
What's Next?
Configure the SQL Server Database
About this task
The following instructions explain how to configure a SQL Server database for use by GE Digital APM. These instructions assume that the SQL Server database has already been created by restoring a backup file using SQL Server Management Studio or another third-party tool.
These instructions provide details on configuring the GE Digital APM SQL Server database using the script MI_SQL_DB_Configure.sql, which is included in your GE Digital APM distribution package. This script ensures that the database will be properly configured for use with GE Digital APM.
When you run the script MI_SQL_DB_Configure.sql, the following database settings will be configured automatically:
- The database will be set to read/write mode.
- The database will be configured to allow multiple users.
- The database will be set to Full recovery mode.
- A SQL Server login will be created, and this login will own the database.
- The SQL Server database name, SQL Server login name, and password will all match.
Procedure
- Open a SQL Server Management Studio query window that is connected via a privileged login.
- Open the file MI_SQL_DB_Configure.sql, and then copy its contents into the SQL Server Management Studio query window.
- Set the @dbname variable to the name of the GE Digital APM SQL Server database that you created.
- Execute the edited script.
- As needed, use SQL Server Management Studio to modify the password. These are the same login credentials that will be used when you create the GE Digital APM data source that will connect to this database.
- Create the custom server-level error messages, which are required by the GE Digital APM system. These error messages must be created at the instance level. Creating them requires a privileged login assigned to either the System Administrator (sysadmin) or Server Administrator (serveradmin) fixed server roles. To create the GE Digital APM error messages:
- Make sure that you are connected to the Database Server with SQL Server Management Studio as a System Administrator or Server Administrator user
- Execute the stored procedure MI_ERRORS_CRT_ALL_MSGS. This procedure was supplied with the GE Digital APM database and can be executed by using the command
exec <databasename>..MI_ERRORS_CRT_ALL_MSGS, where<databasename>is the name of the database you created in the preceding steps.
What to do next
Set the Local DTC Property Settings - GE Digital APM Database Server
About this task
Procedure
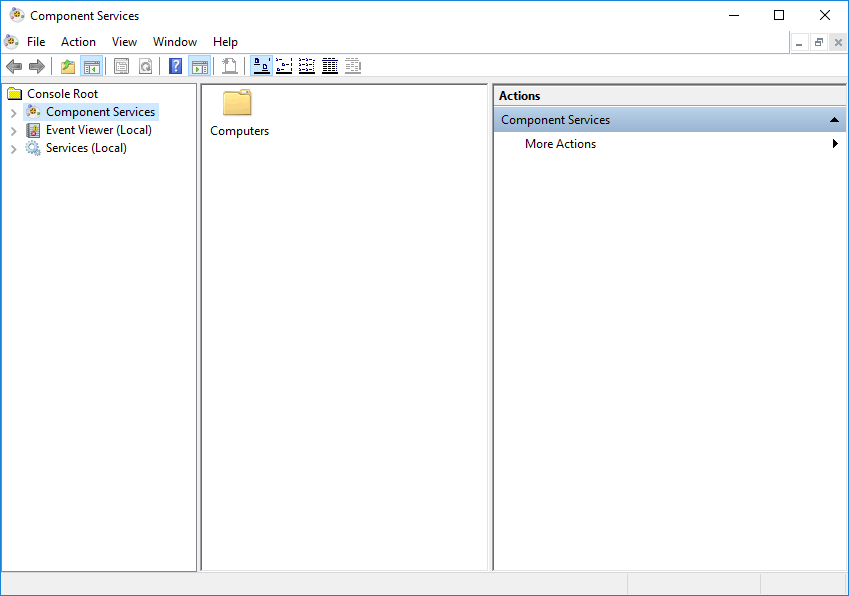
- On the machine that will contain the GE Digital APM Database Server, in Server Manager, on the Tools menu, select Component Services.The Component Services window appears.
- In the left pane, in the tree, expand the Component Services node down to the My Computer node.
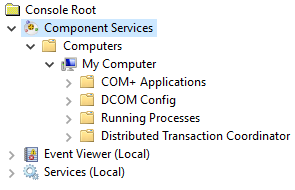
- Expand the Distributed Transaction Coordinator node.
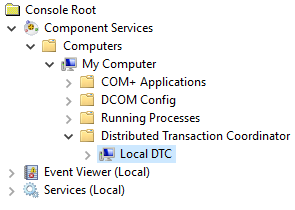
- Select the Local DTC node, and then, on the menu above the tree, select
 (Properties).The Local DTC Properties window appears, displaying the Tracing section.
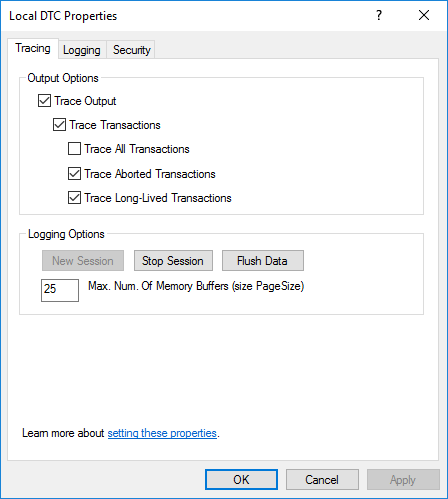
- Select the Security tab.The Security section appears.
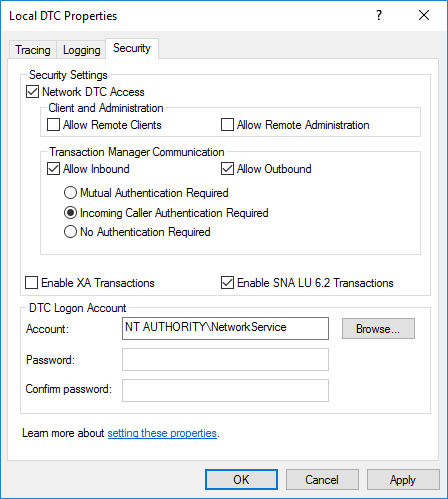
What to do next
About Creating and Configuring the SQL Server Database
After you have installed the SQL Server software on the Database Server machine, you can create the GE Digital APM database by restoring a database backup file that is provided by GE Digital. For example, the restore database option in SQL Server Management Studio could be used to create the database. Specific instructions for creating the GE Digital APM database are not included in this documentation.
After you have created the database, you will need to configure it. To create and configure the GE Digital APM database, you must have access to:
- Microsoft SQL Server Management Studio.
- A privileged SQL Server account with sysadmin rights in the target instance.
- Two files from the GE Digital APM distribution package that will be extracted on the GE Digital APM Server:
- GE Digital APM, which is included in the file
GE Digital APM
in the GE Digital APM distribution package.
-and-
- MI_SQL_DB_Configure.sql, which was extracted from the GE Digital APM distribution package.
- GE Digital APM, which is included in the file
GE Digital APM
in the GE Digital APM distribution package.
These instructions assume that you are familiar with SQL Server Management Studio or another third-party tool for running SQL scripts.
MI_SQL_DB_Configure.sql script.