Dataloggers in Thickness Monitoring

About Dataloggers in Thickness Monitoring (TM)

Dataloggers are data collection devices, which are used to measure and record the thickness of a component. Using the Thickness Monitoring (TM) module, you can:

  • Send data related to a TML to the datalogger.
  • Receive data from the datalogger (after you collect measurement data in the field and record it in the datalogger).

The following dataloggers are supported in TM:

  • GE DMS Go
  • GE DMS Go+
  • GE DMS2
  • Olympus (Panametrics) 37DL Plus Ultrasonic Thickness Gage
  • Olympus (Panametrics) 38DL Plus Ultrasonic Thickness Gage

For each datalogger, GE Digital APM provides:

Access the TM Dataloggers page for an Asset or TML Group

About this task

This topic describes how to access the TM Dataloggers page for an asset or TML Group. You can also access the TM Dataloggers page for multiple assets.

Procedure

  1. Access the Analysis Overview workspace for the asset or TML Group for which you want to access the TM Dataloggers page.
  2. In the upper-right corner of the page, select , and then select Dataloggers.

    The TM Dataloggers page appears, displaying the Send To section. In the section, a list of TMLs linked to the selected asset or TML Group appears. The list also includes TMLs linked to any TML Groups in the asset. By default, the check boxes in all the rows are selected.

What to do next

Access the TM Dataloggers page for Multiple Assets

About this task

This topic describes how to access the TM Dataloggers page for multiple assets. You can also access the TM Dataloggers page for a single asset or TML Group.

Procedure

  1. Access the Thickness Monitoring Overview page for the functional location that contains the assets for which you want to access the TM Dataloggers page.
  2. In the upper-right corner of the page, select .

    The Select Assets to Load for Dataloggers window appears, displaying a list of assets that the functional location contains.

  3. In the rows containing the assets for which you want to access the TM Dataloggers page, select the check boxes.
    Note: We recommend that you select the same type of assets (i.e., either Equipment or Functional Locations).
  4. Select Done.

    The TM Dataloggers page appears, displaying the Send To section. In the section, a list of TMLs linked to the selected assets appears. The list includes TMLs linked to any TML Groups in the assets.

What to do next

Modify Datalogger Settings

Before you begin

  • Datalogger settings are specific to the user, data source, and browser. If you log in as a different user, switch browsers, or use a different data source, you will need to reconfigure your datalogger settings.
  • When you send data to a GE DMS Go or GE DMS Go+ datalogger, GE Digital APM creates a folder in the USB drive. Therefore, you must have the Write permission to the USB drive on the machine that you will use to send data.

Procedure

  1. Access the TM Dataloggers page.
  2. In the upper-right corner of the page, select .

    The datalogger settings appear.

  3. In the drop-down list box at top of the workspace, select the datalogger whose settings you want to configure. By default, the datalogger that you used previously is selected.
  4. If you want to use the GE DMS Go or GE DMS Go+ datalogger, specify a directory in the File Directory box. Files will be sent to and received from the Meridium folder that is created in the specified directory.
  5. As needed, enter values in the remaining fields, and then select Save.

    The datalogger settings are modified.

Results

  • If you have already selected the assets that you want to send to the datalogger, then the Send To section appears. Otherwise, the Select Assets to Load for Dataloggers window appears, allowing you to select the assets for which you want to send data to the datalogger.

What to do next

Send Data to a Datalogger

Before you begin

Procedure

  1. Access the TM Dataloggers page.
  2. At the top of the page, in the drop-down list box, select the datalogger to which you want to send data. By default, the datalogger that you previously used is selected.
  3. In the Send To section, in the rows containing the TMLs whose data you do not want to send to the datalogger, clear the check boxes.
  4. Select Send.

    At the end of the section, the red changes to a green to indicate that the device is connected.

    If the data related to an asset was already sent to the datalogger previously, a message appears, asking you to confirm whether you want to overwrite the existing data on the datalogger. If you choose to overwrite, the data related to the asset is replaced with the data that you send. If you choose not to overwrite, the data will not be sent to the datalogger.

    The date is sent to the datalogger. When the operation is complete, the green changes to a red .

Add Columns to the Send To Grid

Before you begin

  • The data in the columns that you add is not automatically sent to the datalogger. If, however, you want to send this data to the datalogger, you must create a mapping for the corresponding field on the TM Admin Preferences page.
  • The columns that you add are specific to the user, data source, and browser. If you log in as a different user, switch browsers, or use a different data source, the columns that you have added will not appear.

Procedure

  1. Access the TM Dataloggers page.
  2. In the upper-left corner of the Send To section, select .

    The Choose Columns window appears, displaying a list of fields in the Asset family in the left section.

  3. If you want to add fields from the Asset family, skip to step 5.
  4. Select , and then in the Family box, select the family from which you want to add fields.

    A list of fields in the selected family appear in the left section. If, however, the column for a field has already been added to the grid, or the field has been defined in a mapping, it does not appear in the list.

  5. Select the rows containing the fields that you want to add to the grid, and then select .

    The selected fields appear in the right section.

  6. If you want to add fields from another family, repeat steps 4-5.
    Tip: You can change the sequence of the fields using the and buttons.
  7. Select OK.

    Columns for the selected fields appear on the right side of the grid in the Send To section (i.e., after the default columns).

Remove Columns from the Send To Grid

About this task

You cannot remove the default columns that appear in the grid in the Send To section. You can only remove the columns that you have added from the Column Chooser window.

Procedure

  1. Access the TM Dataloggers page.
  2. In the upper-left corner of the Send To section, select .

    The Choose Columns window appears. In the right section, a list of fields for the columns that you have already added to the grid appears.

  3. If you want to remove fields from the Asset family, skip to step 5.
  4. Select , and then, in the Family box, select the family from which you want to remove the fields.

    In the right section, a list of fields that you have already added to the grid appears.

  5. Select the rows containing the fields that you want to remove from the grid, and then select .

    The selected fields are removed from the right section.

  6. If you want to remove fields from another family, repeat steps 4-5.
  7. Select OK.

    Columns for the selected fields are removed from the grid in the Send To section.

Receive Data from a Datalogger

Before you begin

  • Install the Meridium Device Service on the machine that you will use with dataloggers. If you do not install it, when you attempt to send or receive data, you will be prompted to install it.

Procedure

  1. Access the TM Dataloggers page.
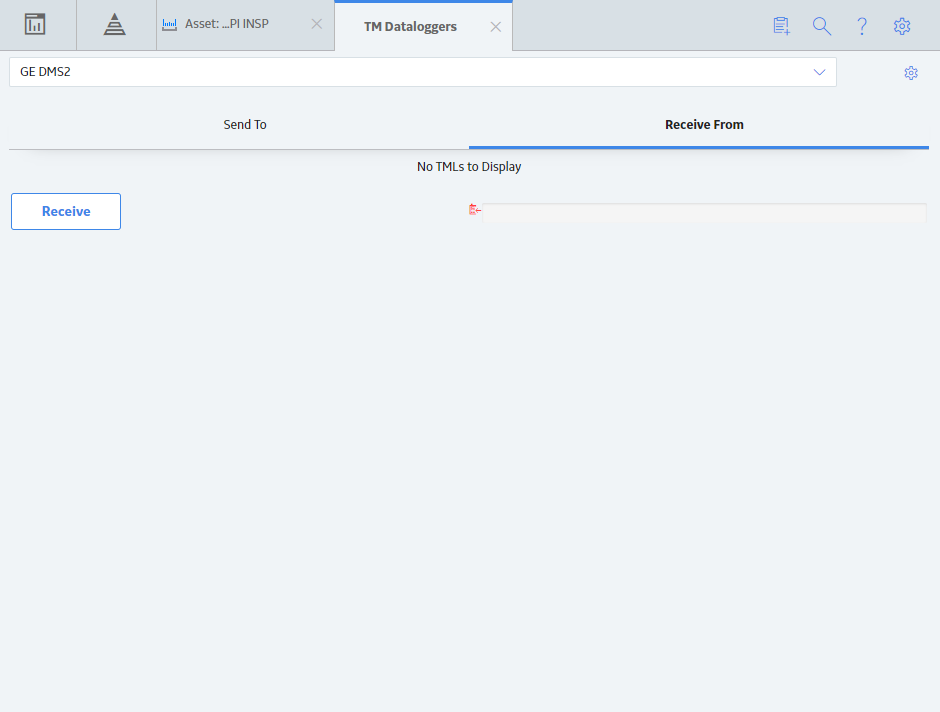
  2. At the top of the page, in the drop-down list box, select the datalogger from which you want to receive data. By default, the datalogger that you previously used is selected.
  3. Ensure that the datalogger settings are correct.
  4. Select the Receive From tab.

    The Receive From section appears.

  5. Select Receive.

    The Select Files to Receive window appears, displaying a list of files that store the measurement data. By default, the check boxes corresponding to all the files are selected.

  6. If you do not want to receive the data stored in a file, clear the check box.
  7. Select Done.

    The data is received from the datalogger, and stored in Thickness Measurement records.

    Note: If readings are not taken for a measurement, however, Measurement Not Taken records are not created.

Results

  • The following analyses are recalculated:
    • TML Corrosion Analysis linked to each TML whose measurement data you have received.
    • Asset Corrosion Analysis linked to each asset whose measurement data you have received.