Modify Downtime Events
Procedure
- Log in to the Plant Applications Web Client.
- Select
 .The Events page appears.
 - Access the required downtime events list.
- In the row containing the downtime event whose detail you want to modify, select
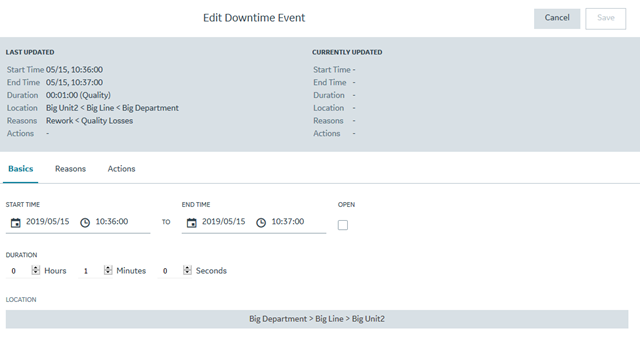
 .The Edit Downtime Event page displaying the Basics section appears.
- In the Basics section, modify the duration and machine for the downtime event.Tip: The modified downtime event details appear in the CURRENTLY UPDATED section.
- Select the Reasons tab, and then modify the Fault Code and reasons for the downtime event.
- Select the Actions tab, and then, in the ACTIONS section, modify the level of reasons for an event.Note: Select Top <number> to access the Top <number> Actions menu, and then modify the action taken by the operator for the downtime event. The <number> represents a numeric value ranging from 0 to 5, indicating the top actions most frequently performed by the operator. You can configure actions in Plant Applications Administrator.
The values that appear in the L1, L2, L3, and L4 boxes for the levels of actions are configured in Plant Applications Administrator and are automatically populated, if available, based on the action you select in the Top <number> Actions menu.
- In the ADD/EDIT COMMENTS section, select Click to add/edit comment. The Comment window appears. In the ADD COMMENT box, enter a comment or modify the comment for the changes you made and select Add Comment
- As needed, select the NPT tab, and then modify the event details for an NPT.
- In the End Time box, modify the duration for the non-productive time (NPT) downtime event.
- In the ADD/EDIT COMMENTS section, select Click to add/edit comment. The Comment window appears. In the ADD COMMENT box, enter a comment or modify the comments entered for the NPT downtime event and select Add Comment.
Note: The NPT section appears based on the selected Fault Code and downtime reasons. - Select Save to save the modified details of the downtime event.
Note: If another user has saved changes to the same downtime event while you are modifying it, you will see the message Event details updated by another user, would you like to accept the changes? Click Yes to accept their changes (in which case the page will update to include the other user's changes) or No to reject them.