 CIMPLICITY
3.3.2. Class Event Definition
About this task
| Class event configuration |
| Supported string substitution for event fields |
Class event configuration

- Event tab
- Actions tab
- Advanced tab
Event Tab
The fields on the Event tab in the New Event dialog box depend on the selected event type.

- Event type
- Event fields
Event Type
All of the event types available in the Events Editor are available for a class event.
The difference between configuring a class event and a standard event is that you:
- Select a data item instead of a point ID when you configure an event that requires a point ID.
- The CIMPLICITY $OBJECT variable is automatically entered when you select the data item.
Events available in the drop down list ??for classes include:
| Alarm Acknowledged |
| Alarm Deleted |
| Alarm Generated |
| Alarm Reset |
| Point Change |
| Point Equals |
| Point Transition High |
| Point Transition Low |
| Point Unavailable |
| Point Update |
| Run Once |
| Timed |
Event Fields
Fields vary based on your selected event. One or more field may display.
Note: The field's value can be selected from an associated browser.
Possible fields and buttons to open associated browsers are as follows.
| Field | Button | Opens |
| Point ID |

|
?? Note: The CIMPLICITY
 $OBJECT variable appears in the Point ID field before the data item as follows: {$OBJECT).DataItem
|
| Source |
|
|
| Alarm ID |

|
|
| Class ID |

|
CIMPLICITY Select an Alarm Class browser |
| Resource ID |

|
CIMPLICITY Select a Resource browser |
| Event Time |
Timed event provides fields to enter The start time and interval for an event.

|
|
| Event int | ||
Actions Tab
Actions listed on the Actions tab are associated with the selected event. .
Buttons on the Actions tab enable you to open a New Actions dialog box to add an additional action.

- New action association.
- Log Flag checkbox.
New Action Association
Click New on the Actions tab in the New Event dialog box.
A New Event-Action dialog box opens.
Selections are as follows.
Action ID
Methods to select an action ID are as follows.
- Browse existing actions.
- Create a new action.
- Browse existing actions.
- Do one of the following.
- Click the Browse Actions button
 to the right of the Action ID field.
 - Click the Popup Menu button to the right of the Action ID field; select Browse on the Popup menu.
A Select an Action browser opens.
- Select an action; click OK.

- Create a new action.
- Click the Popup Menu button to the right of the Action ID field; select New on the Popup menu.
A New Action dialog box opens.
- Enter a unique action name in the Action ID field.

- Click OK.
A New Action dialog box opens for the entered action
- Define the action.

- Click OK.
Result: The New Event-Action dialog box displays when you use either method.
Log Flag Checkbox
Check Log Flag if the action should be ??logged to a database table.
Result: When the New-Event Action dialog box is closed a new class action ??is listed both on the Actions tab in the Class dialog box and at the end of the list of actions associated with the event.
Existing Event-Action Properties
Procedure
Results
When the New-Event Action dialog box is closed the class action that is associated with the event is modified.
Advanced Tab
Advanced tab options are as follows.
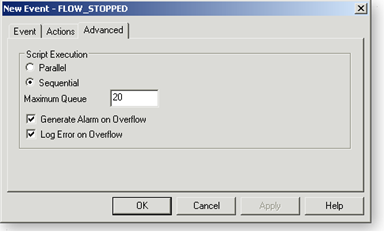
Configure advanced specificationsthe same as you configure them for an event in the Events folder.
When an object is created from the class, the event displays in the CIMPLICITY Event Editor window as:
ObjectName.EventID
Where
ObjectName is the name of the object that has been created.
EventID is the name entered in the New Event dialog box.
Supported String Substitution for Event Fields
String substitution is supported for the following event fields, which you enter in the associated Event dialog box field.
- Point ID.
- Alarm ID.
- Resource ID.
- Alarm Class.
- Point Value.


