 CIMPLICITY
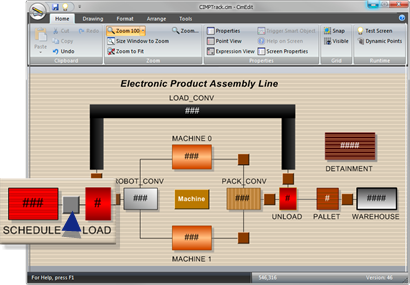
5.3. Configure a Button for the SCHEDULE to LOAD Route
About this task
The routes are different when you move blocks from the:
- SCHEDULE region to the LOAD region
- UNLOAD region to the PALLET region.
For these routes, you will have to prompt the user to tell you the item ID of the block, so Tracker knows which block to move. This can be done by creating a variable setpoint action that will allow a user to type in the item ID of the block.
Begin by configuring a button for the SCHEDULE region to the LOAD region.
| A | Select a Button for the SCHEDULE to LOAD Route |
| B | Create a Mouse Up Event |
| C | Create a Variable Setpoint Action |
| D | Close the Dialog Boxes |
| E | Test the SCHEDULE to LOAD Route Button |
- Select a Button for the SCHEDULE to LOAD Route
Procedure
-
Do the following.
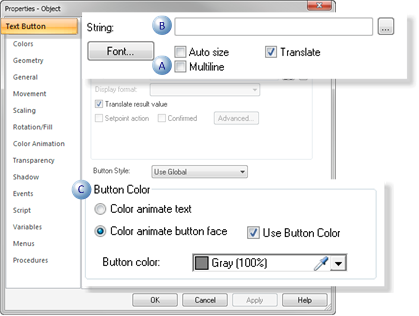
A Multiline check box Clear B String field Delete the default Button text. C Button Color (Optional) Change the button color so it will contrast with the other route buttons. - Create a Mouse Up Event
-
Do the following.
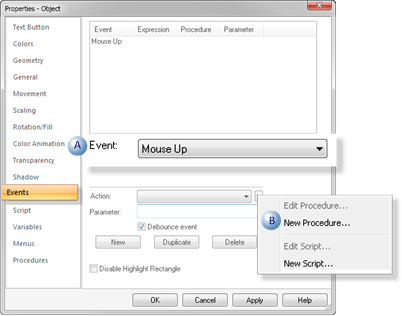
A Event field Select Mouse Up in the drop down list. B Action - Click the Popup button to the right of the Action field.
- Select New Procedure on the Popup menu.
Result: A Procedure Information dialog box opens.
- Create a Variable Setpoint Action
Enter the following in the Procedure Information dialog box.
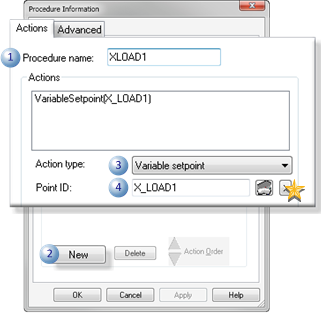
1 Procedure name XLOAD1 2 New Click New. 3 Action type Variable setpoint 4 Point ID X_LOAD1.  SCHEDULE to LOAD route is one of the two routes that has a transition text point.
- Close the Dialog Boxes
Click OK to close the open dialog boxes, including the button's Properties dialog box.
Result: Items can now be moved from the SCHEDULE to LOAD regions after you:
- Test the SCHEDULE to LOAD Route Button
-
Click the new SCHEDULE to LOAD route's button.
A Setpoint dialog box opens.
-
Enter the item ID to be moved in the New value field.
Example
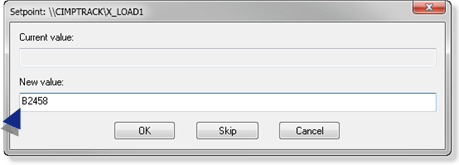 Note: In the real world, there would be some sort of bar code reader that would automatically read in the serial/item number.)


