 Historian
Send Data to AWS IoT Core
About this task
- The iFIX collector
- The MQTT collector
- The ODBC collector
- The OPC Classic DA collector
- The OPC Classic HDA collector
- The OPC UA DA collector
- The OSI PI collector
- The Server-to-Server collector
- The Simulation collector
- The Windows Performance collector
- The Wonderware collector
Procedure
- Access the AWS Management Console page.
-
Search and select IoT Core.
The AWS IoT page appears.
- Create a policy allowing the permissions that you want to grant on your device (for example, iot:Connect, iot:Publish, iot:Subscribe, iot:Receive). For the resource, provide the topic name. If, however, you want to use all topics, enter *.
- Create a thing, linking it with the policy that you have created.
-
Download the certificates and key files for the device to communicate. In
addition, download the root CA certificate.
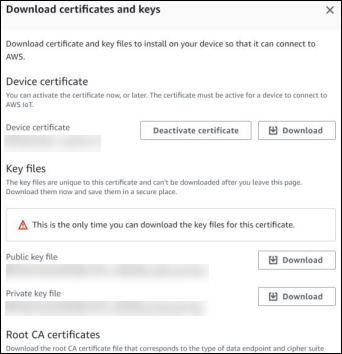
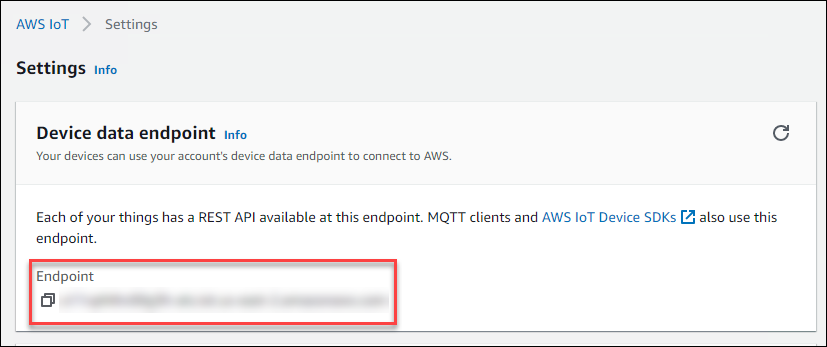
Important: This is mandatory, and it is the only time you can download the certificates. - In the left navigation pane, select Settings.
-
Make a note of the endpoint that appears.
- Access Configuration Hub.
-
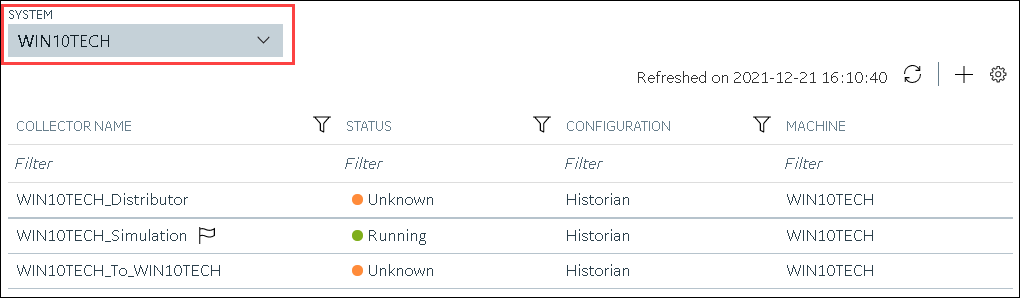
Select Collectors.
A list of collectors in the system appears.
-
If needed, select the system in which you want to add a collector
instance.
-
In the upper-right corner of the main section, select
 .
.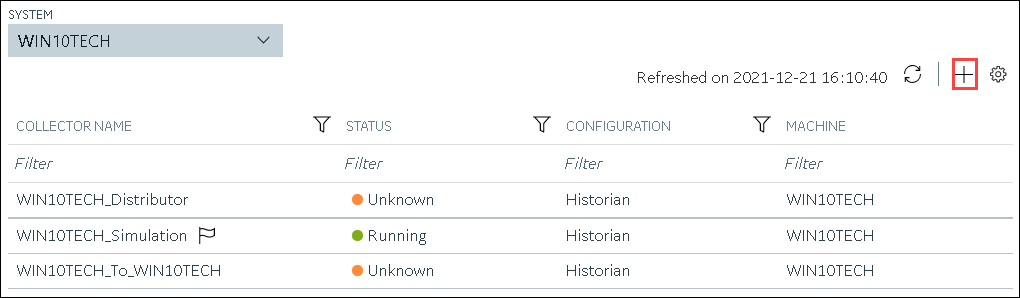
The Add Collector Instance: <system name> window appears, displaying the Collector Selection section. The MACHINE NAME field contains a list of machines on which you have installed collectors. -
In the COLLECTOR TYPE field, select a collector type
(except the File collector and the Server-to-Server collector), and then select
Get Details.
The INSTALLATION DRIVE and DATA DIRECTORY fields are disabled and populated.
-
Select Next.
The Source Configuration section appears, populating the hostname of the collector machine.
-
Select Next.
The Destination Configuration section appears.
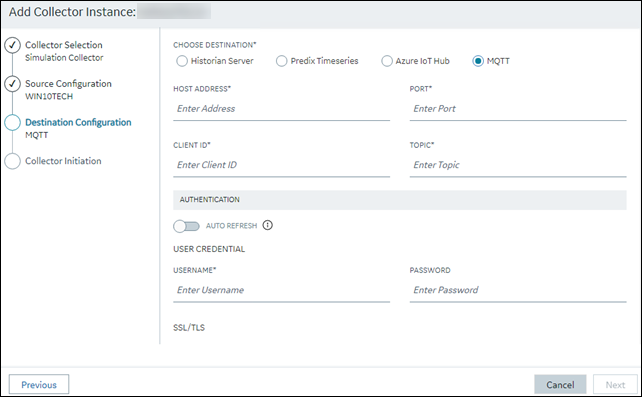
-
In the CHOOSE DESTINATION field, select
MQTT, and then provide values as described in the
following table.
Field Description HOST ADDRESS Enter the endpoint that you have noted down. A value is required. PORT Enter 8883. A value is required. CLIENT ID Enter the thing name. A value is required. TOPIC Enter the MQTT topic to which you want the collector to publish data. A value is required. For information on topic names, refer to https://docs.aws.amazon.com/iot/latest/developerguide/topics.html. USERNAME Enter any value. Since we will use a certificate-based authentication, username and password will not be used; however, you must still enter a value. PASSWORD Enter any value. Since we will use a certificate-based authentication, username and password will not be used; however, you must still enter a value. CA SERVER ROOT FILE Enter the path of the root CA certificate file that you have downloaded. CLIENT CERTIFICATE Enter the path of the device certificate that you have downloaded. PRIVATE KEY FILE Enter the path of the private key file that you have downloaded. PUBLIC KEY FILE Enter the path of the public key file that you have downloaded. CHOOSE CONFIGURATION Select the type of the configuration to specify the tags whose data you want to collect. Select one of the following options: - Historian Configuration: Select this option if you want to add the tags manually using Historian Administrator. If you select this option, the CONFIGURATION HISTORIAN SERVER field appears.
- Offline Configuration: Select this option if you want to provide the tag names using the offline configuration file instead of adding tags manually. By default, this file is located in the following location: <installation folder of Historian>\GE Digital\<collector name>
-
Select Next.
The Collector Initiation section appears.
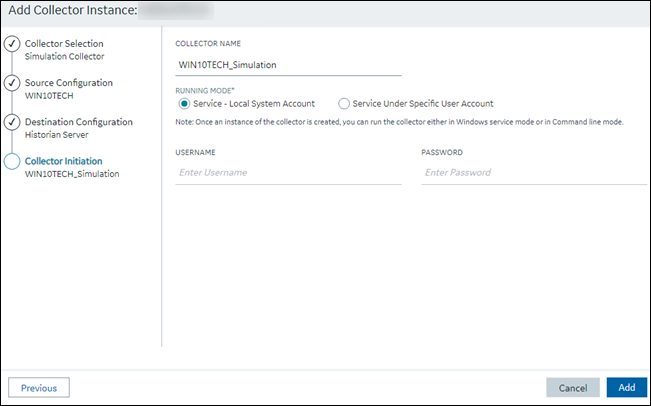
- Enter a unique collector name.
-
In the RUNNING MODE field, select one of the following
options.
- Service - Local System Account: Select this option if you want to run the collector as a Windows service using the credentials of the local user (that is, the currently logged-in user). If you select this option, the USERNAME and PASSWORD fields are disabled.
- Service Under Specific User Account: Select this
option if you want to run the collector as a Windows service using a
specific user account. If you select this option, you must enter values
in the USERNAME and
PASSWORD fields. If you have enabled the
Enforce Strict Collector Authentication
option in Historian Administrator, you must provide the credentials of a user who is added to at least
one of the following security groups:
- iH Security Admins
- iH Collector Admins
- iH Tag Admins
If you choose the first option, you can also configure the collector to start automatically when you start the computer, or, in the case of iFIX collectors, whenever you start iFIX.
-
Select Add.
The collector instance is created.
-
Specify the tags for which you want to collect data.
- If you have selected Historian Configuration in the CHOOSE CONFIGURATION field, specify the tags manually.
- If you have selected Offline Configuration in the CHOOSE CONFIGURATION field, specify the tags using the offline configuration file.
The collector begins sending Historian data to the thing that you have created. -
Access AWS IoT Core, and in the left pane, select
Test.
The MQTT test client page appears.

-
Subscribe to the topic to which the collector is publishing data, and then
select Subscribe.
The messages received from the topic appear, indicating that the collector is sending data to the AWS IoT device.AWS supports a payload of maximum 128 KB. Therefore, if the message size is greater than 128 KB, create a registry key named CloudMaxSamplesPerMsg for the collector instance, and decrease the value to 700 or less. If, however, you want to send more data in a message, we recommend that you create another collector instance and send data to another thing resource in AWS.Tip: To find out the message size, modify the collector instance and set the log level to 3 or more.
- Create a VPC destination or an HTTP destination for the messages.
- Monitor the data that you have collected.