 CIMPLICITY
1.2. Create a CIMPTRACK Project with a TRACKING Resource
About this task
You use the same procedure to create the CIMPTRACK project as any other CIMPLICITY project.
- CIMPTRACK will require the following
- Options to be enabled: Database Logger (both A&E & App and Points), System Sentry, and Tracker.
- A TRACKING resource, which is created using the same procedure as any other resource.
- The TRACKING resource must have ADMINISTRATOR identified as a user for the project.
| A | Create a CIMPTRACK Project |
| B | Create a TRACKING Resource |
- Create a CIMPTRACK Project
Procedure
-
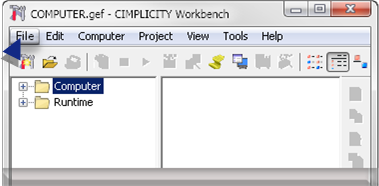
Select File>New>Project on the Workbench menu bar.
The Create As dialog box opens.
-
Do the following.
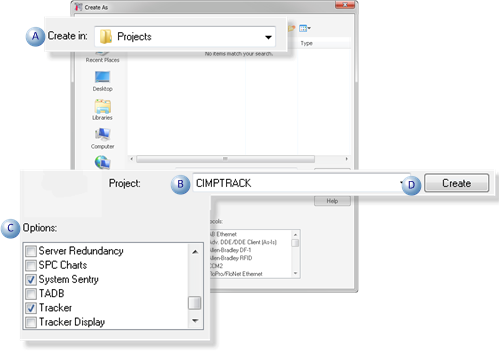
A Find the directory in which you want to create the project. B Name the project CIMPTRACK for this tutorial. C Make sure that the following are checked in the Options box: Database Logger (both A&E & App and Points), System Sentry, and Tracker. D Click Create. The Project Properties dialog box displays.
-
Check Enable project broadcast.
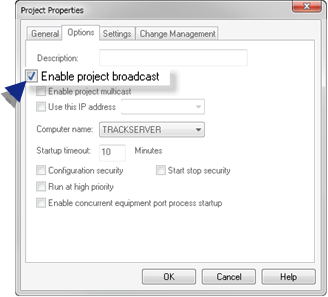
Result: The Workbench will display and will be ready for you to begin Tracker configuration.
- Create a TRACKING Resource
You will have to select a CIMPLICITY resource when you create some Tracker components.
Create a TRACKING resource for this exercise.
-
Do the following.
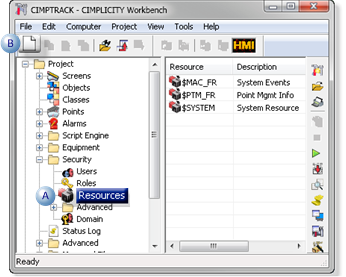
A Select Project>Security>Resources in the Workbench left-pane. B Click the New button on the Workbench toolbar. A New Resource dialog box opens.
-
Do the following.
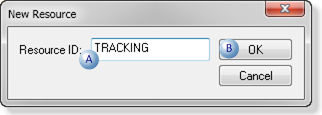
A Enter TRACKING in the Resource ID field B Click OK. A Resource Definition dialog box opens.
-
Do the following.
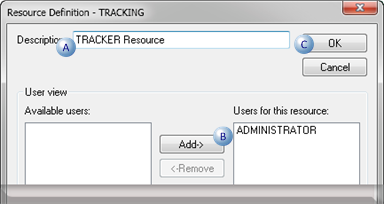
A Enter TRACKER Resource in the Description field. B Add ADMINISTRATOR to the Users for this resource box. C Click OK.
Results
The TRACKING resource is added to the Workbench right-pane resource list.


