 CIMPLICITY
4. Export and Import Production Tracking Data
About this task
What if you have to stop the production line for repairs, but you add some blocks to the schedule region while the repairs are going on?
You can tell Production Tracking that you have made changes while Tracker was down.
- Export File (.prtx)
- Import File (.prtm)
Export File (.prtx)
The .prtx export file exports your current Tracking configuration to a text file. You can then edit that text file and modify the sections you need to update.
The Tracker export utility will use this file to know what to export.
Procedure
-
Do the following.
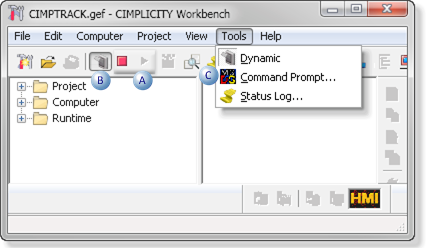
A Make sure that CIMPTRACK is running. B - Click the Dynamic Configuration button.
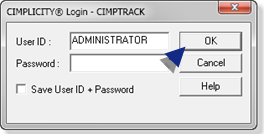
- Enter ADMINISTRATOR; Click OK.
C Select Tools>Command Prompt on the Workbench menu bar. The Command window opens in the CIMPTRACK directory.
-
Click the Dynamic Configuration button.
A Logon dialog box may open.
-
Type the following command.
notepad prtexp.prtxWhere
notepadis the text editorprtexp.prtxis the name of the file you will create.Note: You can give the file any name. However, you must give it a .prtx extension.
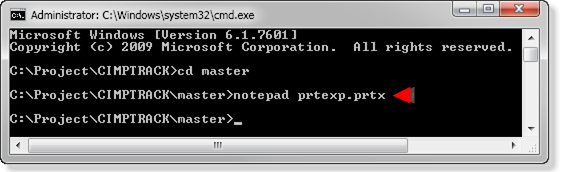
Notepad opens:a message asks you if you want to create the file prtexp.prtx.
-
Enter the following lines in this file.
|-**ALL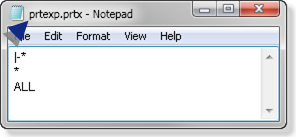
-
Type the following command at the CIMPTRACK Master directory command prompt.
prt_export prtexp.prtx ALL LOCAL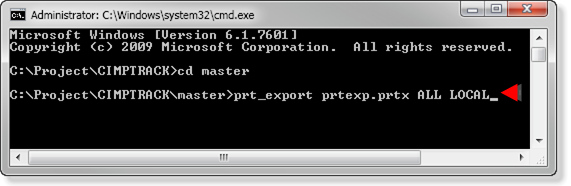
-
Press Enter.
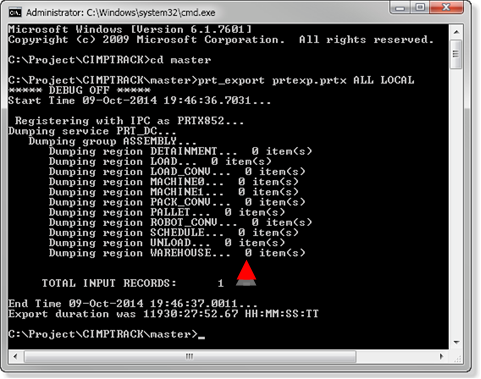
The PRT export utility dumps the ASSEMBLY group, displaying the number of items per region in PRT_UI.
Note: Since you just deleted all of the items in PRT_UI each region has 0 items.
If a region displays 1 or more items, go to that region in PRT_UI and delete it/them.
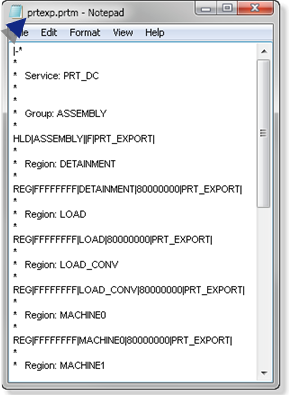
A new file,
prtexp.prtm, is created. -
Take some time to examine this file and determine what the lines are saying.
Review detailed explanations about the fields in the file (prtexp.prtm).
Note:
PRT_DC= PRT Data Collector Resident Process (configured Service in the Tracker window).


