 CIMPLICITY
1.4. Open the Tracker Configuration Window
| A | Open the Tracker Configuration Window |
| B | Configure SQL Server for Tracker |
- Open the Tracker Configuration Window
The first window you will work with is the Tracker Configuration Window (TrackerCfg_UI).
Double-click the Tracker Configuration icon in the Workbench right pane.
The first time you open the TrackerCfg_Ui you will have to configure and/or select the Tracker database.
- Configure SQL Server for Tracker
The first time you open the TrackerCfg_UI an Options dialog box displays.
You can use it to create a SQL Server database connection for Tracker.
The SQL server connection is needed to store the Tracker configuration data.
If you know how, go ahead and configure the connection.
Name the connection CIMPTRACK.
Use this section to check or follow a procedure for your configuration.
| 1 | Open the ODBC Data Source Administrator |
| 2 | Create a CIMPTRACK Data Source |
| 3 | Apply the CIMPTRACK Data Source to Tracker |
- Open the ODBC Data Source Administrator
The first time you open the TrackerCfg_UI, an Options dialog box displays through which you can configure the connection to the Tracker database.??
- Enter sa in the Login Id field.
Note: Leave the Password field blank.
- Click ODBC Admin.
Result: The ODBC Data Source Administrator dialog box opens.
- Create a CIMPTRACK Data Source
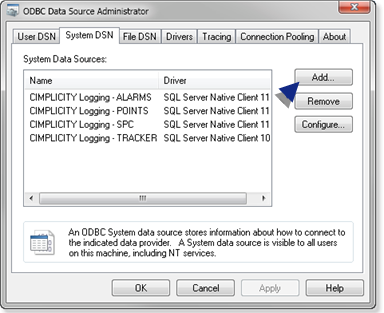
- Select the System DSN tab in the ODBC Data Source Administrator dialog box.
- Click Add.??
- Do the following.
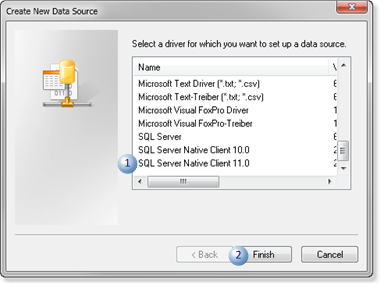
| 1 | Choose SQL Native Client <nn>. |
| 2 | Click Finish. |
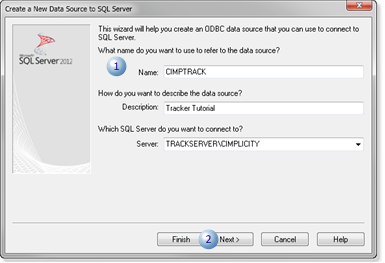
- Do the following in the Create a New Data Source to SQL Server dialog box.
| 1 | Enter the following | |
|---|---|---|
| Name | CIMPTRACK | |
| Description | Tracker Tutorial | |
| Server | (local) or a SQL database that has been assigned to this project, e.g. computer name\CIMPLICITY. | |
| 2 | Click Next. | |
- Do the following for the Login:
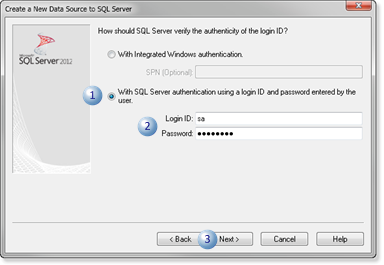
| 1 | Check With SQL Server Authentication using a login ID and password entered by the user. |
| 2 | Enter the Login ID and Password required by your SQL database. |
| 3 | Click Next. |
- Do the following.
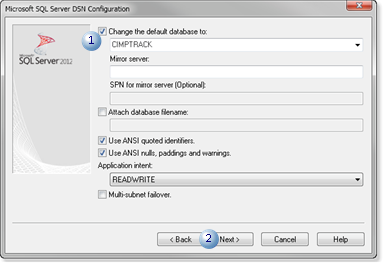
| 1 | Change the default database to CIMPTRACK. |
| 2 | Click Next to move through the following dialog boxes until the ODBC Microsoft SQL Server Setup dialog box displays. |
- Test the data source to verify the connection to the database.
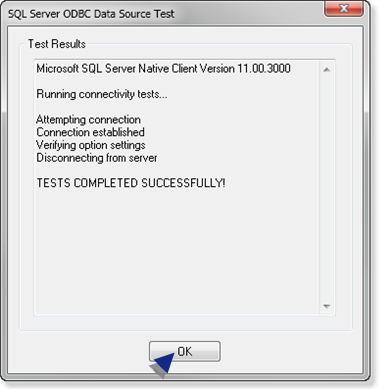
- Click OK.
The ODBC Administrator dialog box displays the new CIMPTRACK connection.
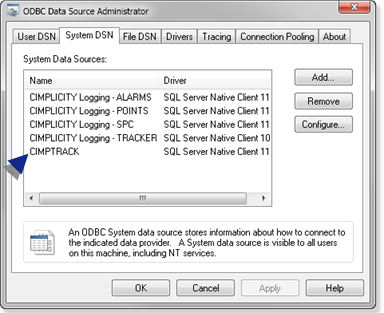
- Click OK to close the ODBC Data Source Administrator dialog box.
The ODBC Data Administrator closes; the RCO Database Connection dialog box displays.
- Apply the CIMPTRACK Data Source to Tracker
Do the following.
| A | Enter the password you entered on the ODBC Login screen in the Password field |
| B | Click OK. |
Result: The ODBC Data Administrator closes and the TrackerCfg_UI displays two top-level folders.
- CIMPTRACK
- PRT
You will work in both during this tutorial.


