 CIMPLICITY
Step 6. Configure Routing Logic
About this task
Note: Make sure the site is locked.
Procedure
-
Select
 in the selected site tree.
-
Do one of the following.
Method 1
Select File>Routing Control Objects on the Tracker menu bar.
Method 2
- Right-click the Routing Logic icon.
- Select New Logic Module from the Popup menu.
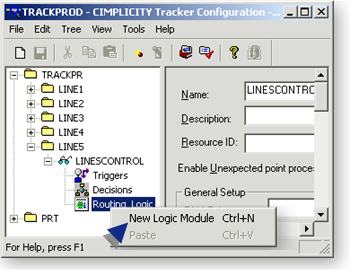
A new routing logic item displays in the left pane; the right pane displays the dialog for configuring a logic item.
-
Use the fields and check box to define the routing logic.
Options are as follows.
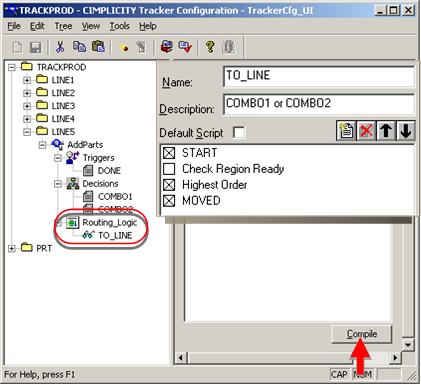
Option Description Name Enter a unique name for this routing logic module. Description (Optional) Enter a unique description for this routing logic module. Default Script Each site can have one default script. The default script is run if there is no RLM point configured. The default script name is also written to the RLM point on startup if the point is blank. Function blocks Go to 5. Compile Compiles the default script or Routing Logic.
Results
The logic module is a configured part of the routing logic for the site.
Note: More than one module can be added to the Routing Control Object. Repeat procedure to add more routing logic modules. Depending on the function block you selected, different types of dialog boxes display requiring unique configuration and parameter values. Similarly, the Parameter dialog boxes vary by parameter. There can be drop-down lists, popup menus, browse buttons or edit controls that can be used to set the value of the parameter.


