 CIMPLICITY
8.5. Test the AddParts RCO
About this task
Note: If you had cleared items from
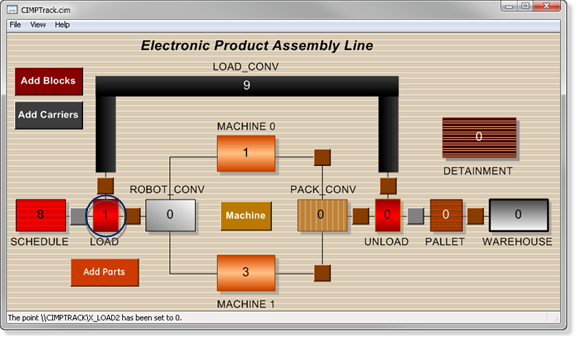
Take a few minutes to test your configuration and to see what is happening in the CIMPTRACK model.
| A | Move a Block and Carrier to the LOAD Region |
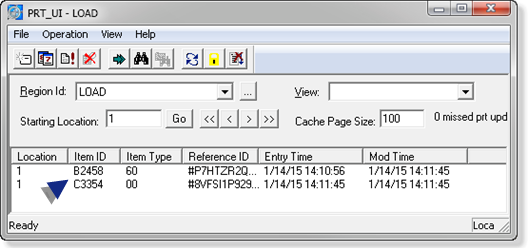
| B | Check the LOAD Region in PRT_UI |
| C | Look at the Block's Attributes before Opening the ??attrentry Screen |
| D | Associate the Attributes with the Block |
- Move a Block and Carrier to the LOAD Region
Procedure
-
Move a carrier from LOAD_CONV to LOAD.
Result: The LOAD region displays 1 item.
- Check the LOAD Region in PRT_UI
-
Select the LOAD region.
Result: The block you selected to move and a carrier should be listed.
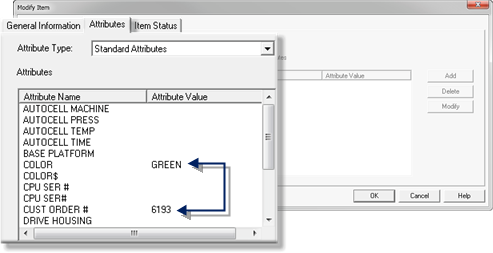
- Look at the Block's Attributes before Opening the ??attrentry Screen
-
Select the Attributes tab.
Result: The block has values for two attributes only.
- COLOR
- CUST ORDER #
- Associate the Attributes with the Block
-
Click the OK button, which you have associated with the ADDPARTS_DONE point.

- Look at the Block's Attributes after Using the ??attrentry Screen
Results
The selected attributes for the blocks should now have a TRUE value.
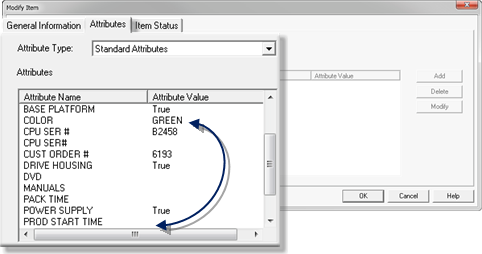
Note: The CPU Serial # value is based on the number that was randomly generated by your script.


