CIMPLICITY
Translation
CIMPLICITY allows you to translate your application into different languages and to switch the displayed language at run time. Use the CIMPLICITY Language Mapper to define the languages and translate the strings to other languages.
Translating CimEdit Screens
Text objects (including Text Button objects), message text, menu text, and tooltip text contain strings. Their Translate property determines whether the text is available for translation.
In the Ambient Properties section, when you select Emit Text, strings from your CimEdit screen will be made available for translation.
The following sections guide you through an example.
Create a CimEdit screen
- Open a new CimEdit window.
- Select Text String and create two text objects, Hello and everyone!.
- Go to the properties of each of the objects and in the Text tab, select the Translate check box.
- Save the screen as c:\temp\hello.cim.
- Select Screen Properties, and then select the Ambient Properties tab.
- In the Map Properties field, enter c:\temp\hello.clm.
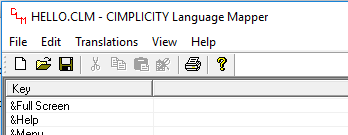
- Select Emit Text, and then select Edit File. The CIMPLICITY Language Mapper window appears. Note: If you select the Main Button, select Options, select the File tab, and then select the Emit translation strings every save check box, you do not have to select Emit Text.
Translate the screen
- In the CIMPLICITY Language Mapper window, select Translations, and then select Language Editor.
- In the Language Editor dialog box, select Add, enter eo as the Language with the default Locale ID, and then select OK.
- In the Language Editor dialog box, select Add, enter fr_CA as the Language, select French (Canada) (0xc0c) as the Locale ID, and then select OK.
- Select Done to exit the Language Editor.
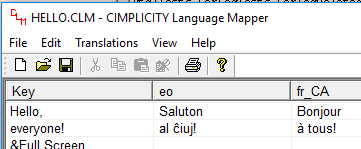
- Double-click the row containing the Hello key to open the Translation Editor.
- Double-click the row containing the eo language, and enter Saluton,.
- Double-click the row containing the fr_CA language, and enter Bonjour,.
- Select Done to exit the Translation Editor.
- Repeat steps 5 to 8 for the everyone! key, and enter al ??iuj! in step 6 and ?? tous! in step 7. Note: If the characters entered in the Translation Editor do not appear as they are, select Edit, and then select Select Font to select Arial or Calibri as the font.
- Select Save, and exit the CIMPLICITY Language Mapper.
Add language switching controls
- In the CimEdit screen, select Screen Properties.
- In the Properties - Screen dialog box, select the Script tab, select Edit, and enter the following script:
Option Explicit Sub SwitchLanguage(x As Long, y As Long, flags As Long) Dim newLang As String Dim newLangStr As String Dim curLangStr As String ' if current language is blank, that's the screen default curLangStr = CimGetScreen.Application.Language If curLangStr = "" Then curLangStr = "en" ' if the new language in English, use the screen default newLangStr = CimGetEventContext().TriggerObject.TextFormat.Text If newLangStr = "en" Then newLang = "" Else newLang = newLangStr ' switch the language MsgBox "Switching from " & curLangStr & " to " & newLangStr CimGetScreen.Application.Language = newLang CimGetScreen().Refresh False End Sub - Select OK.
- In the CimEdit screen, select Text String, and create a text object, en.
- Select Properties, select the Colors tab, and under Fill, select Blue as the Color.
- In the Properties - Object dialog box, select the Text tab, select Font, select the Underline check box, and then select OK.
- In the Properties - Object dialog box, select the Events tab, select Mouse Up as the Event, select SwitchLanguage (Script) as the Action, and then select OK.
- Copy and paste the en text object twice, name them eo and fr_CA, and save the screen.
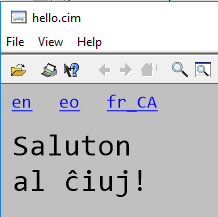
- Select Test Screen. The hello.cim screen appears.
- Select the eo and fr_CA text objects to view the translated text.