CIMPLICITY
Drag Items from One CIMPLICITY Project into Another
About this task
When you have two projects (and two Workbenches) open, you can select certain core items in one Workbench and drag them into the other.
- Overview: Drag Items from one project to another.
- Example: Drag Device Points from a SOURCE to TARGET Project
Overview: Drag Items from one Project to Another
About this task
The items you can drag from one open project to another are as follows.
- Security
- Resource
- Roles
- Users
guide: Guidelines- The User Properties dialog box has a Resources tab so the appropriate resources can be assigned directly to that user. Assigned resources are in the Configured box.
- The Resource Definition dialog box lists all the users and categorizes them as Available users or Users for this resource.
- If the user does not yet exist in the target project when a resource is dragged over, the name is not listed in the Resources dialog box.
- When a user who is configured for a resource is dragged to the target, the resource in the target project automatically lists him/her as Users for this resource. Note: If a resource is assigned to a user in the Users dialog box>Resources tab, but the resource does not exist in the target project, dragging the user will fail.
- Equipment
- Ports cannot be dragged; they must be configured in the target project; they cannot be dragged over.
- Devices (except for the OPC Client and Proficy Driver Server devices)
Note: Make sure the:- Port in the target project has the same name (and device communication) as the port in the source project.
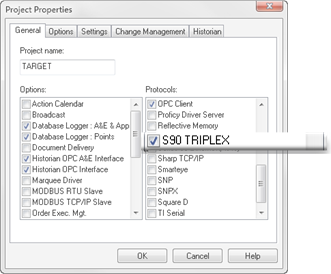
- Device communication has been made available in the second project (Project Properties dialog box>General tab>Protocols).
Even though devices can be dragged from one project to the other only part of the configuration will be ported.
For example, some entries on the Device dialog box>General tab will be ported over; entries on tabs that are specific to a device (e.g. the PrivPage tab for the S90 Triplex) will not be ported.
- Alarms
- Alarm classes
- Alarm strings cannot be dragged; they must be configured in the target project exactly as they are configured in the source project.
- Points
Points that are successfully dragged from one project to the next bring along associated alarms.
guide: Guidelines- Create any associated items that cannot be dragged (e.g. alarm strings, devices) in the second project before dragging the points.
- Drag points associated with the select point (e.g. safety points, point attributes, availability triggers, points in a derived point's expression) before the selected point.Note: If a point's alarm class is not recognized, the point will be copied over if the applications engineer confirms an error message; however, the alarm will not be configured or listed. If the point is deleted and dragged again after the alarm class has been dragged over, the alarm will be configured and listed as well as the point.
- Screens
Screens cannot be dragged from one project to another. However, they can be pasted into the project's Screens folder in Windows Explorer and will display in the Workbench.
Note: If the Workbench is open, press F5 on the keyboard to refresh the view.Important: Make sure the project includes all points, alarms and other features that the screens require. - Other features that can be dragged and dropped are:
- Classes
- Class objects
Example: Drag Device Points from a SOURCE to TARGET Project
An applications engineer needs to add S90 Triplex points to a TARGET project.
| SOURCE | TARGET |
 |
 |
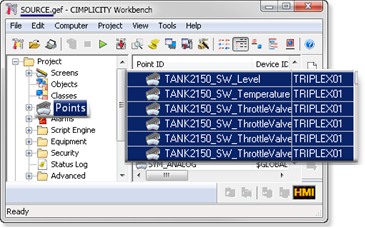
| A | The points are already in a SOURCE project. |
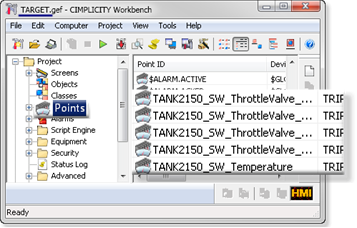
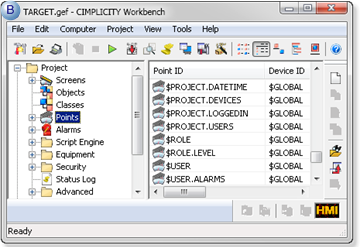
| B | The points are not in the TARGET project. |
The applications engineer does the following.
| 1 | Enables S90TRIPLEX in the TARGET project's Project Properties dialog box. | |
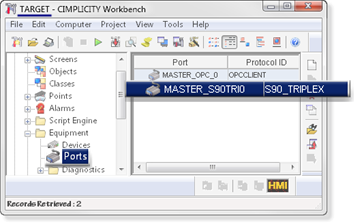
| 2 | Creates an S90 TRIPLEX port in the TARGET project. | |
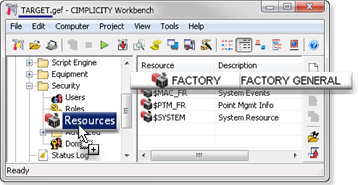
| 3 | Drags the Factory resource from the SOURCE to the TARGET project. | |
| 4 | Drags the Alarm classes from the SOURCE to the TARGET that are associated with the TRIPLEX01 device points. | |
| 5 | Creates Alarm Strings that are associated with the TRIPLEX01 device points. | |
| 6 | Drags the device assigned to the points (TRIPLEX01) from the SOURCE to the TARGET project. | |
| 7 | Clicks OK (to copy points assigned to the device). | |
| Result | ||
-
Enables S90TRIPLEX in the TARGET project's Project Properties dialog box.
- Creates an S90 TRIPLEX port in the TARGET project.
A port cannot be dragged from a SOURCE to a TARGET project; it has to be created in the TARGET project.
- Drags the Factory resource from the SOURCE to the TARGET project.
The selected device (TRIPLEX01) uses a resource named Factory. The TARGET project requires this resource before the device can be dragged over.
SOURCE TARGET 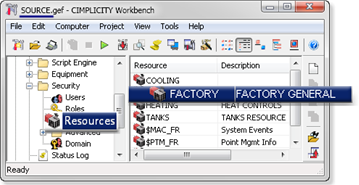
Also drags required roles and users after the resources are in the target project.
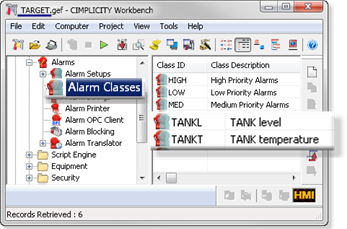
- Drags the alarm classes from the SOURCE to the TARGET that are associated with the TRIPLEX01 device points.
Some of the Triplex device points have associated alarms, which include alarm classes; the alarm classes can be dragged from the SOURCE to TARGET project.
SOURCE TARGET 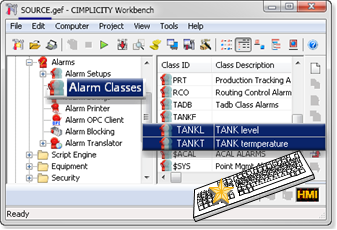
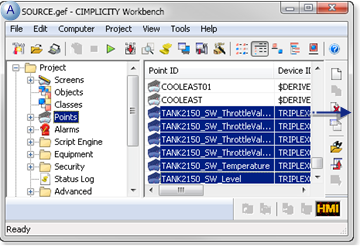
Hold down the Ctrl key to select more than one object.
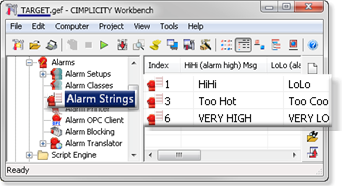
- Creates alarm strings that are associated with the TRIPLEX01 device points.
Alarm Strings cannot be dragged from a SOURCE to a TARGET project; the alarms strings assigned to the point alarms need to be created in the TARGET project.
- Drags the device assigned to the points (TRIPLEX01) from the SOURCE to the TARGET project.
When all of the necessary features are dragged from the SOURCE project or created in the TARGET project, the applications engineer drags the device from the SOURCE to the TARGET.
A message opens reporting how many points are attached to the device and asking if the attached points should be copied to the TARGET project.
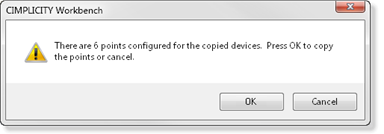
- Clicks OK (to copy points assigned to the device.)
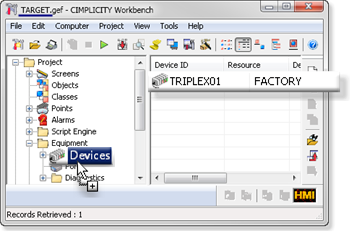
When the applications engineer clicks OK, if the TARGET project has been set up correctly, the device and points are copied to the TARGET project.
Note: If Cancel is clicked, the points can be copied over at a later time.
Results
- The device is copied to the TARGET project.
SOURCE TARGET 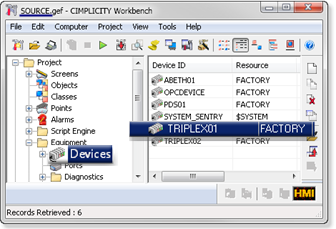
- Points assigned to the device are copied to the TARGET project.
SOURCE TARGET