 Plant Applications
Install Standard Web Client Using GUI
About this task
- Before installing the Standard Edition Web Client, ensure that you first perform the preinstallation tasks.
- We recommend to use the signed certificates. The self-signed certificate which is provided during the Plant Applications Webclient installation expires on February 8, 2024.
Procedure
- Mount the ISO file for the Plant Applications Web Client or load the DVD if you created one from the ISO file on the application server for Plant Applications.
-
Right-click the installfrontend.exe file, and then select
Run as an Administrator.
The Install Proficy Plant Applications 2022 page appears and displays the installation menu.
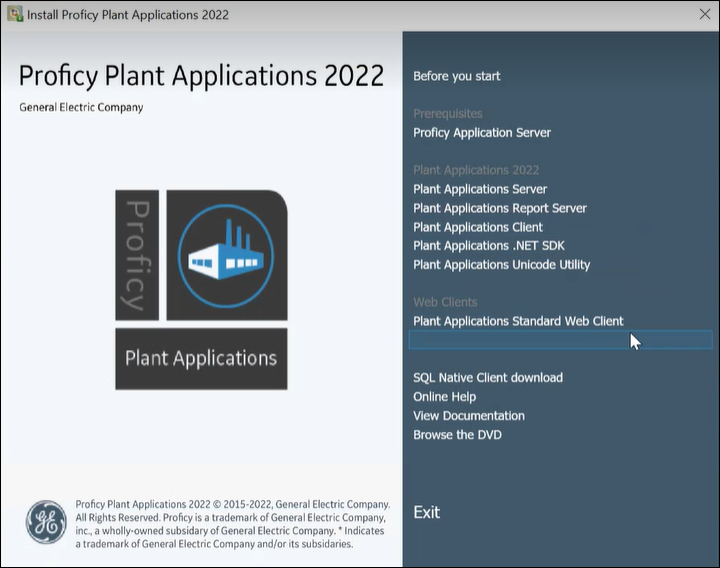 Tip: You can hover over each task that appears in the installation menu to refer to the tooltip associated with that task.Note: Ensure that you have installed the Microsoft Visual C++ 2015 Redistributable (64-bit) package.
 -
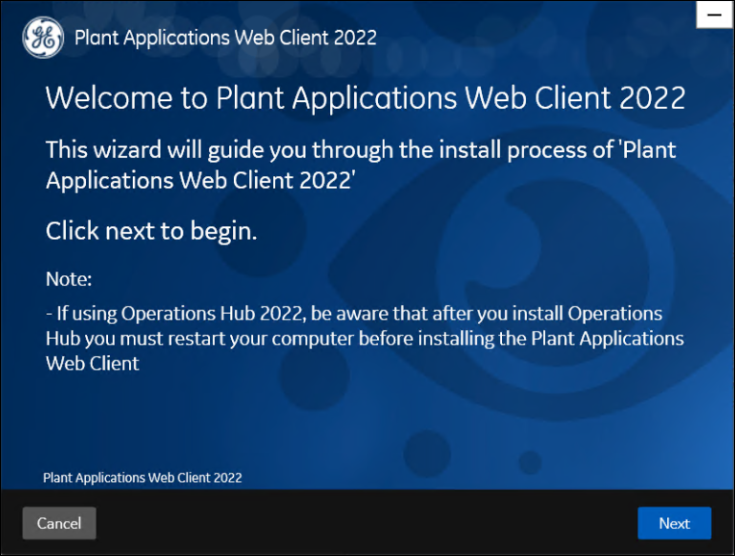
Select Plant Applications Web Client.
The Plant Applications Web Client installation wizard appears, displaying the Welcome to Plant Applications Web Client 2022 page.
-
In the Welcome to Plant Applications Web Client 2022 page,
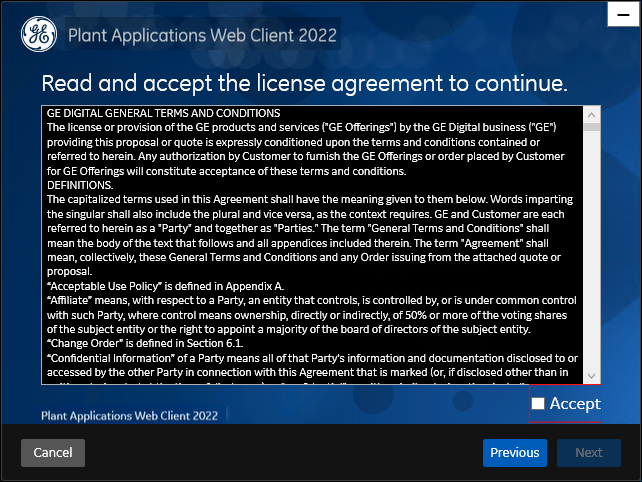
select Next.
The Read and accept the license agreement to continue page appears.
-
Read the license agreement, select Accept, and then select Next to continue the installation.
The Prerequisites page appears.
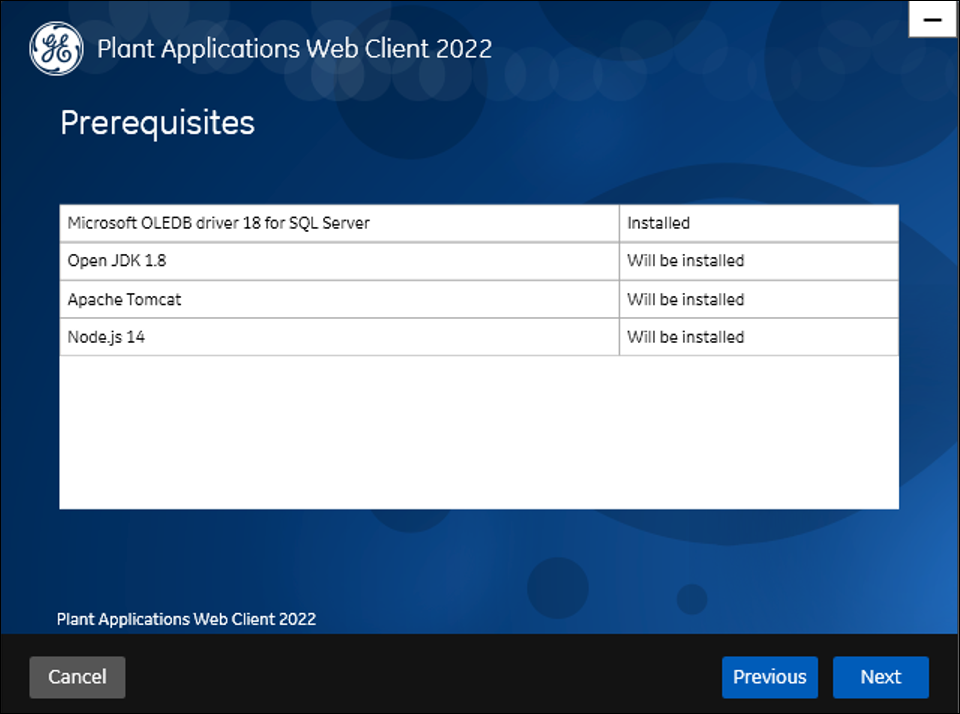 If any of the following required software packages are not already installed on your computer, the installer installs them automatically.Note: If Microsoft OLE DB Driver 18 for SQL Server or later is not installed, the Missing Prerequisites screen appears informing you to install the required version of the missing software before you run the installer. You must exit the installation, and first install the required software.
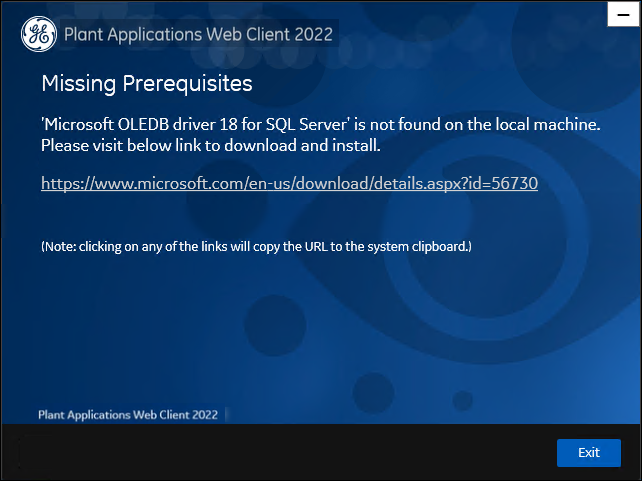
-
In the Prerequisites screen, select
Next to view all installed prerequisites and install
any missing prerequisites.
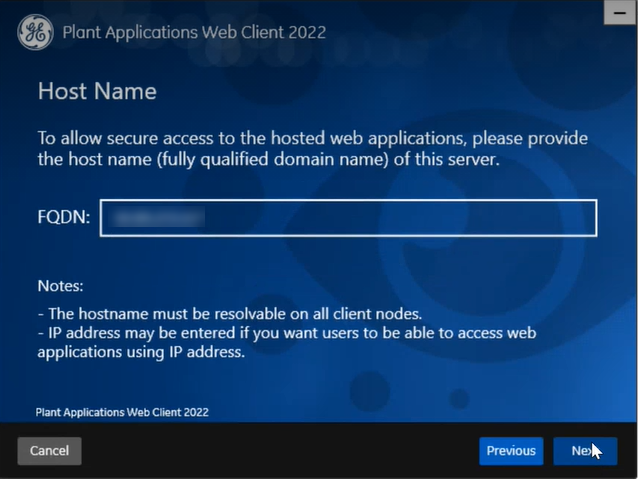
The Host Name page appears.
-
Enter the fully qualified domain name where you want to install the Plant Applications Web Client, then select Next.
Note: Do not use the Load Balancer URL in the FQDN field. If you want to configure the Load Balancer URL, then you must perform it post installation.
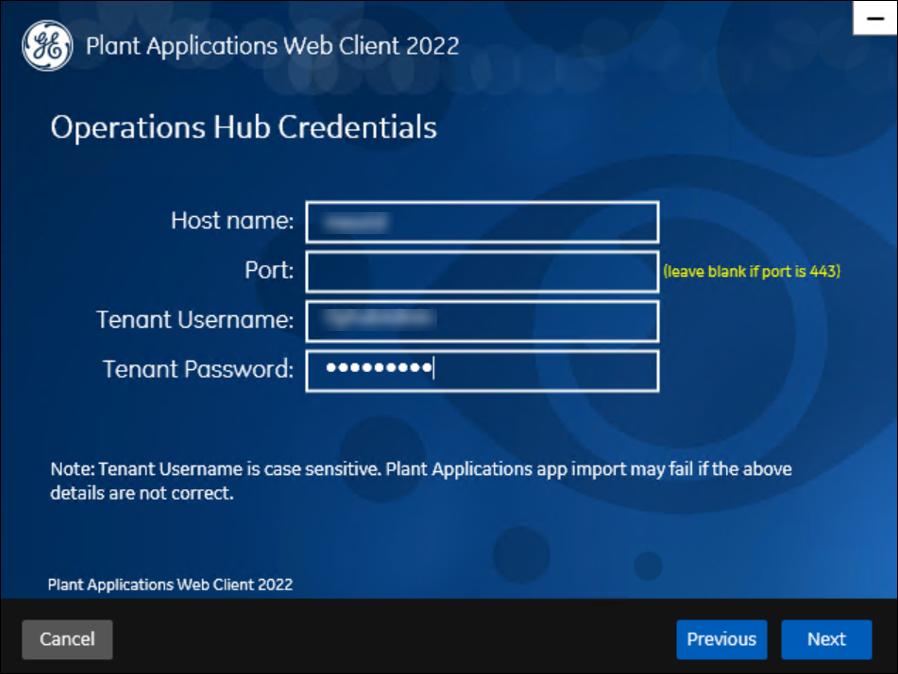
The Operations Hub Credentials page appears.
-
In the Operations Hub Credentials page, enter the
following required credentials to access the Operations Hub server.
Field Description Host Name This field is automatically populated with the local host name, fully qualified host name, or IP address, based on the configuration in Operations Hub. You can edit the host name of the Operations Hub server based on requirement. Note: Instead of IP address, we recommend to use the Operations Hub host name (computer name).Port Enter the Operations Hub port number, if it is other than 443. Tenant Username Enter the tenant username to access the Operations Hub server instance. Note: The default user name isOphubAdmin.Tenant Password Enter the password. Note: The tenant username and password must be same as the credentials that you have specified during the Operations Hub installation.When all the options are entered correctly, the Next option is enabled.The Installation Directory and Customize Web Client Log Files Location page appears with the default installation directory selected as C:\Program Files\GE Digital\PlantApplicationsWebClient.
-
Do the following:
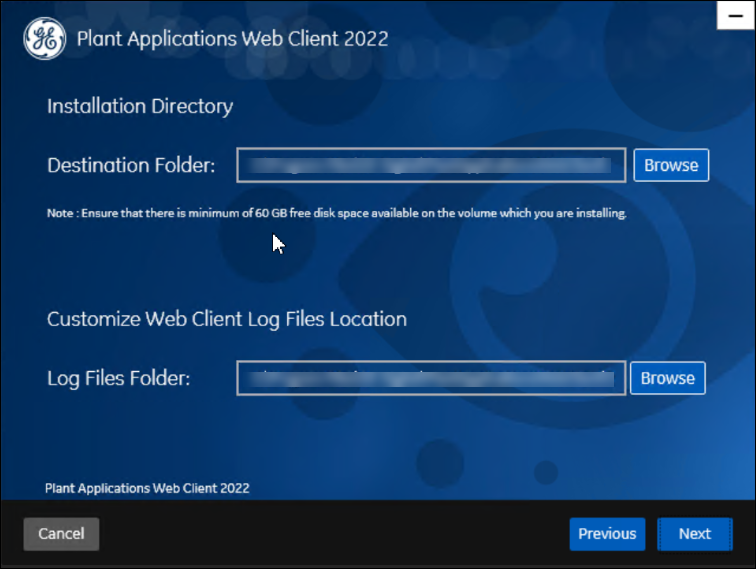
- In the Destination Folder field, select
Browse to select the directory where you want
to install the Plant Applications Web Client.Note:
- Ensure that a minimum of 60 GB free disk space is available on the volume which you are installing.
- Do not use the user profile folder for installation.
- In the Log Files Folder field, select Browse to select the directory where you want to install the Plant Applications Web Client service logs.
- In the Destination Folder field, select
Browse to select the directory where you want
to install the Plant Applications Web Client.
-
Select Next.
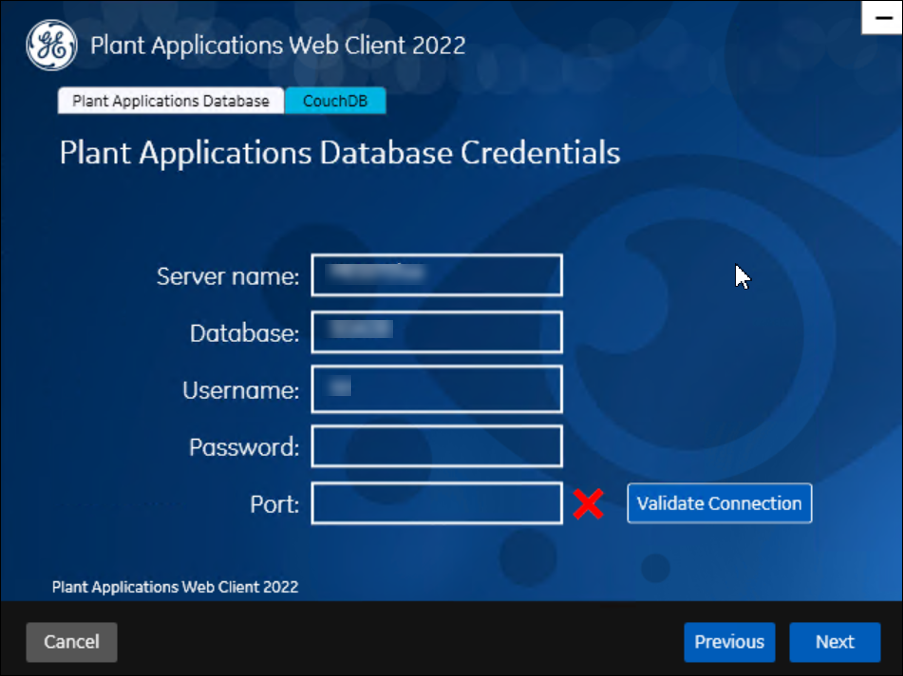
The Plant Applications Database Credentials page appears.
-
Enter the Plant Applications database credentials.
Field Description Server name Enter the server name where the Plant Applications database is installed in the format HOST_NAME\INSTANCE. WhereHOST_NAMEis the host name (either a fully qualified domain name or IP address, of the server) andINSTANCEis the instance of the server used by the database.Note: When there is no instance for the server, you can enterHOSTNAMEas the server name. Localhost is not an acceptable value forHOSTNAME.Database Enter the name of the Plant Applications database that you want to connect with the Plant Applications Web Client. By default, it is SOADB.
Username Enter the user name that has permissions to access the database you entered in the Database field. Password Enter the password. Port Enter the number of the port that the instance uses to listen for client connections. This field is optional. Note: The default port is 1433. -
Select Validate Connection to validate the database
connection.
Note: The validation process takes some time to check whether a compatible version of the Plant Applications server is installed.
-
In the Plant Applications Database Credentials page,
select the CouchDB tab.
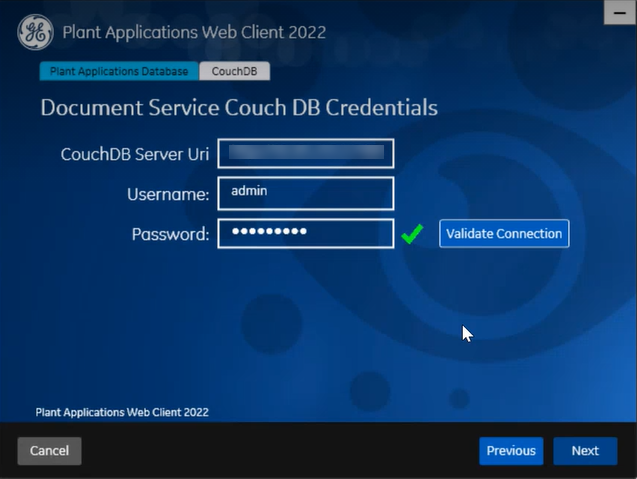
The Document Service Couch DB Credentials page appears.
-
Enter the following Couch DB credentials.
Field Description CouchDB Server Uri Enter the fully qualified web address of Apache CouchDB in the format: https://<host name or IPaddress>:<port number>. For example, https://testmachine:6984.Username Enter the CouchDB user name. Password Enter the CouchDB password. Validate Connection Select the option to validate the Apache CouchDB database credentials. When the Apache CouchDB database connection is successfully validated, the Next option is enabled.
-
Select Next.
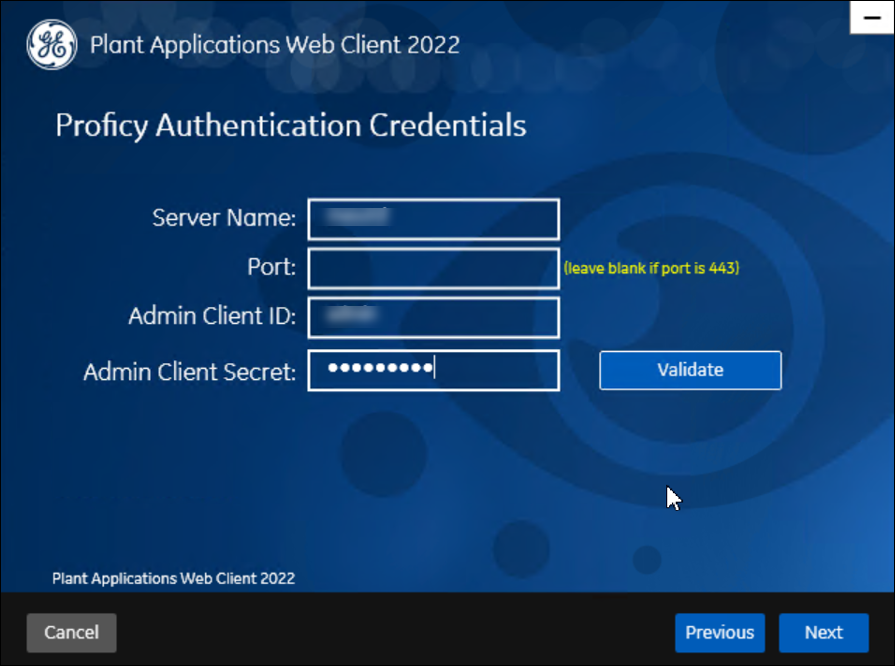
The Proficy Authentication Credentials page appears.
-
Enter the following credentials to access the Proficy Authentication (UAA)
server.
Field Description Server Name Enter the host name of the Proficy Authentication (UAA) server. This is the server name where Operations Hub is installed. When you install Proficy Authentication (UAA) on a different node, then you must provide the Proficy Authentication (UAA) host name. Note: Instead of IP address, we recommend to use the Proficy Authentication (UAA) host name (computer name).Port Enter the Proficy Authentication (UAA) port number. Note: You can leave this field blank if you are using the default port number (443).Admin Client ID Enter the admin client ID to access the Proficy Authentication (UAA) server instance. Note: The default user name is admin.Admin Client Secret Enter the password. Validate Validate the Proficy Authentication (UAA) server connection. Note: The following table describes each icon indicating a validation status that might appear during the validation process.Icon Description 
Indicates that the validation is in progress. 
Indicates that the validation was successful. 
Indicates that the validation was unsuccessful. In this case, make sure you enter the correct password. When all the options are entered correctly, the Next option is enabled. -
Select Next.
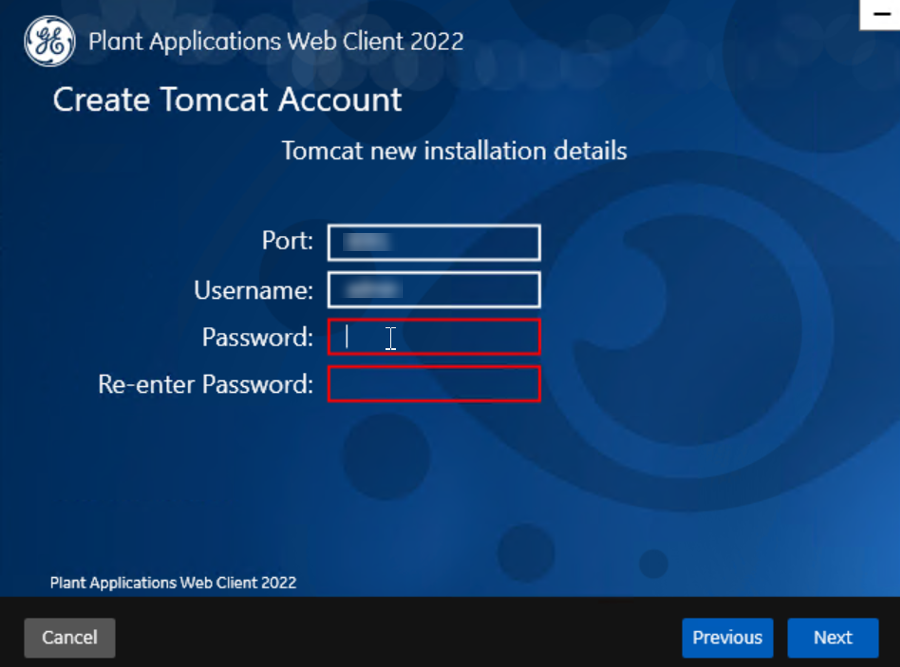
The Create Tomcat Account page appears.
-
In the Create Tomcat Account page, enter the Tomcat
installation details for a new or existing installation. The installer prompts
you to enter details for an existing Tomcat if the Tomcat installation details
are available in the registry settings for the Plant Applications Web Client on your computer. Else, the installer prompts you to enter details for a new
installation of Tomcat.
Field Description Port Enter the HTTP port that Tomcat uses to listen for client connections. Note: The default port is 8090 and when upgrading the Plant Applications Web Client, the default port is 8091.Username Enter the user name to access Tomcat. Note: The default user name is admin.Password Enter the password. Re-enter Password Reenter the password to confirm the value you entered in the Password field. Note: This field appears only when a new installation of Tomcat is initiated by the installer. -
Select Next.
The RabbitMQ Credentials page appears.
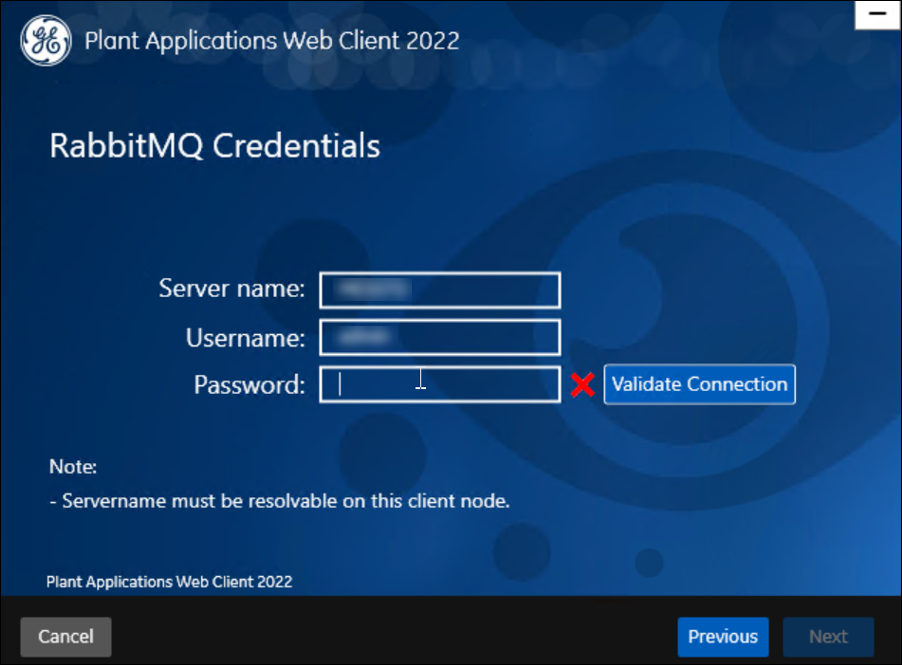
-
RabbitMQ is installed by default as part of the Plant Application Server. Enter
the RabbitMQ login details to proceed with the installation, and then select
Validate Connection.
Field Description Server name Enter the computer name or IP address that hosts the Plant Applications server. Username Enter the Administrator's user name that you set during Plant Applications server installation. The default username is admin. Password Enter the password. -
Select Next.
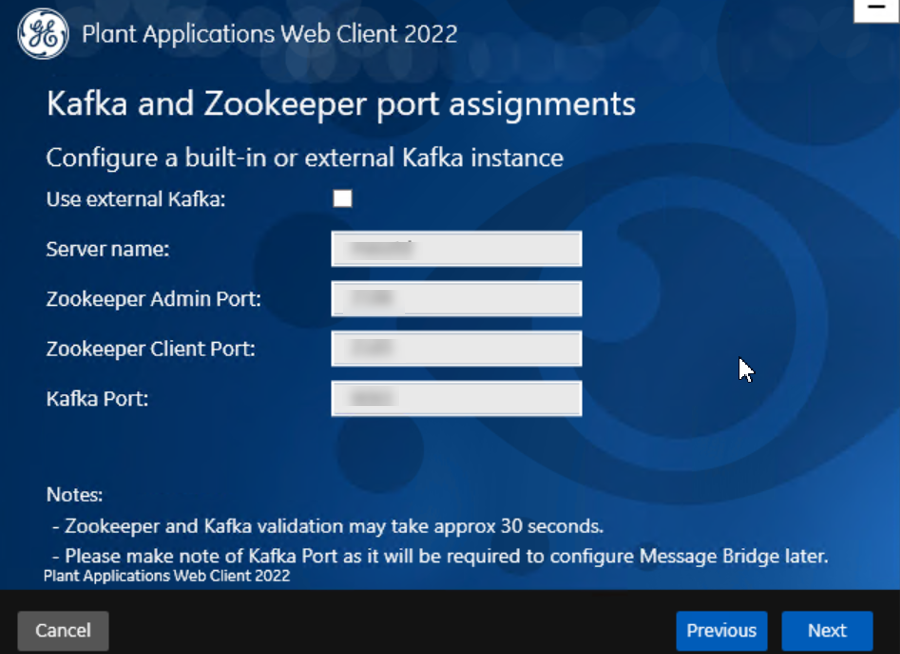
The Kafka and Zookeeper port assignments page appears. Make a note of the kafka port number that is listed for configuring Message Bridge after the Web Client installation.
- Select Next.
-
Enter the following credentials to access the Kafka server.
Field Description Use external Kafka Select this check box if you want to configure an external Kafka instance. Server Name Enter the host name of the Kafka server. By default, it is the Plant Applications Web Client server name. Zookeeper Admin Port Accept the default port number. To change the default port number, enter a new Zookeeper Admin port number.
By default, Kafka and Zookeeper will be installed along with Plant Applications Web Client.
If you are not using any external Kafka server, then you can use Plant Applications Web Client server name.
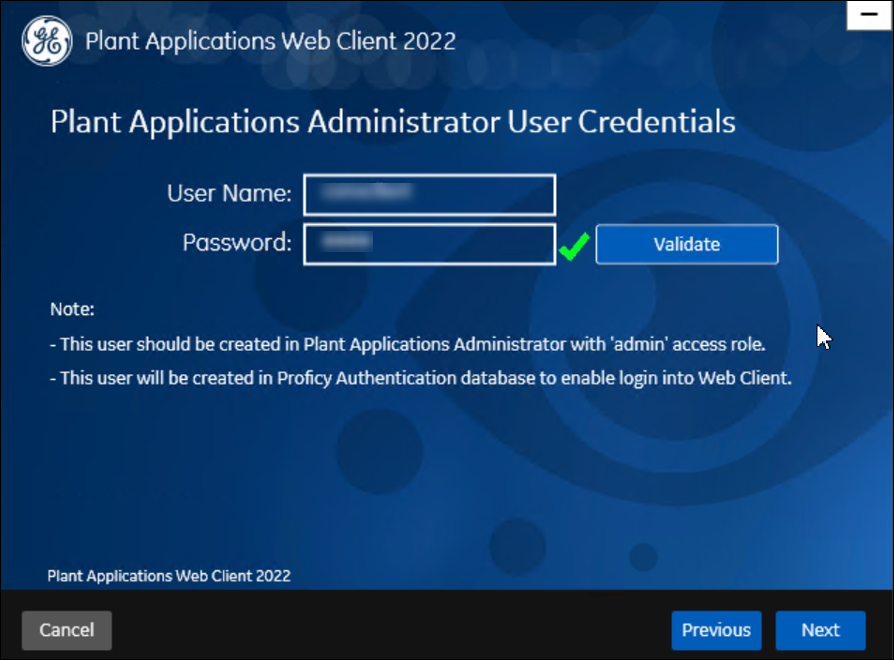
Zookeeper Client Port Accept the default port number. To change the default port number, enter a new Zookeeper Client port number. Note: Ensure that you have entered a valid Zookeeper port number. If you have entered an invalid port number, refer to Changing the Zookeeper Port Number section in Getting Started Guide.Kafka Port Accept the default port number. The default port number is 9093. To change the default port number, enter a new Kafka port number. When all the options are entered correctly, the Next option is enabled.The Plant Applications Administrator User Credentials page appears.
-
Enter the following Plant Applications administrator credentials.
Note: Ensure that the user credentials entered here must exist in Plant Applications Server with an administrator role defined and you must use the same credentials to login into the Web Client applications.
Field Description User Name Enter the user name for an administrator account in Plant Applications. Password Enter the password. -
Select Validate to validate the Plant Applications administrator credentials.
When the Plant Applications administrator connection is successfully validated, the Next option is enabled.
-
Select Next.
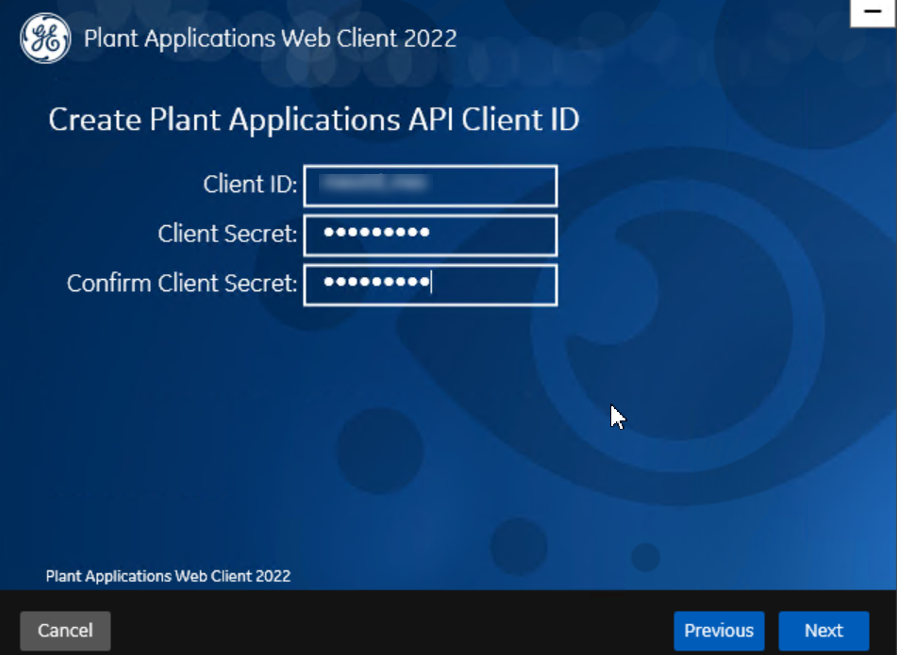
The Create Plant Applications API Client ID page appears. The Client ID and Client Secret is useful for accessing the Plant Applications APIs/Swagger URLs.
-
Enter the required information in the following fields.
Field Description Client ID Enter the username. The default username is hostname_mes, you can enter the user name of your choice. Client Secret Enter the password. Confirm Client Secret Enter the password to confirm the value in the Confirm Client Secret field. -
Select Next.
The You are ready to install screen appears.
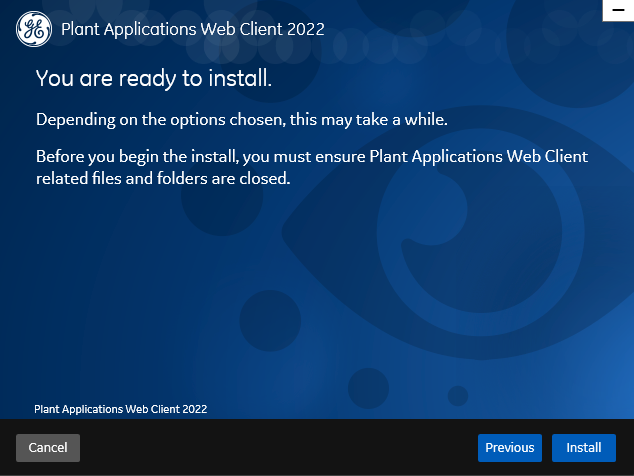
-
Select Install, and then wait for the installation to
complete.
The installation process might take around 20 minutes. On successful installation, the Installation Successful page appears.
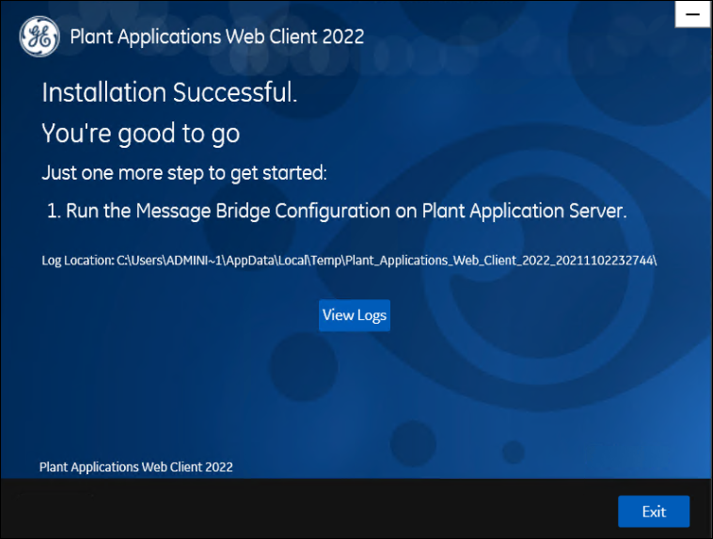 Note: Before you log into the Plant Applications Web Client, ensure to complete the configuration of the Message Bridge Utility.
 - Optional: Select View Logs to see the installation details.
-
In the Installation Successful page, select
Exit to close the wizard.
The Plant Applications Web Client is successfully installed on your computer.
After the installation is complete, Run the Message Bridge Configuration Utility. This is a mandatory step that you must complete before using the Plant Applications Web Client.
Remember: If you upgrade JAVA later, it might create some issues in using the Plant Applications Web Client. To resolve this issue, refer to the Community article 000020691 in the support site http://support.ge-ip.com. - When you have completed running Message Bridge Configuration, Verify the Installation if the Plant Applications Web Client applications are up and running.
- Access the Plant Applications REST APIs to access the REST APIs for Plant Applications Web Client.
- When installation is successful but posting apps into Operations Hub fail, then you must post the apps using utility. See Post Applications into Operations Hub Manually.
-
After the installation is complete, if you want to find the port details or
swagger URL information, refer the WebClient-Ports.txt
located in C:\Program Files\GE
Digital\PlantApplicationsWebClient\WebClient-Ports.txt.
Note: When you complete the installation of Web Client, you must configure the SQL "Always On" server setup. For more information, see Configure Web Client to Support SQL "AlwaysOn" Setup.