Policy Logic Validation
About Validating the Policy Logic
After you build a policy model, you can run a validation process to ensure that the policy logic yields the results you want. Policy validation simulates policy execution, but no actions will be taken as a result (e.g., no Policy Recommendation records will be created). This prevents the policy from generating potentially invalid data while you are confirming that the policy logic is working as expected.
You can validate the policy model logic using ad hoc test values or values in the records belonging to a policy instance. After you run the validation process, detailed results of the simulated execution are displayed on the model canvas.
Validate Policy Logic Using Ad Hoc Test Values
Before You Begin
- Build a Policy Model.
About This Task
Procedure
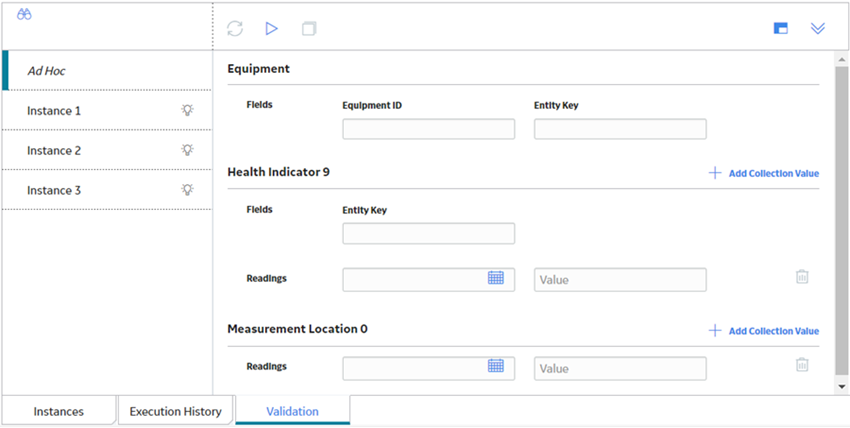
- In the Design workspace, select the Validation tab.The Validation pane appears with one section for each Input node in the policy model that requires an input value.
 Tip:
Tip:- To resize the pane, drag the top edge of the pane.
- To maximize the pane, select
 .
. - To restore the pane to its original size, select
 .
. - To close the pane, select
 .
.
- Enter the test values that you want to use to validate the policy logic.For collection inputs, select Add Collection Value to display additional boxes in which you can specify collection values.Note:
- Unspecified test values are considered as empty strings and not as null values for validation. To specify a null value as the test value, enter null.
- You can copy values from a policy instance to use as a starting point. To do so, select the instance whose values you want to copy, and then select
 .
.
- Select
 .The validation process begins. When the validation is complete, the nodes in the policy model are color-coded to indicate the results of the validation.
Validate Policy Logic Using Policy Instance Values
Before You Begin
About This Task
Procedure
- In the Design workspace, select the Validation tab.The Validation pane appears with one section for each Input node in the policy model that requires an input value.Tip:
- To resize the pane, drag the top edge of the pane.
- To maximize the pane, select .
- To restore the pane to its original size, select .
- To close the pane, select .
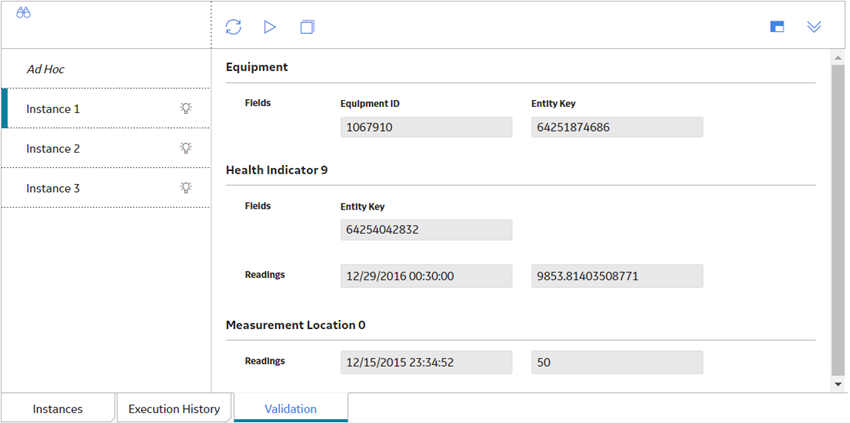
- On the left side of the pane, select the policy instance whose values you want to use in the validation process.The right side of the pane displays values from the records that are included in that policy instance. For example, in the following image, you can see that the value A is stored in the Criticality Indicator field in the Equipmentrecord that is included in the policy instance.
- Select .The validation process begins. When the validation is complete, the nodes in the policy model are color-coded to indicate the results of the validation.