Offline Forms
About Offline Forms
Predix Essentials customers can access data when executing product workflows offline. You can create, read, update, and delete Predix Essentials product data in a location without connecting to a server. Using Offline Forms, you can now modify and define an offline data collection UI for Predix Essentials families.
Offline Forms can be accessed through Configuration Manager and the UI can be specifically configured for offline display. More than one offline form can be configured for a family. This form creation is available only for Entity Families.
To configure a form, you can select a field from a list for the family and drag it onto a grid based canvas. Fields can be setup to occupy an entire row or you can have two fields in a row. The configuration will need to be exported and delivered as part of the Family content delivery.
- Required
- Disabled
- Default
- Masked Field
- Picklist
- Validate (depends on the input type)
Access the Offline Form Builder
Procedure
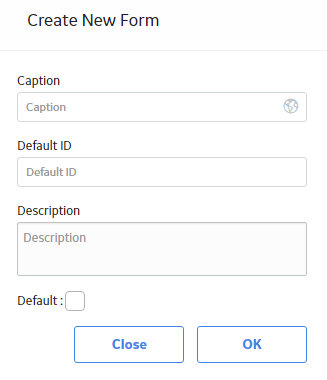
- In the workspace, select the Datasheets tab, and then select Manage Offline Forms.The Create New Form window appears.
 Note: If there is an existing offline form for the entity, the offline form for that entity appears. If there is more than one offline form, the default offline form for that entity appears.
Create an Offline Form
Procedure
- Select
 .The offline form is saved.
Access or Modify an Offline Form
Procedure
- To select an offline form, then in the upper-right corner of the workspace, select
 , and then select the offline form that you want to edit.The workspace for the offline form appears, displaying the fields of the offline form.
 - For information on the selected offline form, select
 .The Form Information window appears.
Add an Offline Form
Procedure
- Select
 .The Offline Form Builder appears.
 - Select .The offline form is saved.
Add or Delete Columns in Offline Forms
Columns can be added or deleted in offline forms.
Procedure
- Add columns:
- Select
 . An additional column is added to the offline form.Note: You may add up to four columns to an offline form.
 - Select
.The offline form is saved.
- Select
- Delete columns:
- Select
 . The column is deleted.
 - Select
.The offline form is saved.
- Select
Delete Fields in Offline Forms
Change the Default Offline Form for the Family
Procedure
- In the upper-right corner of the offline form, select .The Form Information window appears.
- In the upper-right corner of the offline form, select , and then select the Offline form that you want to set as default.The offline form for the selected Entity family appears.
- In the upper-right corner of the offline form, select .The Form Information window appears.