Datasheets
About Types of Datasheets
Predix Essentials offers the following types of datasheets:
- Master/Detail datasheet: A form that lets you display a record and all the records that are linked to it through a given relationship definition. The following image shows a master/detail datasheet that is configured by default for the Calibration Template family.
-
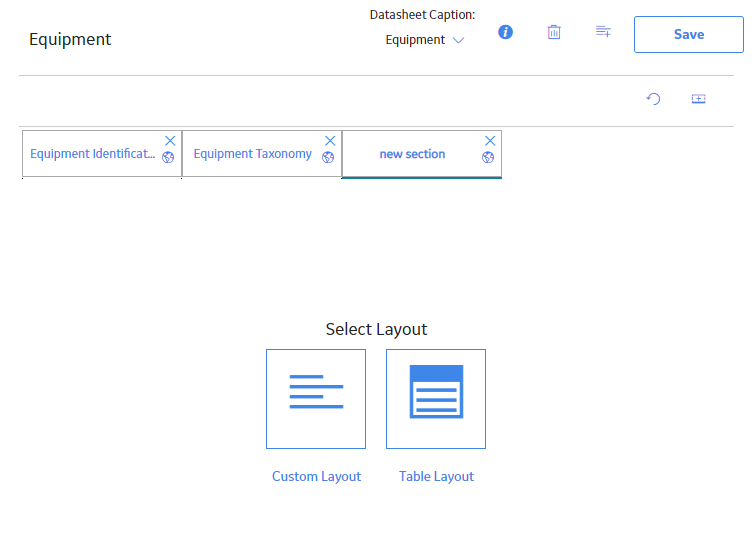
Custom datasheet: Datasheets that can be customized to display fields in a more advanced form. Predix Essentials provides two types of layouts for custom datasheets, the tabular layout and the custom layout.
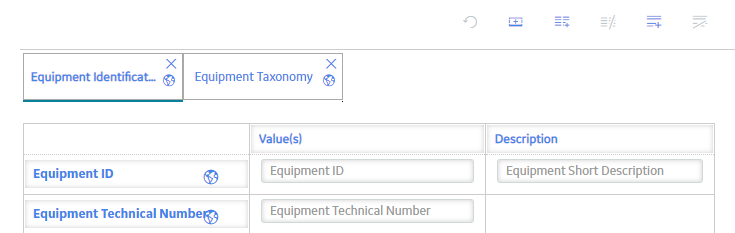
- Tabular layout organizes the datasheet content in a standard arrangement of up to four columns (first column is always row labels), rows, and cells of equal size.
- Custom layout allows for less uniform datasheet configurations with more custom options for item resizing and grouping items.
About Multiple Datasheets
Predix Essentials lets you define more than one datasheet for a given family. For example, members of the Pump family have many pieces of data that can be recorded for them (e.g., maintenance, engineering, reliability, cost, inspection, design, drawing, project, etc.). A datasheet containing all of these data fields would be very large and difficult to navigate.
To make data entry easier, an administrative user can create subsets of the data based on specific purposes (e.g., engineering data in one datasheet, inspection data in another, cost data in a third, and so forth). When you access a record, you can select the datasheet that represents your needs.
When more than one datasheet exists for a family, you will be able to select the appropriate datasheet when you create and view a record. The name of the currently selected datasheet appears at the top of any record you are viewing.
About Field Rules
The field properties and rules that you define for family fields determine how fields will behave when users view them in datasheets.
If you have defined a rule for a field that will affect the way it appears or behaves in a datasheet, you may want to test the field rule. To do so, follow this workflow:
- Configure the family field properties as needed.
- Add the field to the datasheet.
- Compile the family.
- Open a new datasheet for the family.
If you need to make additional changes to a field, repeat this workflow, but omit step 2. After you add the field to the datasheet, any changes you make to the field rule will be applied automatically to the datasheet.
About Master/Detail Datasheets
A master/detail datasheet is a custom form that lets you display a record and all the records that are linked to it through a given relationship definition. Master/detail datasheets can be configured for any entity family using any relationship definition that relates it to another entity family.
For example, in the baseline Predix Essentials database, the Calibration Template family is related to the Calibration Template Detail family through the Has Template Details relationship. The Predix Essentials product includes a master/detail datasheet that allows you to open a Calibration Template record while simultaneously viewing, creating, and modifying linked Calibration Template Detail records.
Privileges for Master/Detail Datasheets
Like standard datasheets, access to records displayed using master/detail datasheets is controlled by family-level security privileges. But because a master/detail datasheet displays records belonging to two entity families that are related to one another through a relationship family, the security considerations for master-detail datasheets are somewhat more complex. Specifically:
- To access records in a master/detail datasheet, at least View privileges are required on the master family. Even if users have privileges on the detail family, without privileges on the master family, they will not be able to access records that are displayed in master/detail datasheets.
- To view existing detail records, users must have View privileges on the detail family and the relationship family that relates the master family to the detail family.
- To create new detail records in a master/detail datasheet, users must have View, Insert, and Update privileges on the detail family.
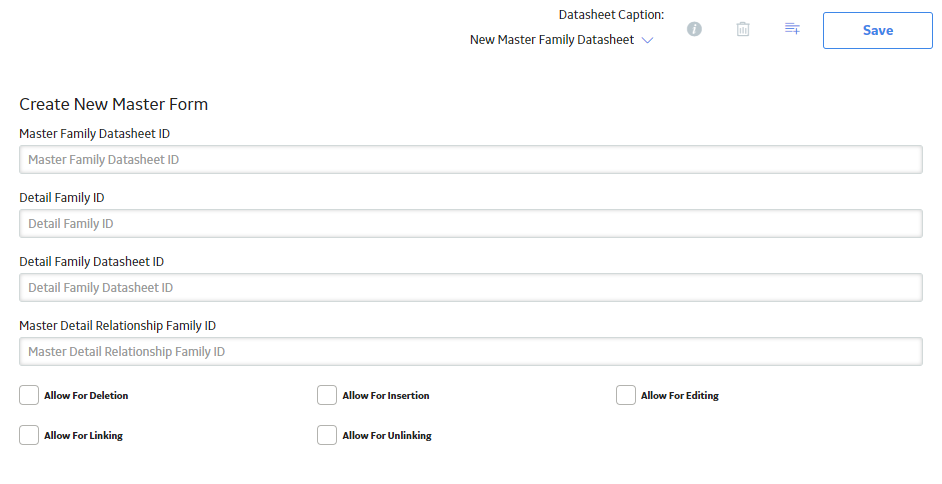
In addition to family-level privileges, the ability to manage records in master/detail datasheets is controlled by datasheet-level privileges. You can define datasheet-level privileges on the Create New Master Form window, which appears when you create a master/detail datasheet.
Five datasheet-level permissions options are available and control users' ability to manage detail records in a master/detail datasheet:
- Allow for Deletion: Determines whether users will be allowed to delete detail records.
-
When this check box is selected, users with Delete privileges on the detail family will be allowed to delete detail records.
- When this check box is cleared, users with Delete privileges on the detail family will not be allowed to delete detail records.
-
Regardless of whether this check box is selected or cleared, users without Delete privileges on the detail family will not be allowed to delete detail records.
-
- Allow for Insertion: Determines whether users will be allowed to create detail records.
- When this check box is selected, users with Insert privileges on the detail family will be allowed to create detail records.
- When this check box is cleared, users with Insert privileges on the detail family will not be allowed to create detail records.
- Regardless of whether this check box is selected or cleared, users without Insert privileges on the detail family will not be allowed to create detail records.
- Allow for Editing: Determines whether users will be allowed to modify detail records.
- When this check box is selected, users with Update privileges on the detail family will be allowed to modify detail records.
- When this check box is cleared, users with Update privileges on the detail family will not be allowed to modify detail records.
- Regardless of whether this check box is selected or cleared, users without Update privileges on the detail family will not be allowed to modify detail records.
- Allow for Linking: Determines whether users will be allowed to link new detail records to the master record.
- When this check box is selected, users will be allowed to link detail records to the master record if they have Insert privileges on the relationship family that relates the detail family to the master family.
- When this check box is cleared, users will not be allowed to link detail records to the master record even if they have Insert privileges on the relationship family that relates the detail family to the master family.
- Regardless of whether this check box is selected or cleared, users without Insert privileges on the relationship family that relates the detail family to the master family will not be allowed to link detail records to the master record.
- Allow for Unlinking: Determines whether users will be allowed to unlink existing detail records from the master record.
- When this check box is selected, users will be allowed to unlink detail records from the master record if they have Delete privileges on the relationship family that relates the detail family to the master family.
- When this check box is cleared, users will not be allowed to unlink detail records from the master record even if they have Delete privileges on the relationship family that relates the detail family to the master family.
- Regardless of whether this check box is selected or cleared, users without Delete privileges on the relationship family that relates the detail family to the master family will not be allowed to unlink detail records from the master record.
Custom-Layout Datasheets
A custom-layout datasheet is a form-based datasheet whose layout can be configured via Predix Essentials. Unlike standard datasheets, custom-layout datasheets provide more flexibility in the layout of fields. For example, they can contain grouped fields, fields that appear side-by-side, and so on.
When you create a custom-layout datasheet, you will need to select a Security Group. Only members of that Security Group will be able to modify the layout of the datasheet via Predix Essentials.
Note that beyond changing the ID, caption, description, default status, and default field order, which is based on the field sequence order, you cannot modify a custom-layout datasheet via the Configuration Manager. The layout of the datasheet must be configured via Predix Essentials.
About the Text Editor
The text editor is available in various text fields throughout the Predix Essentials. You can use the text editor to enter text into a desired field and then use the Spell Check feature to locate and correct misspelled words within the text. The text editor is especially useful for entering large amounts of text, such as descriptions, into text fields.
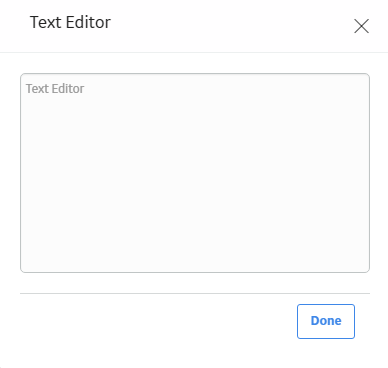
The text editor is not available in all fields. You will know that the text editor is available for a given field if  appears in the field. When you select the button, the text editor appears, as shown in the following image. The name of the field from which the text editor is accessed will appear in the title bar of the text editor window.
Details
- In Predix Essentials, in a datasheet, select the field whose text you want to modify.
The Text Editor window appears.
- Enter the desired text in the text box.
- Select Done.
The text editor closes and the text that you entered appears in the field from which you accessed the text editor.
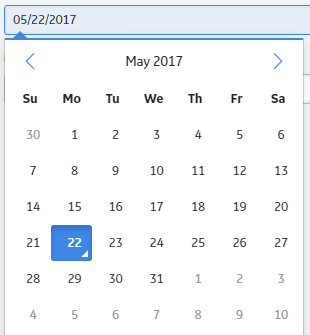
About the Calendar Feature
- Date and time
- Date only
- Time only
Date and Time
When you select a date field that has the date and time feature enabled, the  button will appear. When you select the button, the calendar will appear, as shown in the following image:
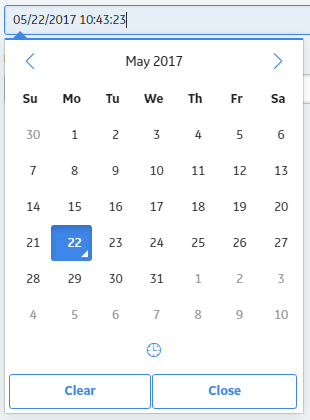
When you select  , the time picker will appear. Depending on your settings, the time picker may or may not have seconds enabled, as shown in the following image:
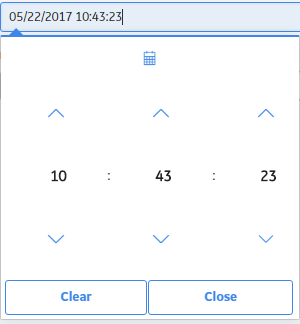
When you select , the calendar will appear again.
Date Only
When you select a date field that has only the date picker enabled, the button will appear. When you select the button, the calendar will appear, as shown in the following image:
Time Only
When you select a date field that has only the time picker enabled, the button will appear. When you select the button, the time picker will appear. Depending on your settings, the time picker may or may not have seconds enabled, as shown in the following image:
Access the Datasheet Builder
Procedure
Create a Datasheet
About This Task
- Master/Detail Datasheet
- Custom Datasheet
Procedure
- Create a Master/Detail Datasheet:
- Select
 , and then select Master/Detail datasheet.The Create New Datasheet window appears.
- Select
- Create a Custom Datasheet:
- Select , and then select Custom datasheet.The Create New Datasheet window appears.
- In the datasheet, select
 .
.The Datasheet Builder workspace appears.
- Select
What To Do Next
Modify a Datasheet
Procedure
- Next to the Datasheet Caption label, select
 , and then select the datasheet that you want to modify.The selected datasheet appears.
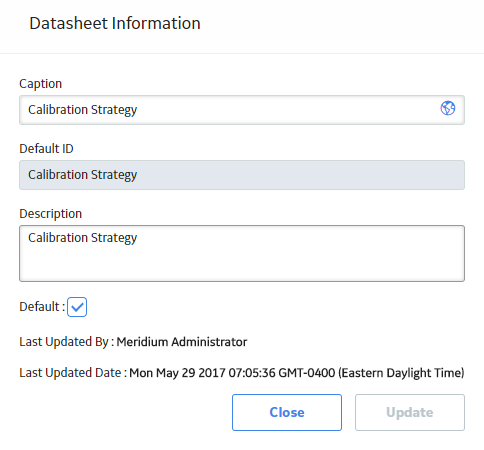
 - Select
 .The Datasheet Information window appears.
Designate a Datasheet as the Default Datasheet
You can designate a datasheet as the default datasheet when you create the datasheet. After you set a datasheet as the default, you can change which datasheet for a given family, is designated as the default.
Before You Begin
- If another datasheet currently has the default designation, you must clear the Default check box for that datasheet before you can designate another datasheet as default.
Procedure
Results
Delete a Datasheet
Procedure
- Next to the Datasheet Caption label, select , and then select the datasheet that you want to delete.The selected datasheet appears.
- Select
 .The Alert window appears.
Add a Section to a Datasheet
Procedure
- Next to the Datasheet Caption label, select , and then select the datasheet to which you want to add a section.The selected datasheet appears.
- Select .A new section appears in the datasheet, displaying the caption new section.
Rename a Datasheet Section or a Field
Procedure
- Next to the Datasheet Caption label, select , and then select the datasheet whose section or field you want to rename.The selected datasheet appears.
Import and Export Datasheets
About This Task
After you have configured a custom-layout datasheet, you can export the configuration via the Configuration Manager so that it can be imported into another database that contains the same family. If you do so, the user who imports the datasheet configuration will not need to save it after the import procedure is completed. If you export the datasheet configuration using the following instructions, however, the user who imports it will need to save the configuration as part of the import procedure.
- The target database contains the same family for which the datasheet was configured in the source database.
- A custom-layout datasheet has been defined for this family in the target database.
- The Security User performing the import is a member of the Security Group that is associated with the custom-layout datasheet in the target database.
Delete a Datasheet Section
About This Task
Procedure
- Next to the Datasheet Caption label, select , select the datasheet that you want to modify.The selected datasheet appears.
- In the datasheet section that you want to delete, select
 .
.
The section is deleted.
Reset the Current Datasheet
Procedure
 .
.