Map SAML Groups With Proficy UAA

About this task

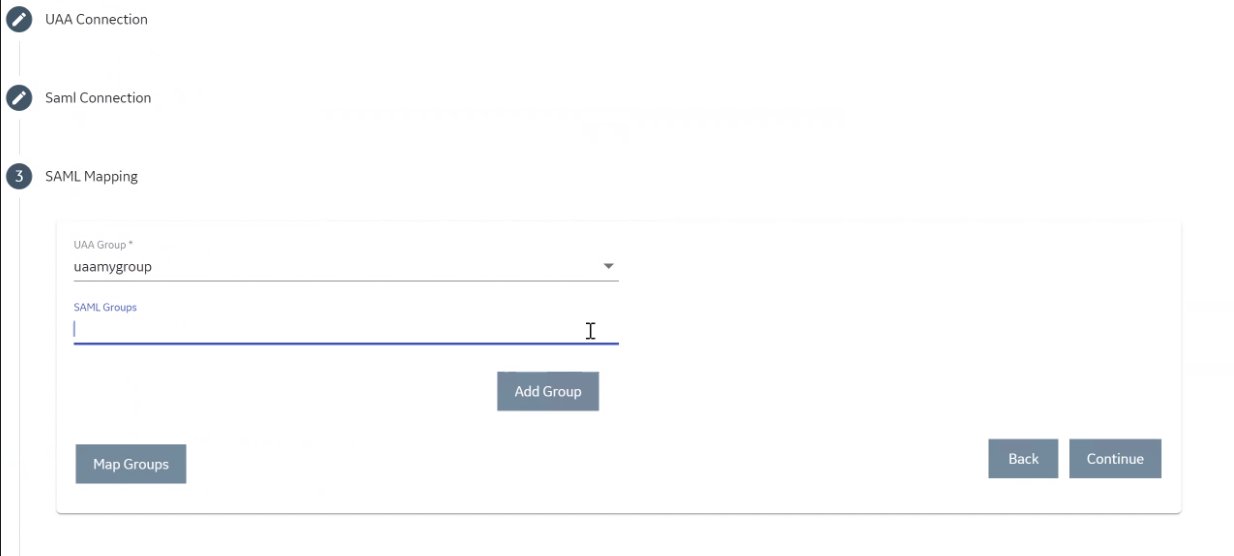
If you want SAML users to use Proficy UAA, you must map the corresponding SAML groups with the Proficy UAA group created during the Proficy product installation.

Procedure

  1. Double-click .
    Tip: By default, this icon appears on the desktop after you install Proficy UAA.
  2. Select the Identity Providers tab.
    The UAA/LDAP/SAML Connectivity Tool appears.
  3. Select the Map Existing SAML Groups check box.
  4. In the UAA Connection section, provide values as specified in the following table.
    Important: The values that you provide in this step must match the values that you provided in the while installing your Proficy product. These values are required to connect to the Proficy UAA. Proficy UAA works only with a single instance of UAA, which is specified during installation. After installation, you cannot change the instance of UAA that Proficy UAA will use.
    Box Description
    URL Enter the authorization server URL of the Proficy UAA server that you specified in the UAA Base URL box during installation (for example, https://localhost).

    If referencing Historian 7.x UAA, then use a url of https://Historian7x:8443; if referencing Historian 8.x then use a URL of https://Historian8x (no port number). The port numbers reflect the default port numbers for Historian. If ports were customized, then use the selected port.

    Client ID Enter the client ID of the Proficy UAA server that you specified in the Admin Client ID box during installation.
    Client Secret Enter the client secret configured for the OAuth client that you specified in the Admin Client Secret box during installation.
  5. Select Test.
    If connection to the UAA server is established, a message appears, confirming the same.
  6. In the Existing SAML Identity Provider section, select the Identity Provider.
  7. Click Show IDP Details, or Create New IDP and provide values as specified in the following table.
    Item Description
    Metadata Location Specify the SAML Metadata – either an XML string or a URL that will deliver XML content. Optionally, you can select Instead Upload Metadata Xml to enter the metadata location using a file you downloaded from your SAML Identity Provider.
    Name Specify the name of your SAML provider.
    Origin Key Specify the unique alias for the SAML provider.
    SAML Group Attribute Names Specify the names of the attributes that contain the group membership information about a user in a SAML assertion.
    NameID Optionally, enter a SAML Name ID and associated fields that you want to use in a Link Test.
    Link Text Specify the text you want to appear in a link test.
    Enable SAML Link Select this check box to enable the SAML Link; clear to disable.
    Note: It is recommended to use the same Name and Origin Key (not mandatory).
  8. Select Add or Update to save your changes.
    Tip: Click Delete IDP to remove the existing IDP, and instead create a new one (using the Create New IDP button).
    The SAML Mapping screen appears.
  9. In the drop-down list box, select the Proficy UAA group to which you want to map SAML groups.
  10. Enter a SAML Group and click Add Group. Repeat this step for each SAML group you want to add.
  11. When finished adding SAML groups, click Map Groups.
  12. Next, select Continue to complete.
    A message appears, confirming that the SAML groups are mapped to the Proficy UAA group.