 Historian
Set Up a Mirror of Mirror
Before you begin
- Install Historian server on each machine that you want to use in the mirror of mirror setup.
- Set up Configuration Hub on each machine that you want to use in the mirror of mirror setup.
- Add a system. The server that you specify while adding the system serves as the primary server for the system.
- Create data stores in the primary server in the public/IT network with the same name as the data stores in the primary server in your organization network.
About this task
Note: For the Historian Enterprise Mirror Architecture, only "Time
based" archives are supported.
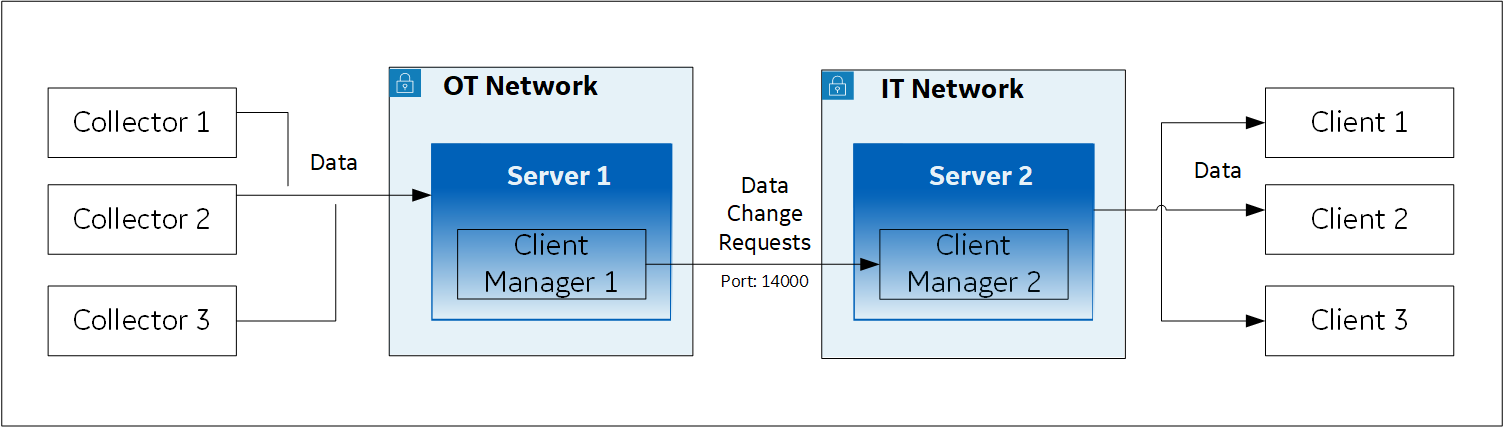
Single-Node Setup: The following image shows two networks - OT and IT - with a Historian server installed in each network. These networks communicate using port 14000.
 In this setup:
- Server 1 is the primary server in the OT network; it stores data from collectors.
- Server 2 is the primary server in the IT network; it is connected to clients.
- When a tag/data is created, updated, or deleted, Client Manager 1 communicates the same with Client Manager 2 (installed with Server 2 in the IT network).
- The change in the tag/data is replicated in Server 2 (that is, data is created, updated, or deleted accordingly).
- The latest data is retrieved from Server 2 using the clients.
- Mirror 1 includes Mirror Server 1 and Mirror Node 1, which is a backup/standby node for Mirror Server 1; both these machines are in the OT network.
- Mirror 2 includes Mirror Server 2 and Mirror Node 2, which is a backup/standby node for Mirror Server 2; both these machines are in the IT network.
 If Mirror Server 1 goes down, Client Manager M1 in Mirror Node 1
communicates with Client Manager 2 in Mirror Server 2.
If Mirror Server 1 goes down, Client Manager M1 in Mirror Node 1
communicates with Client Manager 2 in Mirror Server 2. 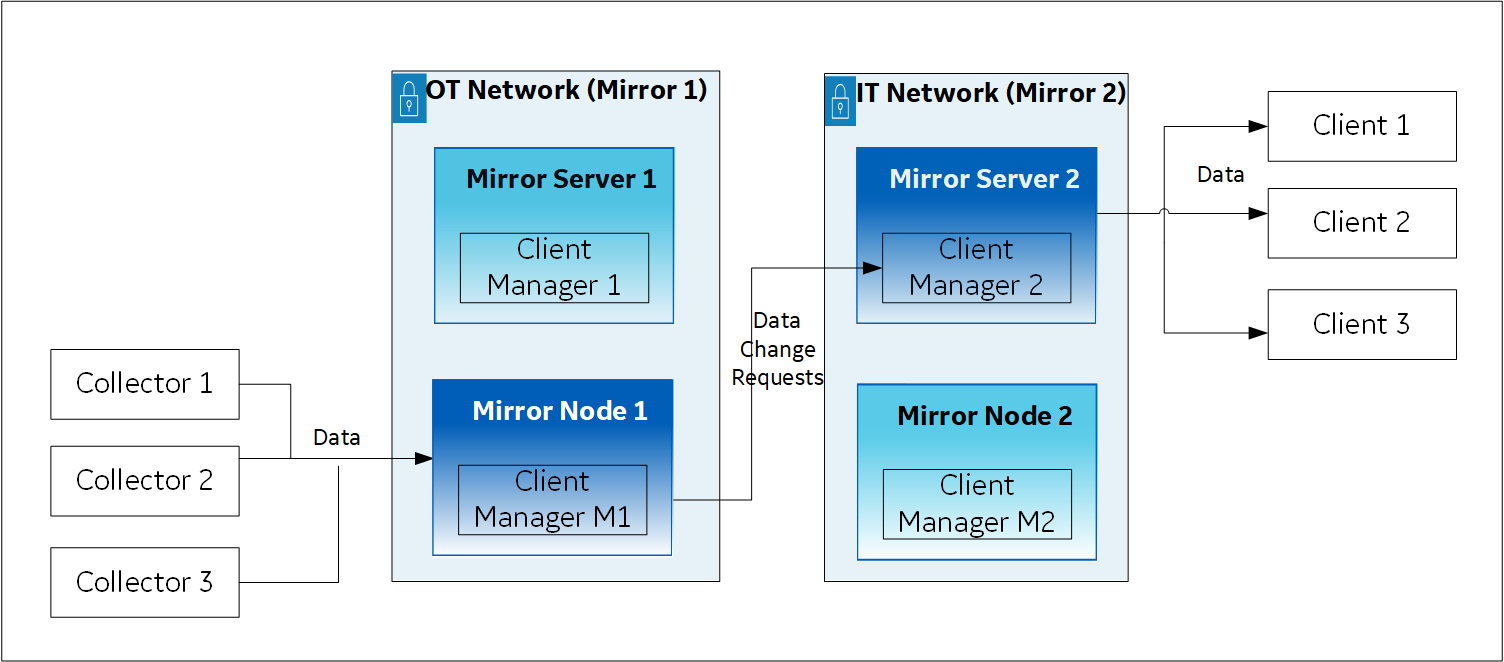 Similarly, if Mirror
Server 2 goes down, Client Manager 1 in Mirror Server 1 communicates with Client
Manager M2 in Mirror Node 2.
Similarly, if Mirror
Server 2 goes down, Client Manager 1 in Mirror Server 1 communicates with Client
Manager M2 in Mirror Node 2. 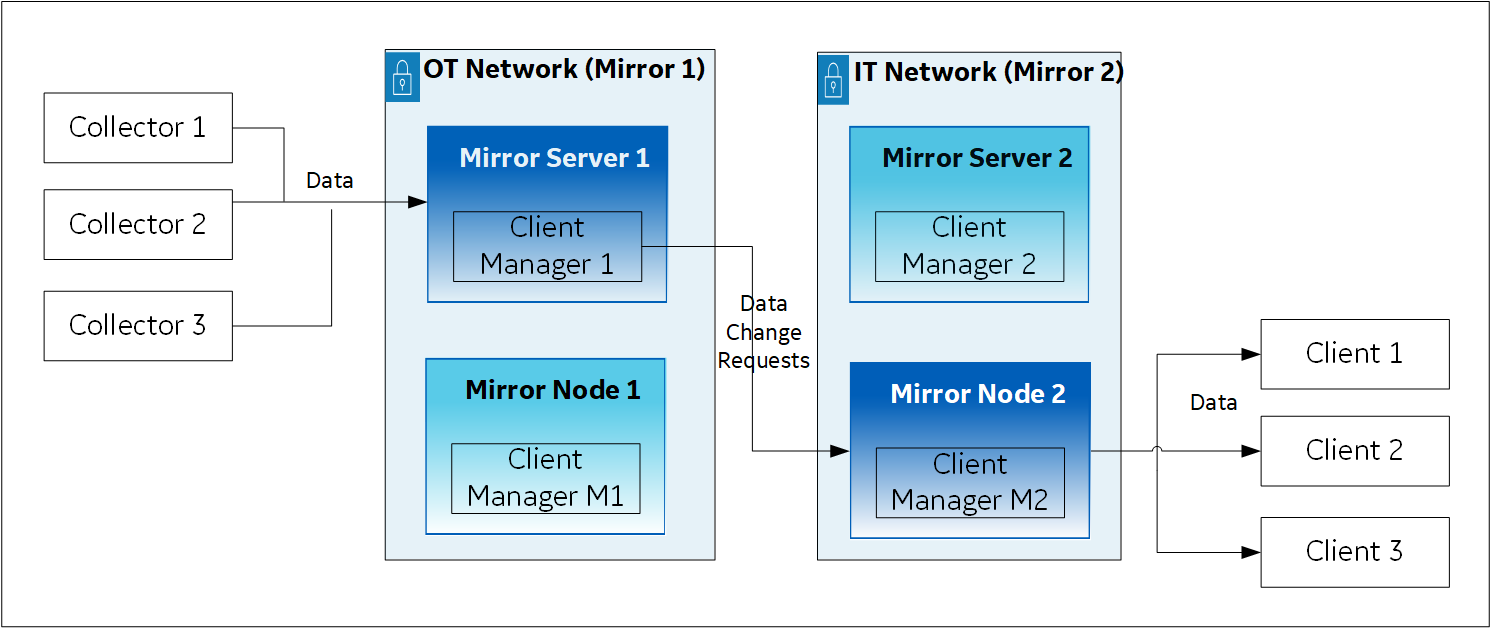 If both Mirror Server 1 and Mirror Server 2
are down, Client Managers M1 and M2 communicate with each other.
If both Mirror Server 1 and Mirror Server 2
are down, Client Managers M1 and M2 communicate with each other.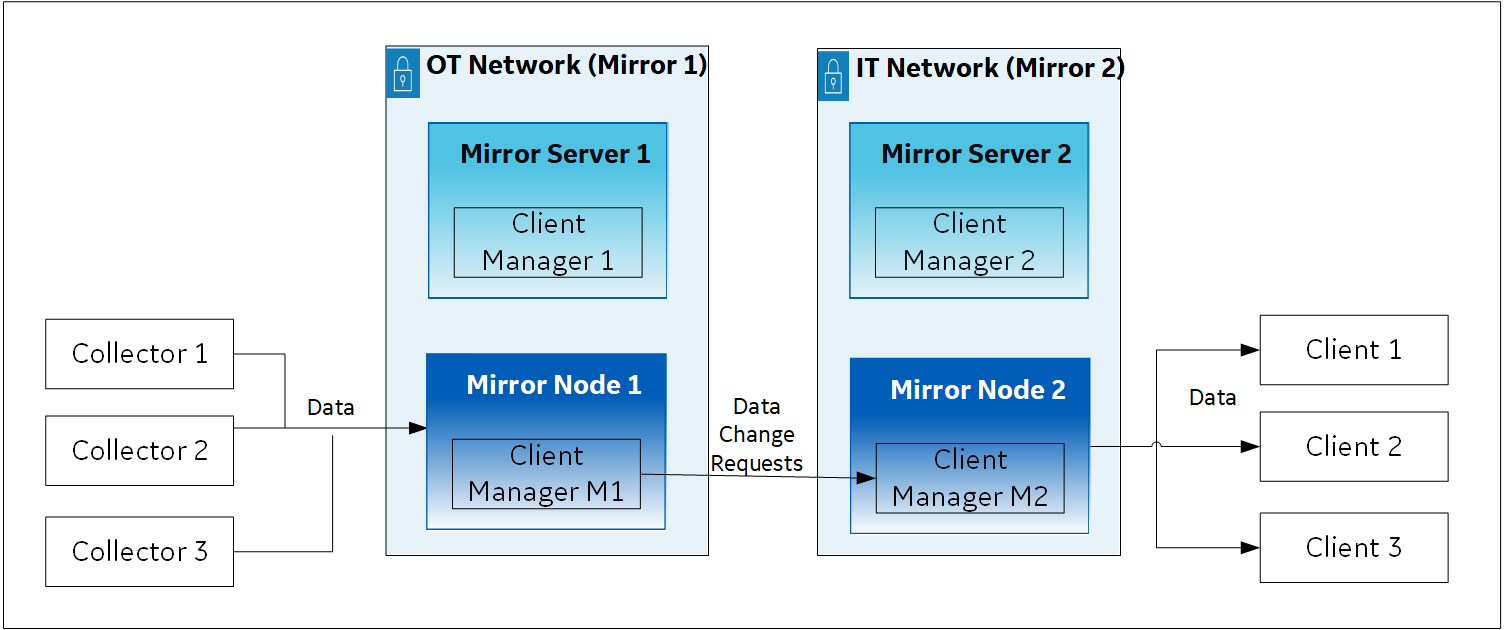
If Mirror Server 1 and/or Mirror Server 2 are available, the connection is
re-established using these primary servers.Thus, you can choose to
always retrieve data from either Mirror Server 2 or Mirror Node 2. In addition, the
store-and-forward functionality is available (in case Client Managers are not yet
connected).
Thus, you can choose to
always retrieve data from either Mirror Server 2 or Mirror Node 2. In addition, the
store-and-forward functionality is available (in case Client Managers are not yet
connected). This topic describes how to set up a mirror of mirror for the
configuration described in the preceding example. It includes the following
high-level steps:
- Installing the Historian server on all the machines
- Setting up mirror 1
- Setting up mirror 2
- Setting up a mirror of mirror
Procedure
Installing the Historian server
-
On the machines designated as the mirror primary servers (Mirror Server 1 and Mirror Server 2 in the example), install the Historian server. During the installation, select Historian Mirror Primary Server on the Choose the type of install you want to perform page.
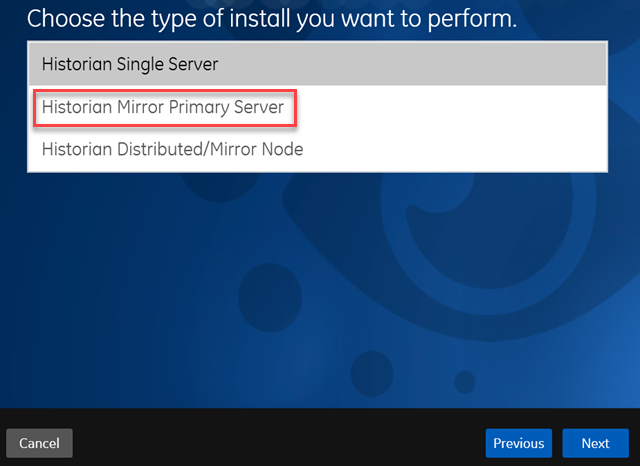
- On the machines designated as mirror nodes (Mirror Node 1 and Mirror Node 2 in the example), install the Historian server. During the installation, select Historian Distributed/Mirror Node on the Choose the type of install you want to perform page.
Set up Mirror 1:
- On the mirror primary server in your organization's network (Mirror Server 1 in the example), access Configuration Hub.
-
In the NAVIGATION section, under the Configuration Hub plugin for Historian, select Systems.
A list of systems appears in the main section.
-
Expand Mirror Server 1.
A list of servers in the system appears.
-
Select
 .
.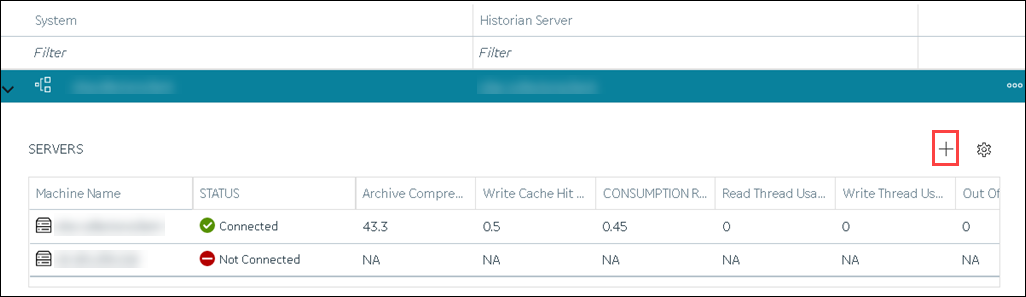 The Add Server Machine: <system name> window appears.
 -
Enter the host name or IP address of the mirror node in your organization's network (Mirror Node 1 in the example), and then select Add.
The distributed server is added to the system. A distributed location is added in the server.
-
Right-click Mirror Node 1, and then select Browse Locations.
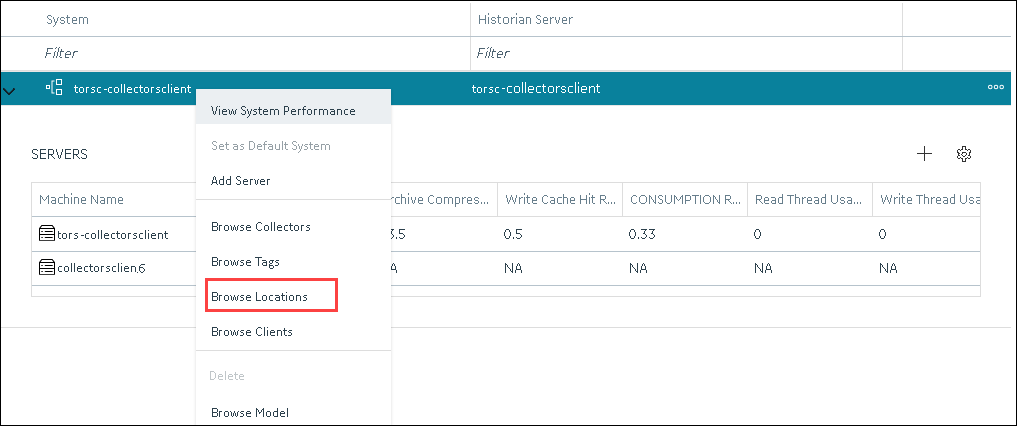 A list of distributed locations in the system appears.
 -
Select Mirror Locations.
A list of mirror locations in the system appears.
-
In the upper-right corner of the main section, select .
The Add Mirror Location window appears.
-
Provide values as described in the following table.
Field Description MIRROR LOCATION NAME Enter a name for the mirror location. A value is required and must be unique for the system. SERVER MACHINES Select the servers that you want to add to the mirror group (Mirror Server 1 and Mirror Node 1 in this example). This box contains a list of all the servers in the system. You must add minimum two servers to a mirror location. -
Select Add.
Mirror Node 1 is created.
-
Right-click the system name, and then select Add Data Store.
The Add Data Store: Mirror Node 1 window appears.
-
Enter values as described in the following table.
Field Description DATA STORE NAME Enter a unique name for the data store. A value is required. You can use all alphanumeric characters and special characters except / \ * ? < > | You must provide the same name for the mirror setup in the IT network (mirror 2 in the example).
DESCRIPTION Enter a description for the data store. Set as default data store for the system Select this check box if you want to set this data store as the default one. A default data store is the one that is considered if you do not specify a data store while adding a tag. You can set only one data store as default. -
Select Add.
Mirror 1 is configured.
Set up Mirror 2:
- On the mirror primary server in the IT network (Mirror Server 2 in the example), access Configuration Hub.
-
In the NAVIGATION section, under the Configuration Hub plugin for Historian, select Systems.
A list of systems appears in the main section.
-
Expand Mirror Server 2.
A list of servers in the system appears.
-
Select .
The Add Server Machine: <system name> window appears.
-
Enter the host name or IP address of the mirror node in your organization's network (Mirror Node 2 in the example), and then select Add.
The distributed server is added to the system. A distributed location is added in the server.
-
Right-click the system name, and then select Browse Locations.
A list of distributed locations in the system appears.
-
Select Mirror Locations.
A list of mirror locations in the system appears.
-
In the upper-right corner of the main section, select .
The Add Mirror Location window appears.
-
Provide values as described in the following table.
Field Description MIRROR LOCATION NAME Enter a name for the mirror location. A value is required and must be unique for the system. SERVER MACHINES Select the servers that you want to add to the mirror group (Mirror Server 2 and Mirror Node 2 in this example). This box contains a list of all the servers in the system. You must add minimum two servers to a mirror location. -
Select Add.
Mirror Node 2 is created.
-
Right-click Mirror Node 2, and then select Add Data Store.
The Add Data Store: Mirror Node 2 window appears.
-
Enter values as described in the following table.
Field Description DATA STORE NAME Provide the same name that you provided while setting up mirror 1. DESCRIPTION Enter a description for the data store. Set as default data store for the system Select this check box if you want to set this data store as the default one. A default data store is the one that is considered if you do not specify a data store while adding a tag. You can set only one data store as default. -
Select Add.
Mirror 2 is configured.
Set up Mirror of Mirror:
- Access Configuration Hub in the primary server in the OT network (Mirror Server 2).
-
In the NAVIGATION section, under the Configuration Hub plugin for Historian, select Systems.
A list of systems appears in the main section.
-
Expand Mirror Server 1.
A list of servers in the system appears.
-
Select .
The Add Server Machine: <system name> window appears.
-
Enter the host name or IP address of the mirror server in the IT network (Mirror Server 2 in the example), select the Set as Mirror of Mirror check box, and then select Add.
The distributed server is added to the system. A distributed location is added in the server.
-
In the NAVIGATION section, under the Configuration Hub plugin for Historian, select Systems.
A list of systems appears in the main section.
-
Expand Mirror Server 1.
A list of servers in the system appears. In the example, Mirror Server 1, Mirror Node 1, and Mirror Server 2 appear.