 Historian
Install the Historian Server Using the Installer
Before you begin
- Set up the Historian environment.
- If you are changing the role of a Historian server that was previously a distributed/mirror server to any other configuration (single-server or mirror primary server), you must first Uninstalling Historian.
- If you are installing a distributed/mirror server, use the same configuration, license key, installation drive, Proficy Authentication instance, and domain as the primary server.
About this task
You can also install it at a command prompt.
Procedure
- Log in as an administrator to the machine on which you want to install the Historian server.
- Run the InstallLauncher.exe file.
-
Select Install Historian.
The welcome page appears.
-
Select Next.
The license agreement appears.
-
Select the Accept check box, and then select
Next.
The Where do you want to install Historian? page appears.
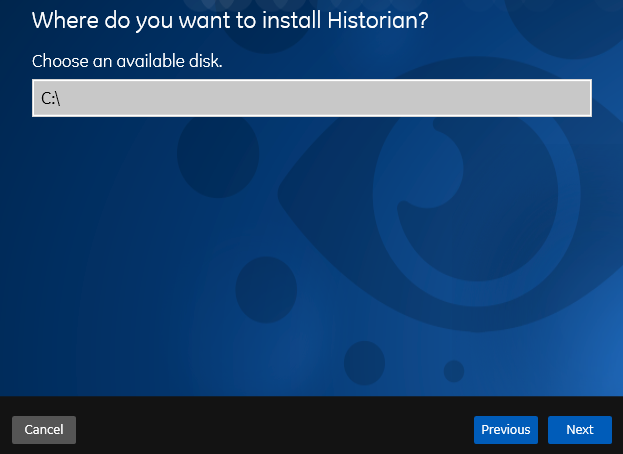
-
If needed, change the default installation drive of the Historian server, and
then select Next.
The Override the default Historian data Path? page appears.
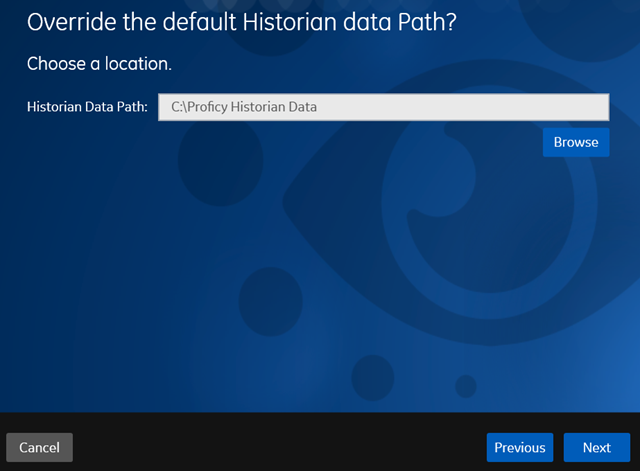
-
If needed, change the default folder of the log files, and then select
Next. If you want to include the Historian server in
a cluster, enter the path to the shared folder of the cluster.
The Proficy Authentication Service page appears.
Only if you want to use Web-based Clients (such as Configuration Hub, Trend Client, the Web Admin console, and REST APIs), you need Proficy Authentication. Otherwise, you can skip this step. If you use Web-based Clients, Proficy Authentication is required for user authentication. It provides identity-based security for applications and APIs. It supports open standards for authentication and authorization, including Oauth2.
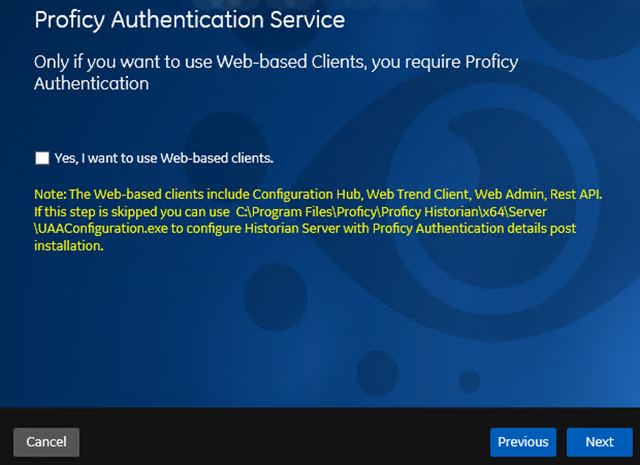
-
If you want to use Web-based Clients, select the Yes, I want to use Web-based Clients check
box, and provide values as described in the following table.
Field Description Proficy Authentication server name Enter the name of the machine on which the Proficy Authentication server is installed. If the machine uses a fully qualified domain name (FQDN), provide the FQDN. By default, the local hostname is considered. Public https port Enter the port number used by the Proficy Authentication service. The default value is 443. Ensure that this port number matches the one on the TCP Port Assignments page during Web-based Clients installation. Note:- You can install a Proficy Authentication service using Operations Hub or Historian Web-based Clients. You can provide the URL of an existing Proficy Authentication instance. Or, if a Proficy Authentication service is not available, you can install it during Web-based Clients installation.
- If you change the Proficy Authentication server for Web-based Clients later, you must change the Proficy Authentication server for the Historian server as well. You can do so using the Proficy Authentication Configuration tool without the need to install the Historian server again.
-
Select Next.
The Historian Security Groups page appears.
Using Historian security groups provides an added layer of control over access to your Historian system.
By default, the option to create Historian security groups is not selected.
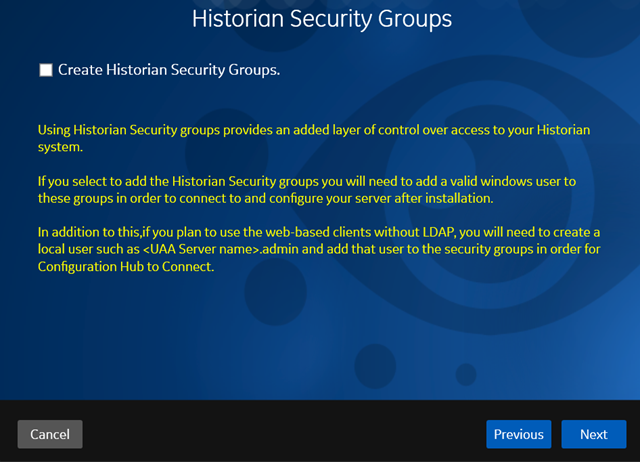
-
If you want the installer to create Historian security
groups, select the corresponding check box, and then select
Next.
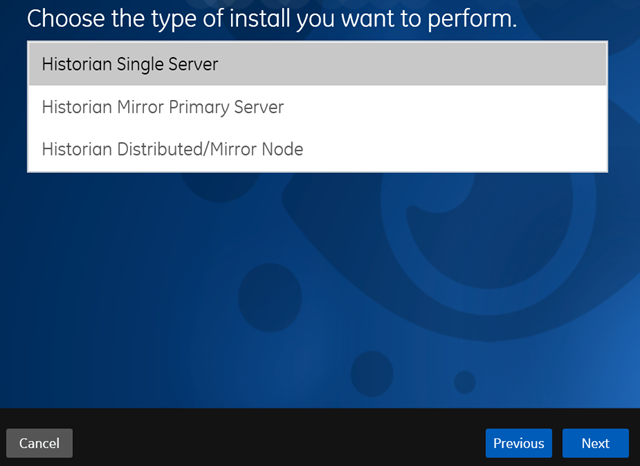
The Choose the type of install you want to perform page appears.
-
Select the type of the Historian server that you want to install, and then
select Next.
- Historian Single Server: This is for a stand-alone Historian system, which contains only one Historian server. This type of system is suitable for a small-scale Historian setup.
- Historian Mirror Primary Server: This is for a horizontally scalable Historian system, which contains multiple Historian servers, all of which are connected to one another. Installing this server will allow you to add machines and distributed/mirror servers to this system.
- Historian Distributed/Mirror Node: This is for a horizontally scalable Historian system. Installing this server will allow you to add this node to a primary server.
The Ready to Install page appears. -
Select Install.
The installation begins.
-
When you are asked to reboot your system, select
Yes.
The Historian server is installed on your machine in the following folder: <installation drive>:\Program Files\Proficy\Proficy Historian\x64\Server, and the following registry path is created: HKEY_LOCAL_MACHINE\SOFTWARE\Intellution, Inc.\iHistorian\Services.In addition, the following components are installed:
- The RemoteCollectorConfigurator utility: A command-line tool, which allows you to manage collectors remotely. By default, it is located in the C:\Program Files\GE Digital\NonWebCollectorInstantiationTool folder. For instructions on using this utility, refer to About Installing and Managing Collectors Remotely.
- The Proficy Authentication Configuration tool: A utility that allows you to specify the Proficy Authentication server details to match with the Proficy Authentication server used by Web-based Clients. By default, it is located in the C:\Program Files\Proficy\Proficy Historian\x64\Server folder. For instructions on using this tool, refer to Change the Proficy Authentication Server.