 CIMPLICITY
6.1.1. Create an Add Blocks Button for the Script
About this task
| A | Create an Add Blocks Button |
| B | Create a Mouse Up Event |
| C | Write a Script for the Add Blocks Button |
| D | Finish the Add Blocks Configuration |
- Create an Add Blocks Button
Procedure
-
Do the following.
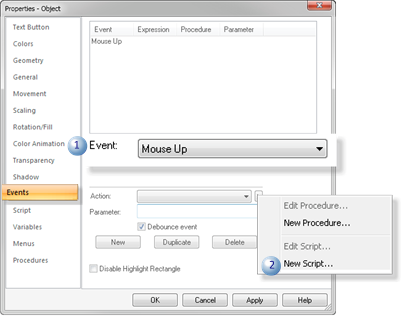
A Event field Select Mouse Up in the drop down list. B Action - Click the Popup button to the right of the Action field.
- Select New Script on the Popup menu.
Result: An Edit Script window opens.

- Write a Script for the Add Blocks Button
The script includes the following sections
-
Add the code to add this new item to your schedule region.
Enter:
'Set the item properties item.regionid="SCHEDULE" item.itemid=itemid item.itemtypeid=model item.regionloc=-1 item.exthold 0 item.groupid="MAIN" item.inthold 0 'Add the item to PRT item.Add

- Finish the Add Blocks Configuration
Results
The CimEdit screen now has an Add Blocks button.


