Enable Multi-Factor Authentication
This topic describes how to enable multi-factor authentication for users.
Note: Enabling MFA also enables two-factor authentication for UAA and LDAP
users as both the identity providers have a common login entry point.
- Log in to Configuration Hub as an administrator.
-
Go to .
The existing list of identity providers appear.
-
Select the
UAArecord for which you want to enable the multi-factor authentication.The option to enable MFA appears on the DETAILS panel under the MFA section. -
Enable the toggle switch for MFA.
By default, MFA is disabled.
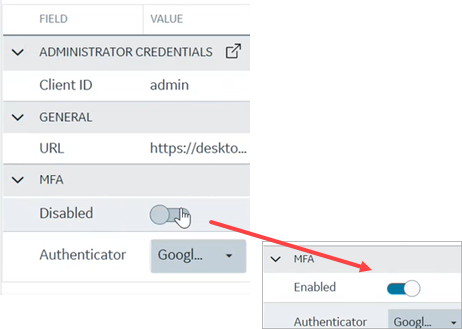 The multi-factor authentication for
UAAis enabled. -
Select Authenticator.
Currently, Google authenticator is the only available authenticator.
-
Restart the
GE Proficy Authentication Tomcat Web Serverservice. -
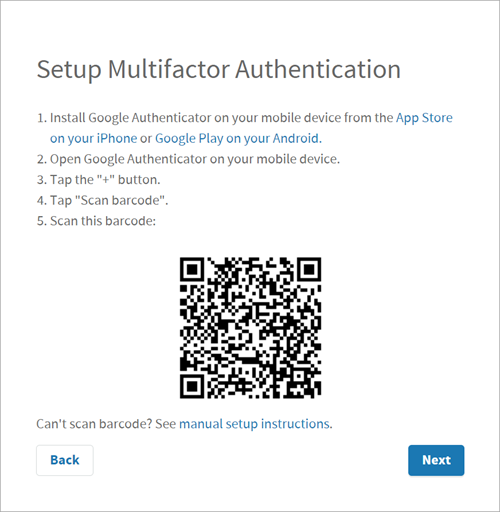
Activate multi-factor authentication for user logins.
You need to perform the following steps only for the first time for every user login.
-
Log in to Configuration Hub with UAA user credentials.
The MFA setup screen appears with a barcode.
-
Enter the 6-digit code in the passcode field and select
Verify
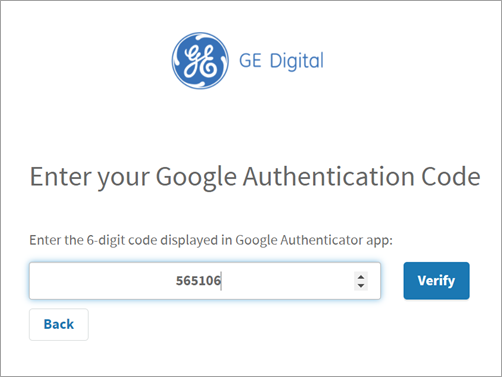 You are logged in successfully.
-
Log in to Configuration Hub with UAA user credentials.