Configure SAML Identity Provider
You can add multiple SAML connections.
- Go to .
-
Select
 , then select
SAML.
, then select
SAML.
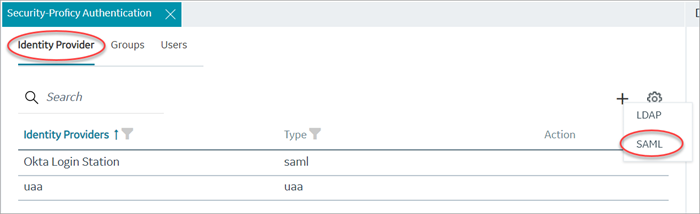
The SAML Identity Provider screen appears.
-
Enter the following details:
Field Description Metadata Location Select Metadata XML to upload the XML document and populate the location URL in this field. The XML file contains the metadata to interact with SAML enabled identity providers (Azure, ADFS, or Okta). Refer to Configure Okta as SAML IDP. Name Name of the SAML identity provider. Attribute Name The attribute that contains the group membership information about a user in a SAML assertion. Name ID SAML Name ID and associated fields that you want to use in a link test. Enable SAML Link Select the check box. 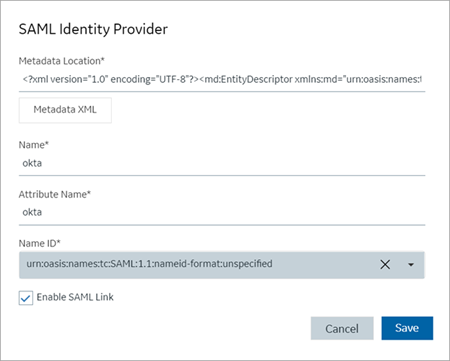
- Select Save.