Install Single-Server Historian Using the Installer

Before you begin

About this task

This topic describes how to install single-server Historian using the installer. You can also install single-server Historian at a command prompt.

Procedure

  1. Log in as an administrator to the machine on which you want to install Historian.
  2. Run the InstallLauncher.exe file.
  3. Select Install Historian.
    The welcome page appears.
  4. Select Next.
    The license agreement appears.
  5. Select the Accept check box, and then select Next.
    The Where do you want to install Historian? page appears.

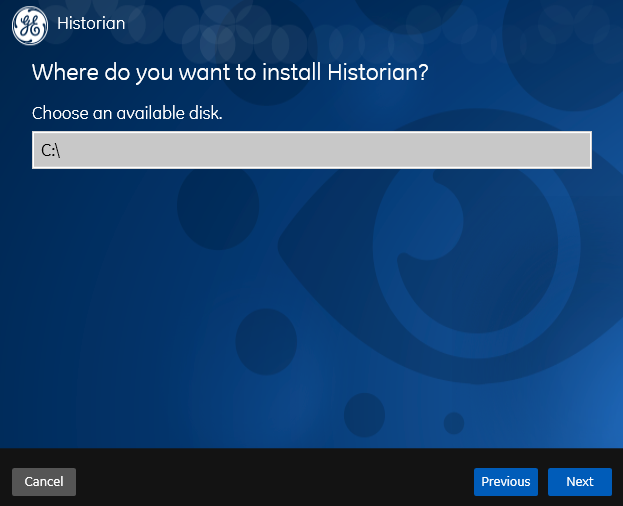
  6. If needed, change the default installation drive of the Historian server, and then select Next.
    The Override the default Historian data Path? page appears.

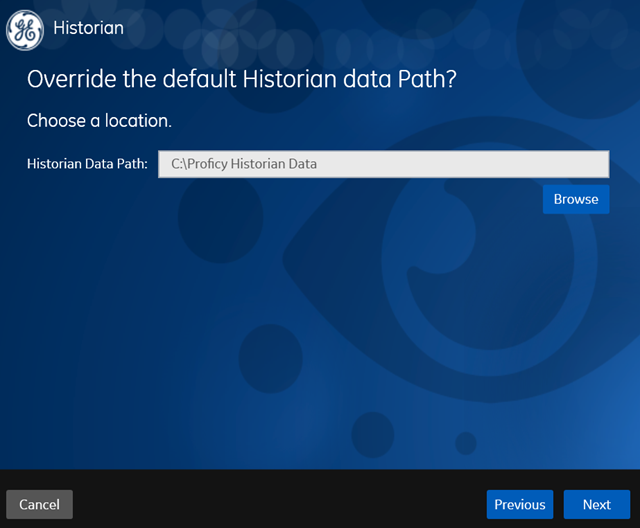
  7. If needed, change the default folder of the log files, and then select Next.
    The User Account and Authentication (UAA) Service page appears.

    Only if you want to use Web-based Clients (such as Configuration Hub, Trend Client, the Web Admin console, and REST APIs), you need UAA. Otherwise, you can skip this step. If you use Web-based Clients, UAA is required for user authentication. UAA provides identity-based security for applications and APIs. It supports open standards for authentication and authorization, including Oauth2.
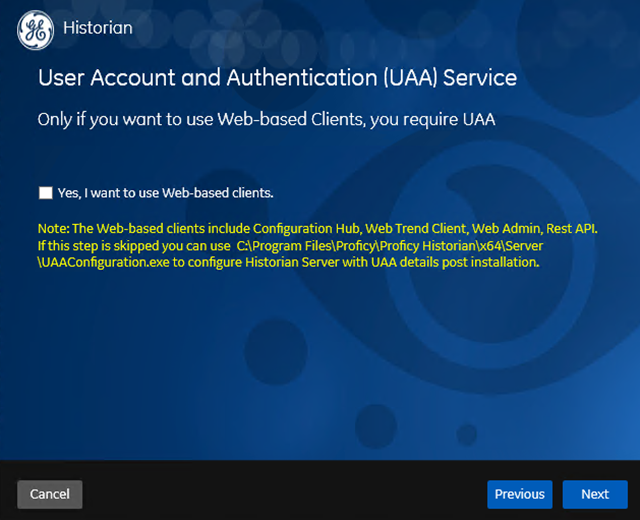


  8. If you want to use Web-based Clients, select the Yes, I want to use Web-based Clients check box, and provide values as described in the following table.
    Field Description
    UAA server name Enter the name of the machine on which the UAA server is installed. If the machine uses a fully qualified domain name (FQDN), provide the FQDN. By default, the local hostname is considered.
    Public https port Enter the port number used by the UAA service. The default value is 443. Ensure that this port number matches the one on the TCP Port Assignments page during Web-based Clients installation.
    Note:
    • You can install a UAA service using Operations Hub or Historian Web-based Clients. You can provide the URL of an existing UAA instance. Or, if a UAA service is not available, you can install it during Web-based Clients installation.
    • If you change the UAA server for Web-based Clients later, you must change the UAA server for the Historian server as well. You can do so using the UAA Configuration tool without the need to install the Historian server again.
  9. Select Next.
    The Historian Security Groups page appears.

    Using Historian security groups provides an added layer of control over access to your Historian system.

    By default, the option to create Historian security groups is not selected.


  10. If you want the installer to create Historian security groups, select the corresponding check box, and then select Next.
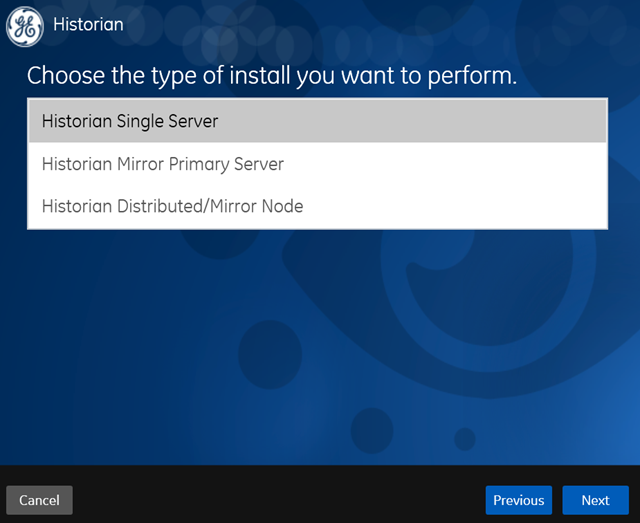
    The Choose the type of install you want to perform page appears.

  11. Select Historian Single Server, and then select Next.
    The Ready to Install page appears.
  12. Select Install.
    The installation begins.
  13. When you are asked to reboot your system, select Yes.
    Single-Server Historian is installed on your machine. In addition, the following components are installed:
    • The RemoteCollectorConfigurator utility: A command-line tool, which allows you to manage collectors remotely. By default, it is located in the C:\Program Files\GE Digital\NonWebCollectorInstantiationTool folder. For instructions on using this utility, refer to About Installing and Managing Collectors Remotely.
    • The UAA Configuration tool: A utility that allows you to specify the UAA server details to match with the UAA server used by Web-based Clients. By default, it is located in the C:\Program Files\Proficy\Proficy Historian\x64\Server folder. For instructions on using this tool, refer to Change the UAA Server.

What to do next

While installing the Historian server, if you have allowed the installer to create Historian security groups, create a local Windows user with the format <Web-based Clients server name>.admin, and add the user to the ihSecurityAdmins group.

This user will log in to Web-based Clients.

Alternatively, you can create UAA users in an external UAA and map their security groups. For information, refer to About UAA Groups.

Depending on whether the Historian server will use local or domain security groups, select the appropriate option in Historian Administrator.