 Proficy Historian for Cloud
About Deploying Proficy Historian for Azure Cloud
Historian is an Azure Application Solution Template offer type.
Deployment Steps
- Login to Azure Marketplace.
- Search for Proficy Historian.
- In the search results, select Proficy Historian for Azure (Term
License).

- Click Create.

- On the Basics screen, enter the
Subscription, Resource group, and
Region (if required) as defined in the following
table.

Field Description Subscription Select the required subscription option, in which you wish to deploy Historian from the drop-down list. Resource Group Select the required resource group option, in which you wish to deploy Historian from the drop-down list. Region If you are creating a new resource group, select the region for the new resource group. If an existing resource group is selected, then the resources will be deployed in the region specified. - On the Required Parameters screen, enter the
Deployment Name and
Password.

Field Description Deployment Name Enter a name for the current deployment. Constraints: Must start with an alphabet and must not container any spaces. Password Enter the password for the super user. Constraints: Password must contain minimum eight characters, at least one uppercase letter, one lowercase letter, one number and one special character. Password must start with the letters. Allowed Special Characters include: !@#*._^~:?- Confirm Password Re-enter the same password for confirmation. - On the Optional Parameters screen, enter the optional fields
as described in the following table:

Field Description AKS Cluster Name In this field, enter the AKS cluster name in which Historian will be deployed. Constraints: Cluster name must be 1-63 characters in length. The only allowed characters are letters, numbers, dashes, and the underscore. The first and last character must be a letter or a number. Web Admin In this field, select Yes to deploy the Historian Web Admin in AKS cluster. Existing Vnet Name Existing Vnet Name in which AKS worker node will run. If left empty, a new VNet will be created. Constraints: The Virtual Network name must be 2-64 characters in length. The only allowed characters are Alphanumerics, underscores, periods, and hyphens. Start with an alphanumeric, and end with an alphanumeric or underscore. Existing Subnet Name If this field is not entered with any values, a new subnet will be created. Constraints: The Subnet name must be 1-80 characters in length. The only allowed characters are Alphanumerics, underscores, periods, and hyphens. Start with an alphanumeric, and end an alphanumeric or underscore.Note: If the VNet Name specified, then it is mandatory to specify a Subnet Name. Refer to the next table for examples of various combinations of VNet and Subnet Name.Kubernetes Service Cidr If you are using existing VNet and if the VNet's address space is overlapping with "10.0.0.0/16", then you can specify a Kubernetes service Cidr so that it will not overlap with VNet's Address space. Refer to this link for additional details. The following table shows examples of various combinations of VNet and Subnet Name.
vnet_name subnet_name Type empty empty New Vnet and new Subnet will be created. empty not empty New Vnet and new Subnet with specified name will be created. not empty empty Invalid option. (If VNet specified, then its manadatory to specify subnet name) not empty not empty Existing vnet and existing subnet will be used. - On the Review and Create screen, after the validation
completes, click Create.

This action starts an ARM deployment.
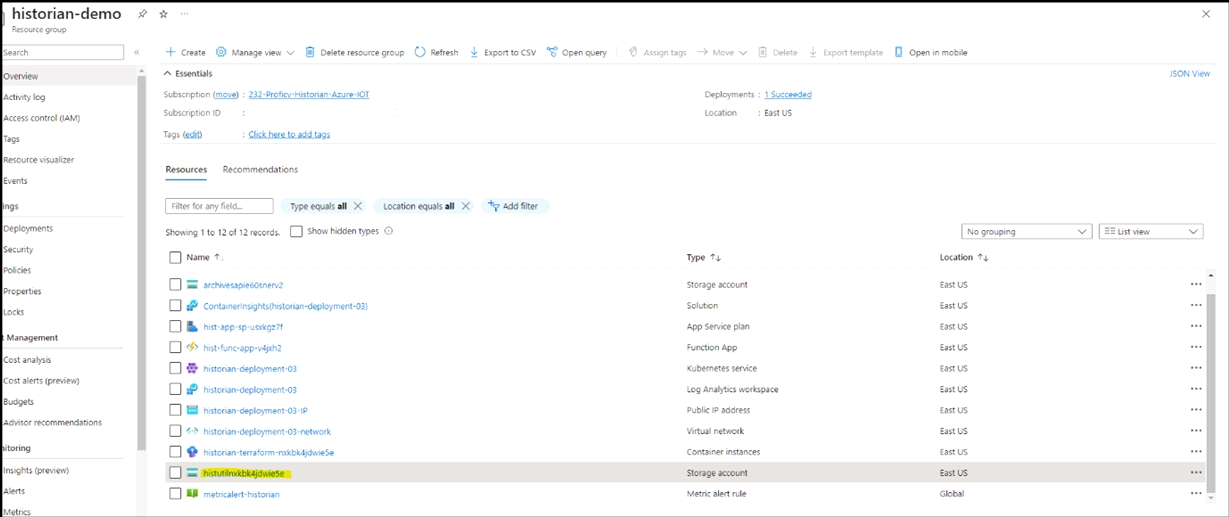
Deployment Completed Example
The ARM template will deploy the following:
- Storage account starting with prefix: histutil<unique_string>.
- Container Instance with name: historian-terraform-<unique_string>.
- Role assignments for Container instance.
The container instance will run a docker container that will deploy the planned infrastructure using terraform. After the container instance state is terminated, you can check the status of the deployment.

Checking the Status of a Deployment
- Go to the resource group in which ARM template was deployed.
- Go to the container instance with name
historian-terraform-<unique_string>. - The status of the container should be Terminated. If it is still running, wait for
it to stop.

- After the container is terminated, download the terraform-output.txt file, and check
for the logs in historian-deployment.log file. To download, follow these steps:
- Go to the resource group in which ARM template was deployed.
- Go to the storage account with name:
histutil<unique_string>.
- Go to containers and then Terraform-state. Download the file with name ending in terraform-output.txt.
Checking for Errors
To check for any errors during deployment, you can download the
<TIMESTAMP>_historian-deployment.log file.
<TIMESTAMP>_terraform-output.txt
fileThe files can be downloaded from Resource_Group -> histutil<unique_string> -> Containers.
If deployment
fails, the <TIMESTAMP>_terraform-output.txt file will not be
uploaded to the blob container. In this case, check the
<TIMESTAMP>_historian-deployment.log file.
The
<TIMESTAMP>_terraform-output.txt file will contain value
of these fields:
- Historian-AKS-Cluster
- LoadBalancer-IP
- Resourse-Group
- Subnet
- Super-User-Name
- Virtual-Net
