 CIMPLICITY
Option 1.1. Use a Range as a Source
About this task
Ranges include:
- One or more locations in
- One or more regions in
- Any running project to which you have access.
You can configure ranges through any function block that contains a range name. Once you have defined it, the range is available for any other range source architecture that you configure.
Steps to select a range as a source include.
| 1 | Open the P1 dialog box. |
| 2 | Use P1 dialog box features. |
| 3 | (Optional) Use Range Browser features. |
| 4 | (If an existing range is not acceptable) Configure the range. |
- Open the P1 dialog box.
- (Recommended) Create a new Routing Logic Module.
- Double-click the Range Name or Hold Active Range parameter in function blocks including:
| Set Source Range | |
| Begin Spread Range Block Module | |
| Rotation Pull Ahead | |
| Apply Hold to Range. | |
| Apply Hold To Item |
A P1 dialog box opens.
The P1 dialog box provides you with the Browse, add and editing options that other RCO function blocks offer.
- Use P1 dialog box features.
Do any of the following through the P1 dialog box.

| Option | P1 Dialog Box | ||
| Range Name |
Identifies the range to:
|
||
| Browse buttons |

|
Opens the Range Browser | |
| Popup Menu button |

|
Displays the popup menu | |
| Selections are: | |||
| New | Opens a new Range Viewer dialog box. | ||
| Edit | Opens the Range Viewer for a range that is entered in the Range Name field. | ||
| Browse | Opens the Range Browser. | ||
| Recent ranges | Uses the range that is selected in the list. | ||
| OK | Closes the P1 dialog box; displays the range as the parameter value. | ||
The Range Browser lists all of the ranges that have been configured for the project.
- (Optional) Use the Range Browser.
If you opened the Range Browser you can use the buttons to do any of the following.
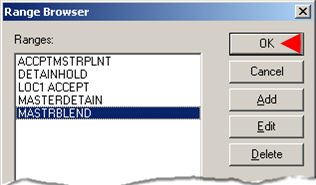
| Button | Description |
| OK | Closes the Range Browser and enters the selected range into the Range Name field in the P1 dialog box. |
| Cancel | Closes the Range Browser without selecting a range. |
| Add | Opens a new Range Viewer dialog box. |
| Edit | Opens the Range Viewer for the selected range. |
| Delete | Deletes a selected range. |
The Range Viewer dialog box is either blank or contains regions and locations that are included in a selected range.
- Configure the range.
Depending on whether you are adding or editing a range, the Range Viewer dialog box is blank or contains regions and locations that are included in a selected range.
- Do the following to configure the range.

- Add to or edit the list as follows.
- Click Add.
A blank Range Editor dialog box opens.
- Select a region in the list and click Edit.
The Range Editor dialog box opens with the current configuration.
- Enter or edit the ranges as follows.

| Field | Description |
| Range name | (Read only) Name entered in the Range Viewer Range name field. |
| Region | Region to be included in the range. |
| Project | Name of a running project from which a region is selected. |
| Region start | Region location or location code for the first location to include in the range. |
| Region end | Region location or location code for the last location to include in the range. |
- Click OK.
The Range Viewer displays the region and selected location codes in the Region list.
Example
The example computer factory:
- Wants to be able to select the next order that should be sent to the $OM_PLANT_BLND region.
- Creates a range that includes all locations in the $OM_MASTR_BLND region.

- Continue to add, edit or delete regions until the range has all of its regions/locations.
- Click OK.
The P1 dialog box opens with the selected range in the Range Name field.
Procedure
Results
The range displays as the value for the Range Name parameter.


