 CIMPLICITY
.NET Control: Insert into a CimEdit Screen
About this task
.NET controls can be easily found and placed onto a CimEdit screen using the Ribbon bar .NET button.
| 1 | Open the .NET Component Browser. |
| 2 | Select a .NET control to insert. |
| 3 | Adjust the control on the screen. |
- Open the .NET Component Browser
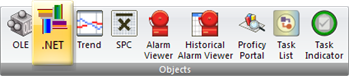
- Click the .NET button in the Drawing>Objects group on the CimEdit Ribbon bar.
The ActiveX placement cursor  displays on the screen.
- Place the cursor where the component will be placed initially.
- Click the left-mouse button.
A .NET Component Browser opens; the browser (initially) includes the following categories of .NET components.
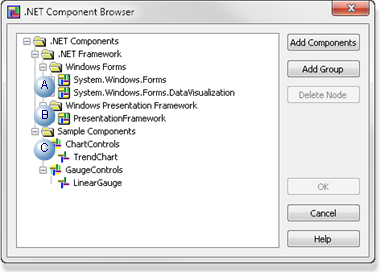
| A | System.Windows.Forms (Forms-based controls) |
| B | Windows Presentation Framework (WPF controls) |
| C |
Sample Components
Note: CIMPLICITY provides two sample controls
|
- Select a .NET Control to Insert
Do the following.
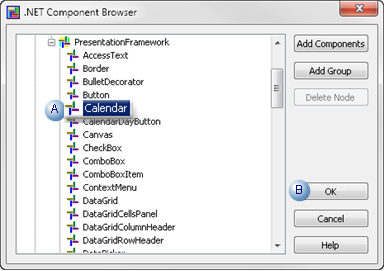
| A | Select a component in the .NET Component browser's expanded tree. |
| B | Click OK. |
Result: The component displays on the CimEdit screen.
- Adjust the Component on the Screen
Screen editing actions and configuration actions with the Properties dialog box on a screen that contains hosted .NET components all work essentially the same as on a screen that contains only OLE and CIMPLICITY native objects.
Actions include, but are not limited to:
|
|
|
|
|
|
|
|
|
Note: For most actions, the control will have to be in configuration mode.
- .NET Control: Display modes.
- .NET Control: Resize.
- .NET Control: Move.
.NET Control: Display Modes
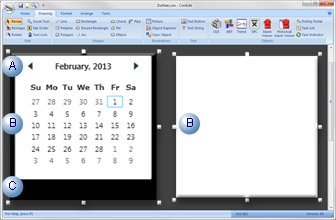
When .NET controls are placed initially on the CimEdit screen they are in configuration mode, which displays as follows.
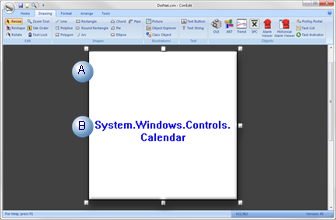
| A | The initial object size is the same regardless of what control is selected. |
| B | Text identifies the selected component. |
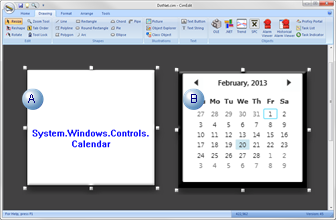
The control display when you double-click it depends on the default control configuration and properties.
| A | The initial object size is the same regardless of what component is selected. |
| B |
Possible displays include:
|
| C | Area surrounding control display, if there is one, standardizes the initial insert size. |
.NET Control: Resize
You can resize the .NET component using the same methods as you use for any CimEdit object.
- Resize process may require some toggling between the configuration mode image and the runtime (or blank) representation.
- Actual runtime display may or may not resize, depending on the control. However the area around it can be increased or decreased.
Examples
- The initial size of a checkbox control is the same as any other control. The checkbox itself cannot be resized; the area around the checkbox can be reduced so only the checkbox displays.
- The actual text box in a Rich Text box control can be larger or smaller, as required.
Procedure
-
Toggle back and forth until the image is the appropriate size.
Display Mode Guidelines A Configuration Resize the .NET component object the same say you resize any CimEdit object. - Select a handle and move it.
- Enter new Geometry specifications in the object's Properties dialog box.
Note: If the component size is reduced, the identification label may no longer display when the control is in configuration mode.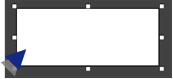
B Runtime - If the component has enough information to display a runtime representation, this display will guide the resizing.
- If the runtime image is blank, you can estimate the size and modify it when your configuration produces an image.
guide: Guideline: Component IdentificationNaming the component will enable you to identify it easily. Instances when entering a unique name will help include:
- The size is reduced so the configuration mode no longer displays the name.
- The runtime mode is blank.
- More than one of the same component is required.
- A CIMPLICITY procedure that requires the control name is being configured.
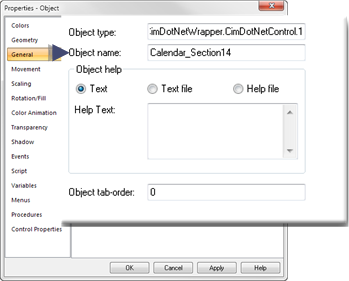
- Right-click the component; select Properties on the Popup menu.
The component's Properties dialog box opens.
- Select General.
- Enter a unique name in the Object Name field.
.NET Control: Move
Move the .NET component object the same way you move other CimEdit objects.
Note: The object must be in the configuration mode to move it.- Select the object and move it.
- Enter new Geometry specifications in the object's Properties dialog box.


