Query Results
About Query Results
The following topics describe available actions related to query results.
Access the Results Workspace
Procedure
Sort Column Values in the Results Workspace
About This Task
Procedure
- To sort the values in multiple columns, perform the following steps:
- For the column whose values you want to sort, right-click the column header, and then select Sort Ascending or Sort Descending.
- For each additional column whose values you want to sort, right-click the column header, and then select the sort order.
The values in selected columns are sorted in ascending or descending order.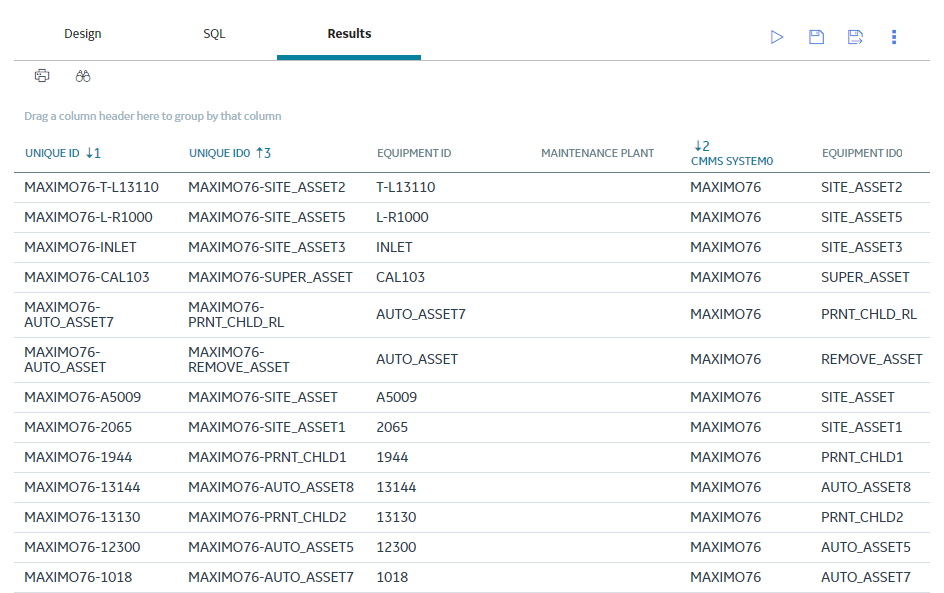 Note: The columns whose values are sorted in ascending order are indicated by
 in the column headers, and the columns whose values are sorted in descending order are indicated by
  in the column headers. The numbers appearing in the column headers denote the sequence in which you have sorted the columns.Tip: To clear the sorting from a column, right-click the column header, and then select Clear Sorting.
Group by Column Values in the Results Workspace
About This Task
Procedure
- To group the results based on the values in a column, perform the following steps:
- To create sub-groups, right-click additional column headers and select Group by This Column.A sub-group is created based on the values in the selected column.
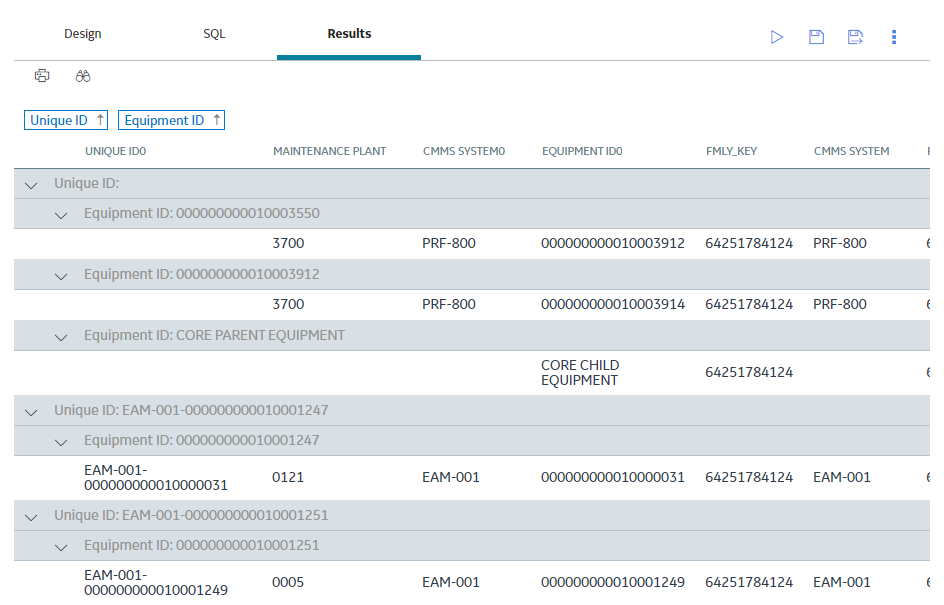
Note: The groups are automatically sorted in ascending order. You can change the order by selecting the grouped column name.Tip: To remove a group, perform the following steps:- Right-click the grouped column name and select Ungroup. You can also drag and drop a grouped column name on an area within the result grid to remove the group.
- To remove all groups, right-click any grouped column name or column header, and then select Ungroup All.
- To create sub-groups, right-click additional column headers and select Group by This Column.
Export a Query Result Set to a File
About This Task
Procedure
- In the upper-right corner of the workspace, select
 , and then select Export to a File.
The Export to a File window appears.
Export a Query Result Set to a Dataset
About This Task
A query can be exported as a dataset, a fixed set of information that is stored as a Catalog item.
Note: When you run a query in unformatted mode, the results will still display formatted date values. Date values will always be displayed in the local time for the user; however, if you export the unformatted query result set to a file or dataset, the exported date values will be unformatted.
Procedure
- In the upper-right corner of the workspace, select , and then select Export to a Dataset.The Save As window appears.
Sort the Query Results
Before You Begin
When defining sort criteria for a query, note that:
- The sort criteria determines the default sort order for query results. After the results are displayed, users can modify the sort order in the results grid.
- If no sort criteria has been defined, the query results will not be sorted in any particular order by default. Users can still modify the sort order in the results grid.
- Any sort criteria that is defined for numeric columns in a query will be applied to stored values (vs. displayed values) regardless of whether the query is running in formatted or unformatted mode.
- Unlike the sorting that you can apply directly to the results, sorting preferences that you define in the Design workspace are stored with the query itself and are applied each time you run the query.
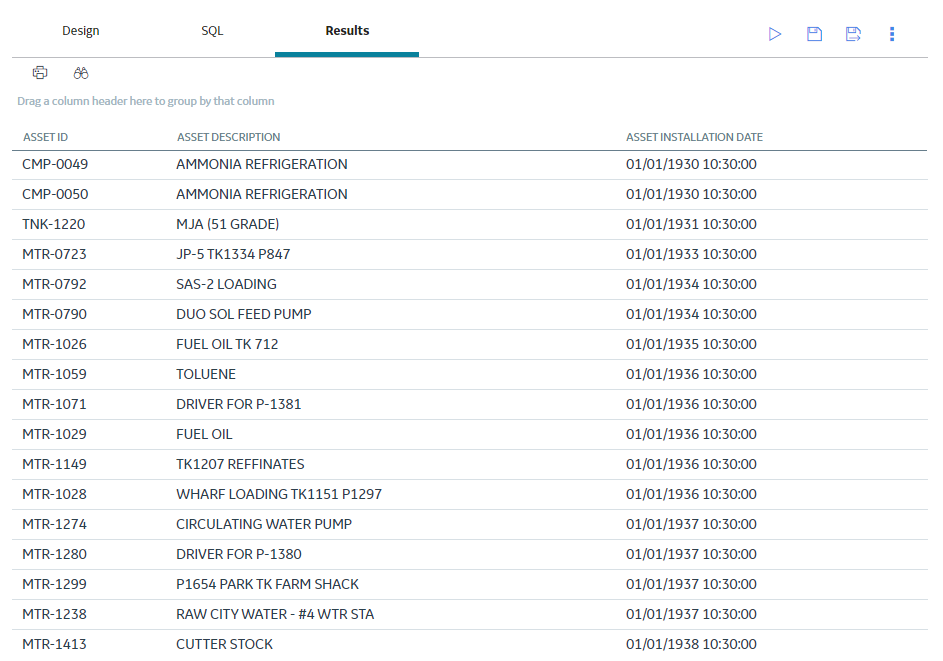
For example, according to the following image, the Asset Installation Date will be sorted in Ascending order:
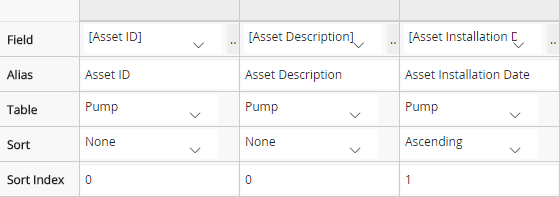
These sort options will affect the query results, as shown in the following image:
Note: The sort order that you specify within the query definition will be saved as the default layout for the results.
About This Task
Procedure
Filter the Query Results
About This Task
Procedure
- Select
 .A Filter row is added below each column name.
 - Select
 below the column name in which you want to set the filter criterion.A window with a list of filter options appears.
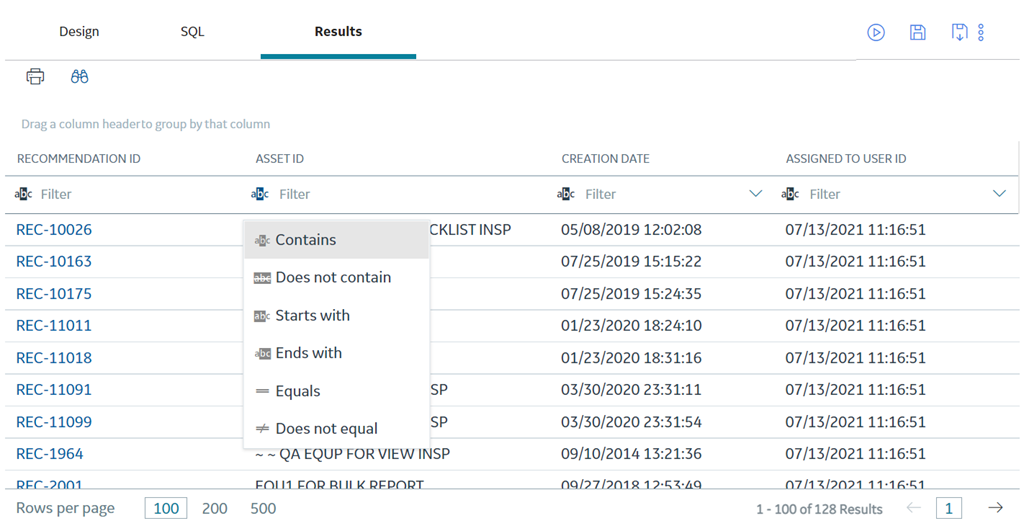
Modify the Value in the Field Cell
Procedure
- In the page heading, select
 .The Expression Builder window closes, and in the grid in the Conditions section, the word Creator appears in the Field cell.
Remove the Limit on the Number of Results
Procedure
- In the content heading, select .The query results are displayed, and the number of results that are returned is no longer limited.
Modify the Output Mode of a Select Query
Procedure
- In the content header, select .The query is run in the selected mode, and the results appear.Note: When you run a query in unformatted mode, the results will still display formatted date values. Date values will always be displayed in the local time for the user.Tip: You can save the query to save the selected mode. The next time you run the query, it will use the mode that was selected when it was last saved.
Display Unique Records Only
Procedure
- In the content heading, select .The query is run, and the results will include only unique records.
Limit the Number of Results
Procedure
- In the content header, select .The query results are displayed according to your selection in the Records box. For example, if you enter 20 in the Records box, the query will return only the first 20 records that meet the other query criteria.