
Set Up Mimic Target Zones (Classic)
Target zones represent areas on a mimic that were set as selectable in the HMI/SCADA system. You set the navigation of these target zones for an operator.
About this task
Note: These steps are also applicable for mimics bound at the asset
level.
Before you begin
- In iFIX, set regions on a picture as Is Selectable to appear as clickable targets on the Mimic Card.
- In CIMPLICITY, only groups with the mouse-up or mouse-down event show as selectable targets on the Mimic Card. When defining a mouse-up or mouse-down event for a group, you must specify the script action, and then create an empty script.
- Assign the mimic to an asset type.
Procedure
- Go to .
- Under Object Types, select an object type.
- For the selected item, go to .
- To enable an operator to navigate to a particular asset object in the model, do the following:
-
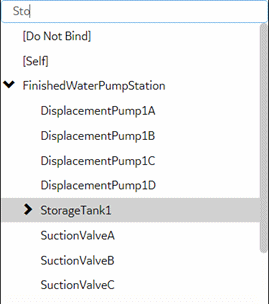
In the Referenced
Object column and next to the target
name, select or search for the asset object in the
model hierarchy tree. You can do a partial search,
such as Sto, and Operations
Hub highlights all assets containing Sto, as shown
in this example.
In Runtime, the background of a target zone changes to blue when an operator hovers over it. After an operator selects a target on the mimic card, the target asset becomes the active one, changing the mimic and content in the trend and alarm cards accordingly. -
In the Referenced
Object column and next to the target
name, select or search for the asset object in the
model hierarchy tree. You can do a partial search,
such as Sto, and Operations
Hub highlights all assets containing Sto, as shown
in this example.
- Select Save.