Step 11. Add/Publish a WYSIWYG Form
Procedure
-
Select Add/Publish on the popup menu.
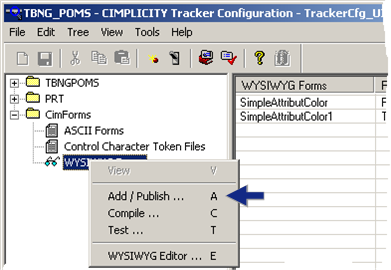
The Add /Update WYSIWYG Form dialog box opens.
-
Click the Open button to the right of the WYSIWYG Form field.
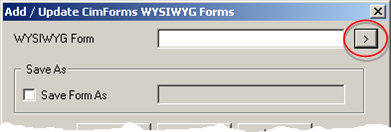
The Select the WYSIWYG Form dialog box opens.
-
Select the file you want to compile.
The file type is
CimForms WYSIWYG Form files (*.cwf) Files that were created and saved or were edited and saved as *.cwf files in the in the WYSIWYG Text Editor. 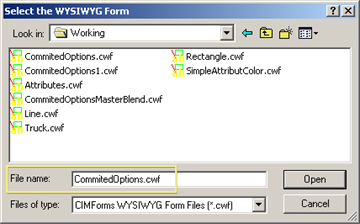
-
Click Open.
The Add /Update CimForms WYSIWYG Forms dialog box displays the path and file you selected.
The options are as follows.
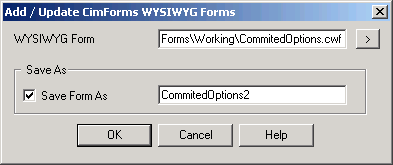
Option Description WYSIWYG Form Path and file name are automatically filled in when the file is selected in the Select the WYSIWYG Form dialog box. Path and filename can also be typed in. Save Form As Check to be able to change the name of the form. Broadcast saves the file as a .cwf file. You do not need to include the file extension. -
The ASCII Form Properties dialog box provides the following information.
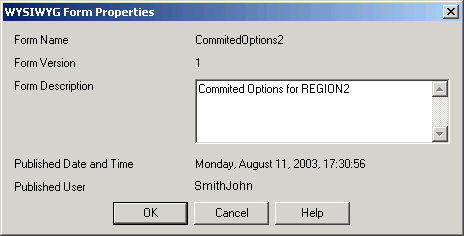
Field Description Form Name Name of the selected file or of the name entered in the Save As field. Read only Form Version Count of the number of times the file has been published. Read only Form Description Description that will help users know the content and intended use of the added file. Read/Write Published Date and Time Last time the file was published. Read only Published User Windows logged in User ID Read only -
Click OK.
Result: When you add/publish a WYSIWYG form the Broadcast:
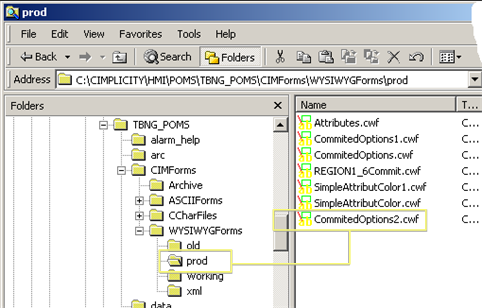
- Adds the file to the list of published files in the TrackerCfg_UI right pane.

- Saves the file in the <Project Name>\CIMForms\WYSIWYGForms\prod folder.