Asset Criticality Analyses (ACAs)
About Asset Criticality Analyses
Asset Criticality Analysis (ACA) is a tool that you can use to define the criticality of a system and the individual locations and pieces of equipment that make up that system.
About the Asset Criticality Analysis Team
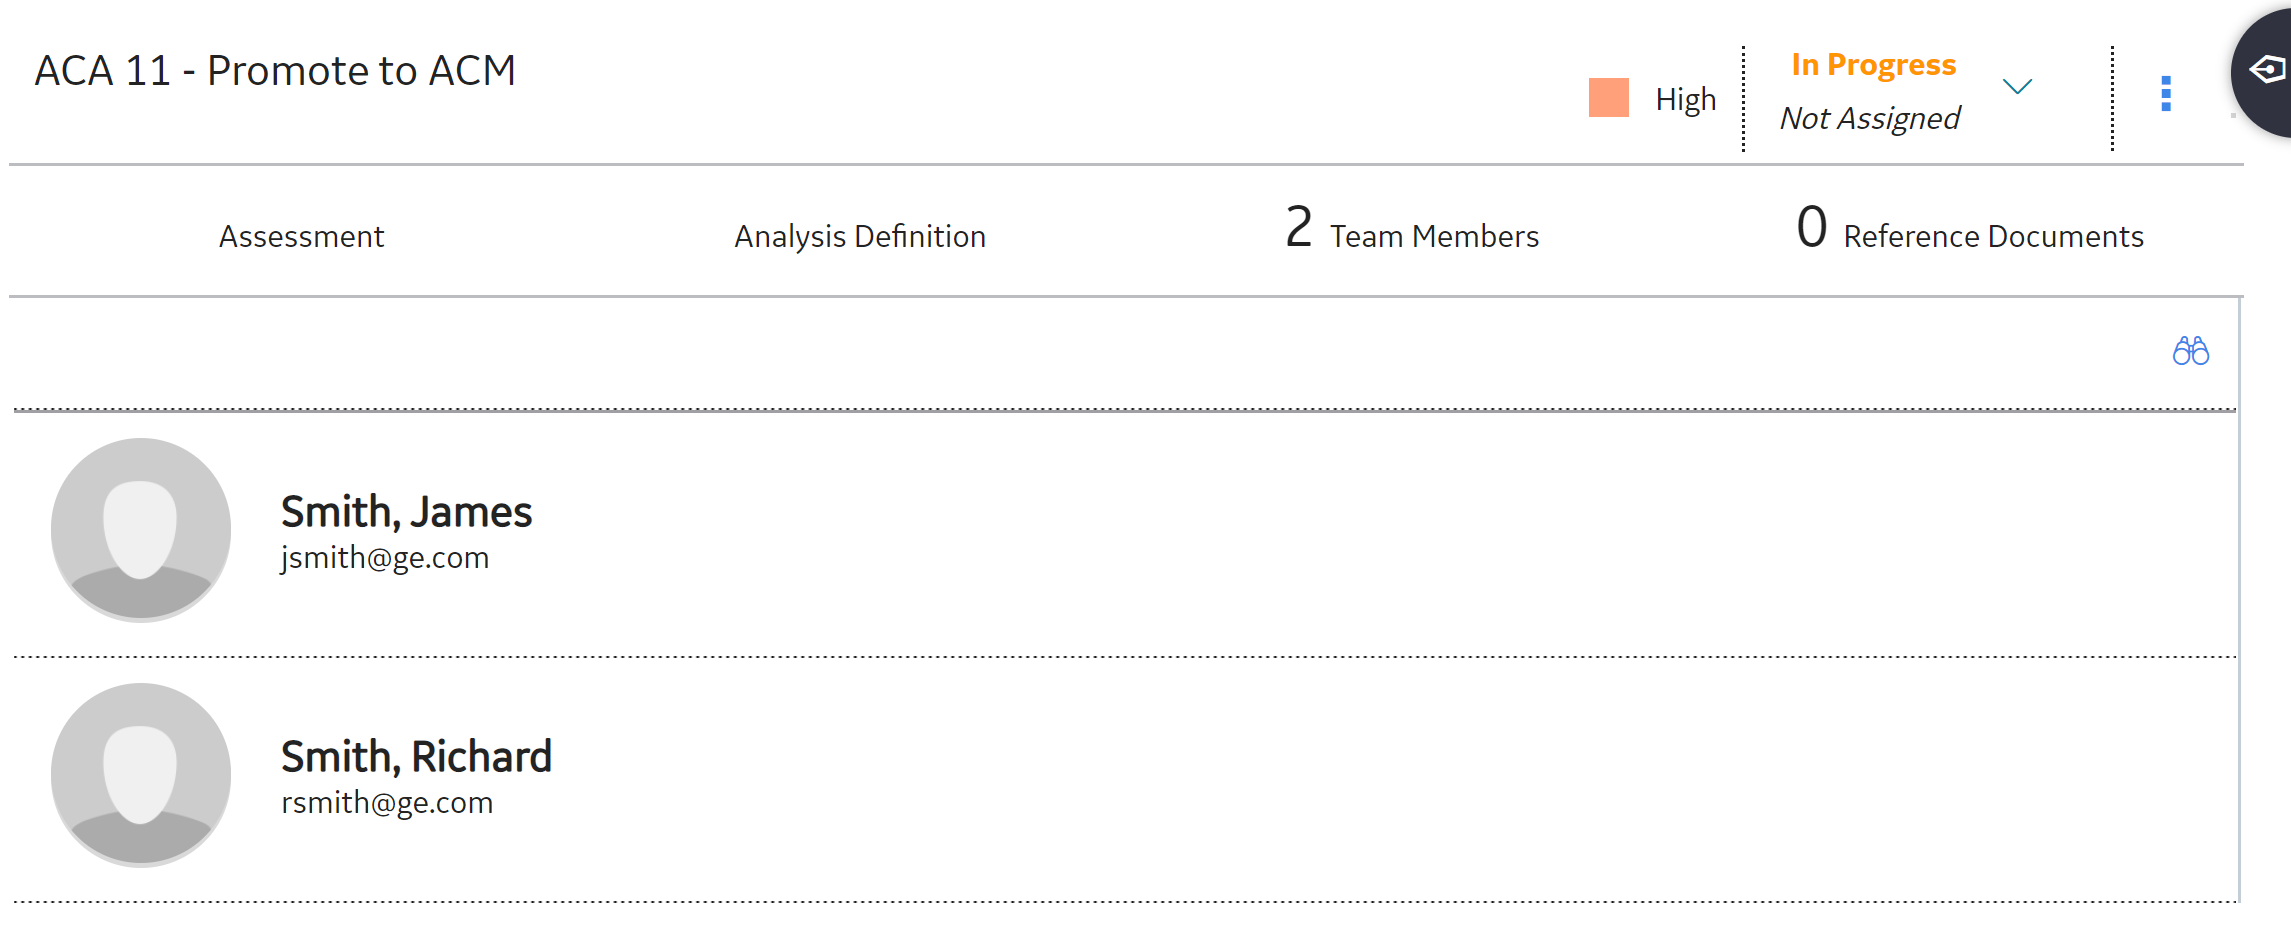
After you have defined the ACA that you want to conduct, you can define the ACA team by accessing the ACA Team Members section.
After you define the ACA team using these examples, the Asset Criticality Analysis Team Members page will look similar to the following image.
About General Recommendation Records and ACA
At the Analysis level and Asset level, you can add General Recommendation records to the ACA by linking them to ACA records.
If you add to the ACA a record that is already linked to a General Recommendation record, that General Recommendation record will also be added to the ACA automatically.
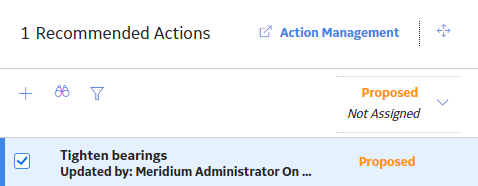
You will know that a General Recommendation record is linked to an Asset Criticality Analysis System record when you access the Recommended Actions pane, which lists the number of Recommended Actions that are currently associated with that system.
For example, the following image shows the grid on the Asset Criticality Analysis Systems page. In the Recommended Actions column, the text Recommended Actions appears, indicating that the Asset Criticality Analysis System record that appears in that row is linked to one General Recommendation record.
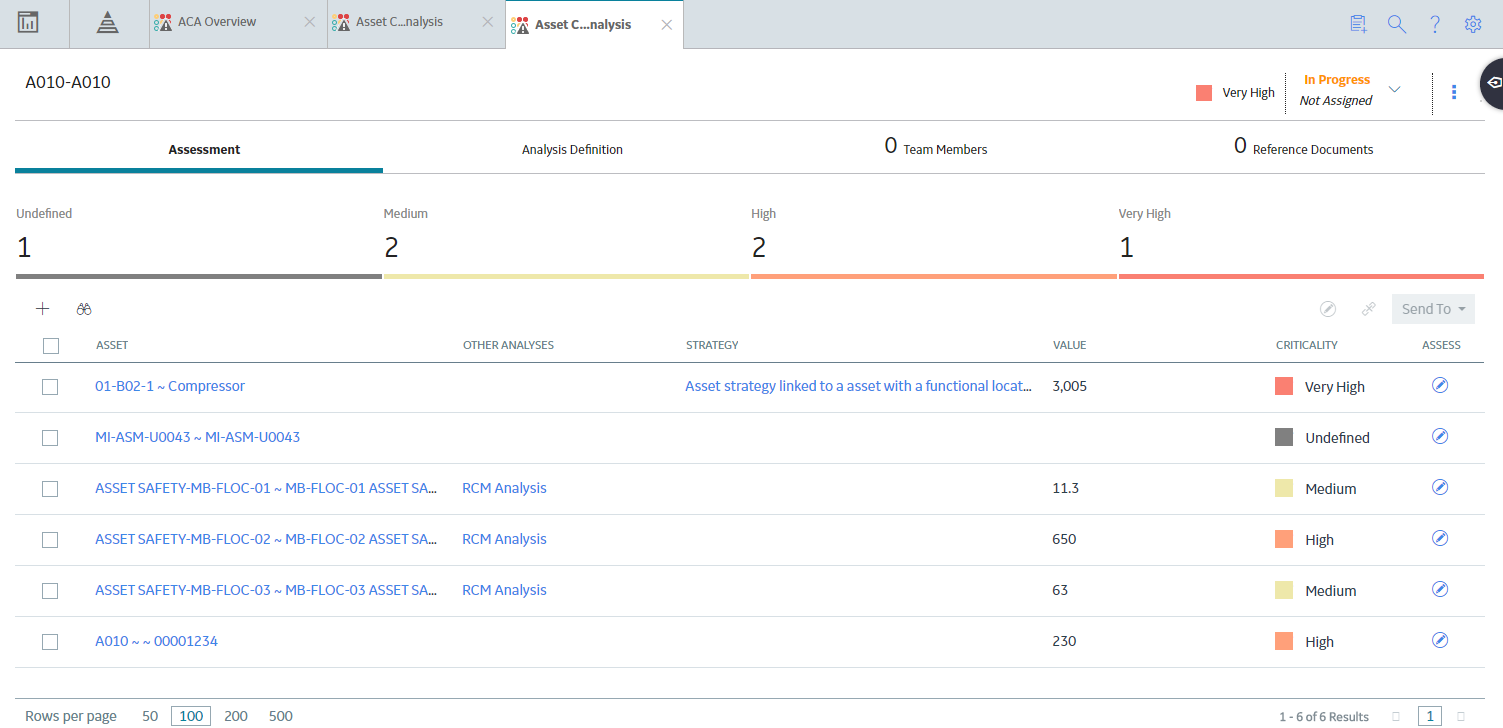
Access an ACA
Procedure
- Select the link for the record you want to open.The Analysis workspace appears, displaying the Assessment section.Note: If you want to modify the ACA, select the Analysis Definition tab, modify the available fields, and then select
 to save your changes.
Access the Analyses Section
Before You Begin
- MI ACA Administrator
- MI ACA Member
- MI ACA Owner
About This Task
Procedure
- In the ACA Overview page, select the Analyses tab.The Analyses section appears, displaying a list of available analyses based on the current filter.
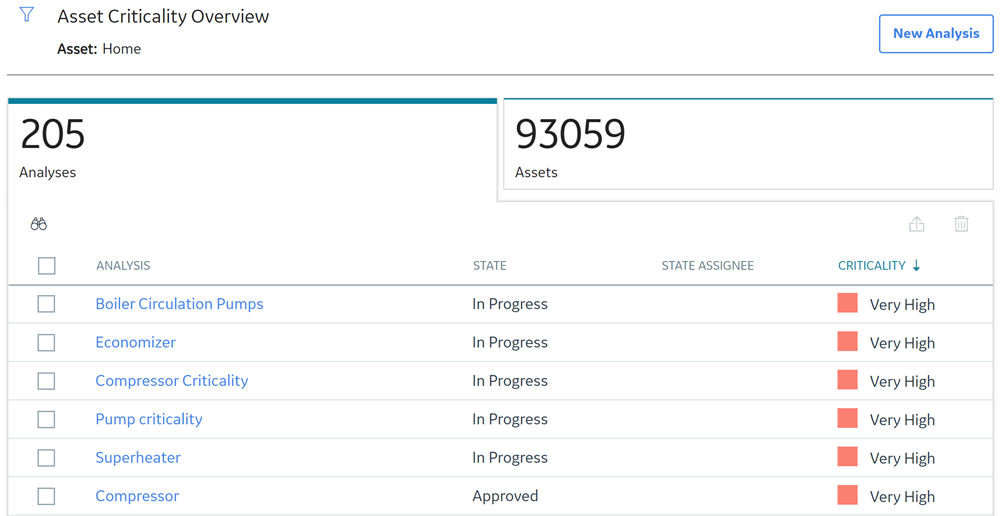
Note: By default, the Asset Hierarchy level is set to Home. You can modify the Asset Hierarchy level by selecting .
.
Create an ACA
Procedure
- Select New Analysis.The Analysis Definition workspace appears.
- Select .The new analysis is saved.
What To Do Next
Access Recommended Actions for an ACA
Procedure
- In the workspace, select
 .The Recommended Actions pane appears, displaying a list of Recommendations associated with that ACA system.
 Note: See the Overview of Recommended Actions section of the documentation for additional options when working with recommendations.Tip: For information about additional options available when working with the Recommendation records, refer to the Action Management section of the documentation.
Access the ACA??Team Members Section
Procedure
- Select the Team Members tab.The Team Members section appears.
Tip: For details about working with teams and the Team Members section, refer to the Teams section of the documentation.
Access the Assets Section
Before You Begin
- MI ACA Administrator
- MI ACA Member
- MI ACA Owner
About This Task
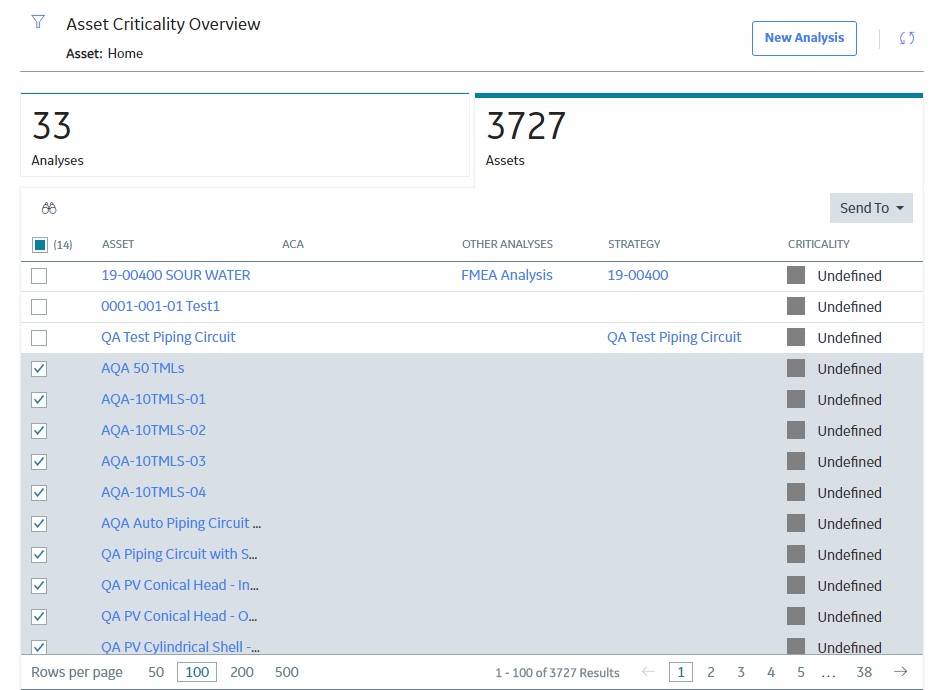
This topic describes how to access the Assets section, in which you can view information and perform tasks related to assets of various Asset Hierarchy levels. If you want to view assets associated with a particular Asset Hierarchy level, you can access the ACA Overview page from that Asset Hierarchy level.
Procedure
- In the ACA Overview page, select the Assets tab.The Assets section appears, displaying a list of available assets based on the current filter.

Note: By default, the Asset Hierarchy level is set to home. You can modify the Asset Hierarchy level by selecting.
Add an Asset
Procedure
- Select the Analyses tab.The Analyses section appears, displaying a list of available analyses based on the asset that is selected in the asset hierarchy.
- Select an analysis.The Assessment workspace for the selected analysis appears.
- Select
 .The Enter Parameter Values window appears.
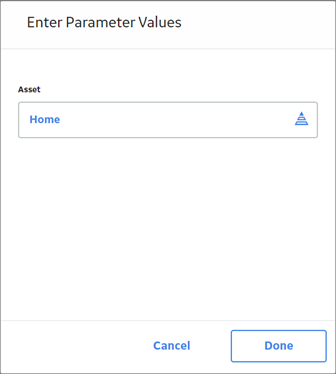
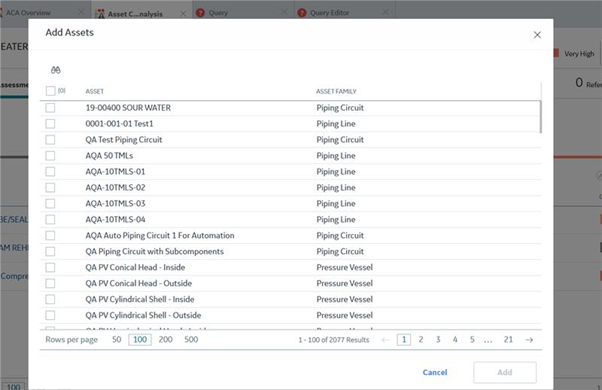
- In the Asset section, select
 .The Hierarchy window appears, displaying the asset hierarchy.
 - Select a hierarchy level, and then select Done.The assets associated with the hierarchy level appear in the Add Assets window.
What To Do Next
Unlink an Asset
This topic lists the steps required to unlink an asset from an analysis.
Procedure
- Select the Analyses tab.The Analyses section appears, displaying a list of available analyses based on the current filter.
- Select an analysis.The Assessment workspace for the selected analysis appears.
- Select
 .A window appears, asking you to confirm that you want to unlink the selected analysis.
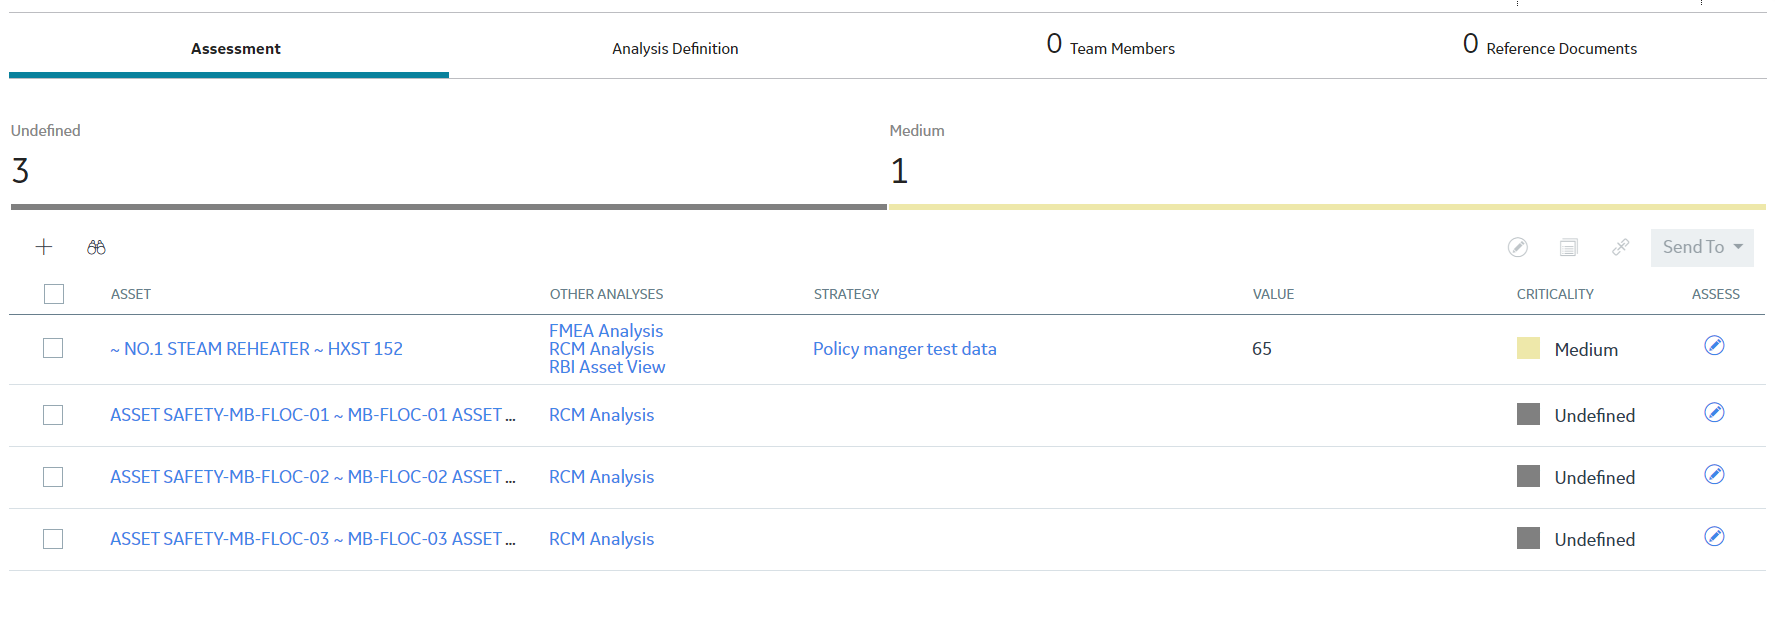
Apply Assessment to other Assets in Analysis
This topic lists the steps required to apply assessment of an asset to other assets in an analysis.
Procedure
- Select the Analyses tab.The Analyses section appears, displaying a list of available analyses based on the current filter.

- Select an analysis.The Assessment workspace for the selected analysis appears.
- Select
 .The Apply Assessment To window appears.
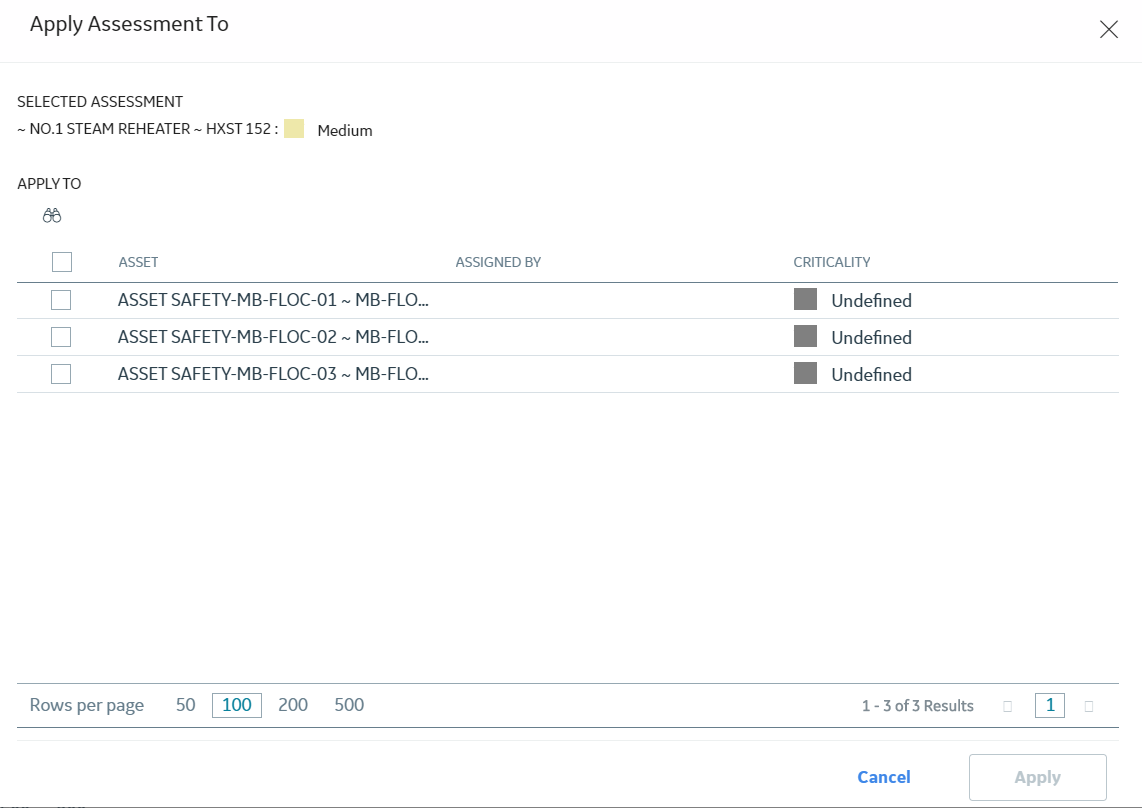
- Select the assets on which the same assessment is to be applied and then select Apply.The selected assets have the same assessment from the analysis.
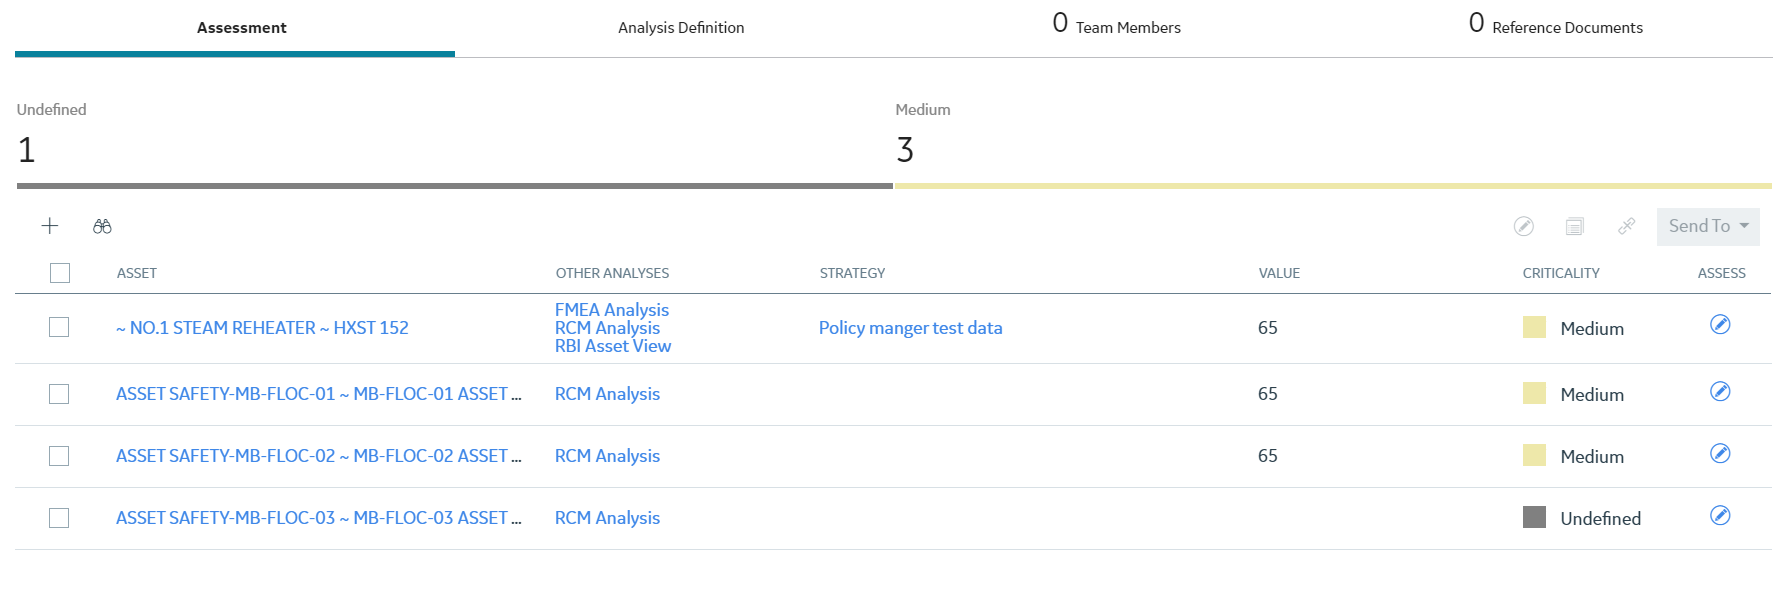
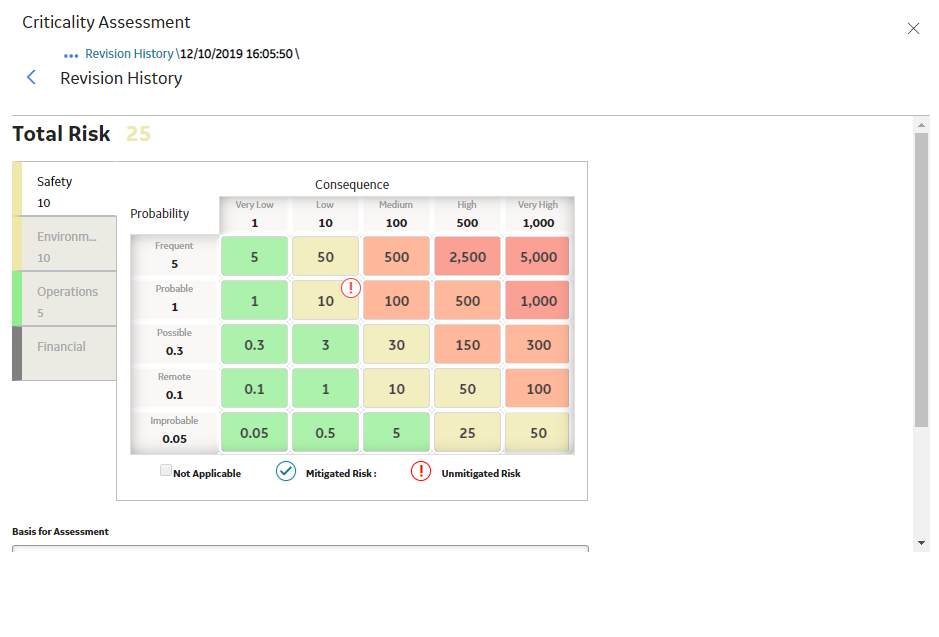
Assess an Asset Via the Risk Matrix
This topic describes how to assess the criticality of an asset with the Risk Matrix. You can also assess asset criticality with the Criticality Checklist.
Before You Begin
Procedure
- Select the Analyses tab.The Analyses section appears, displaying a list of available analyses based on the current filter.
- Select an analysis.The Assessment section for the selected analysis appears.
- To assess a single asset, next to the asset you want to assess, select
 .Note: To assess multiple assets simultaneously, next to each row containing an asset that you want to assess, select the check box, and then select
 above the grid.The Criticality Assessment section appears.
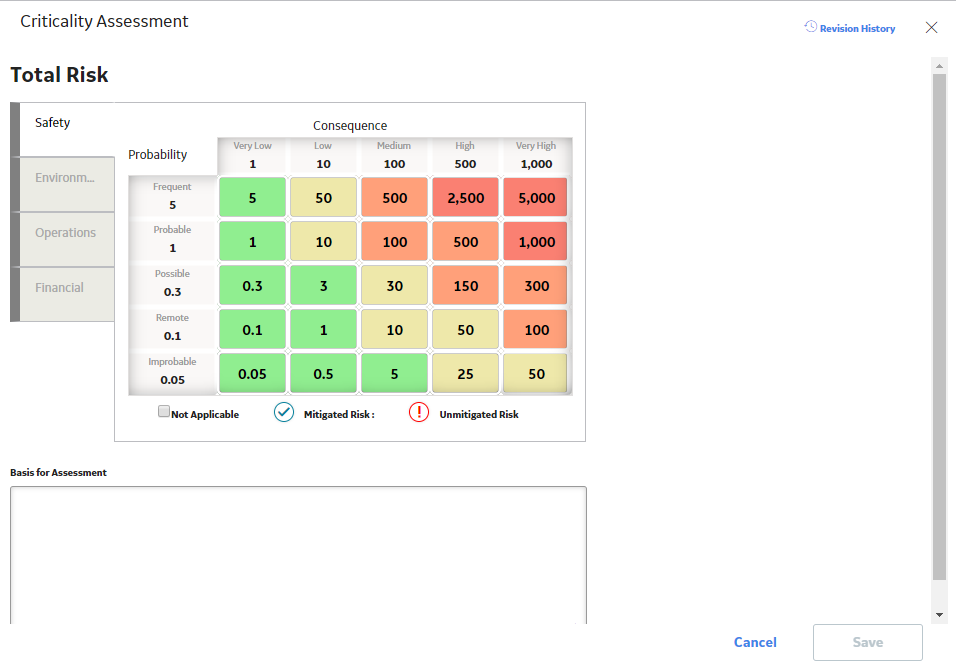
What To Do Next
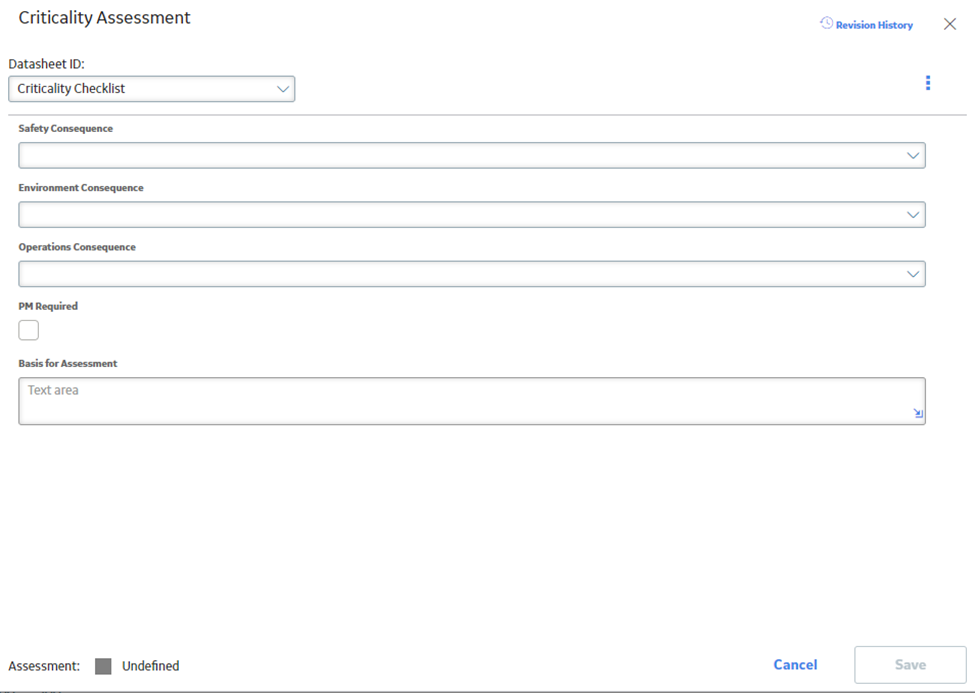
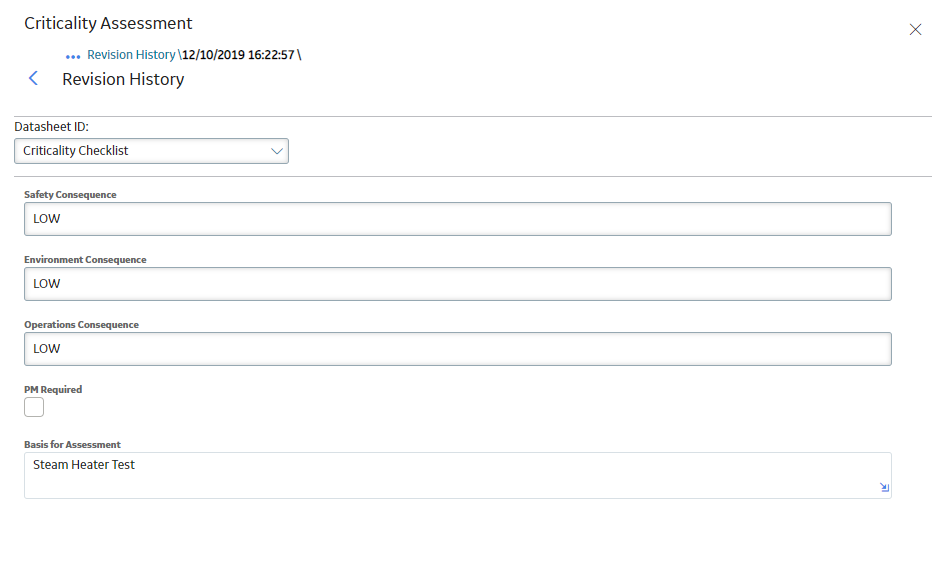
Assess an Asset Via the Criticality Checklist
This topic describes how to assess the criticality of an asset with the Criticality Checklist. You can also assess asset criticality with the Risk Matrix.
Before You Begin
- There must be an available analysis that contains assets.
- Asset Criticality Analysis must be configured to measure criticality with the Criticality Checklist.
Procedure
- Select the Analyses tab.The Analyses section appears, displaying a list of available analyses based on the current filter.
- Select an analysis.The Assessment section for the selected analysis appears.
- To assess a single asset, next to the asset you want to assess, select .Note: To assess multiple assets simultaneously, next to each row containing an asset that you want to assess, select the check box, and then select above the grid.The Criticality Assessment window appears.
What To Do Next
View the Revision History of a Criticality Assessment via the Risk Matrix
This topic describes how to view the revision history of a criticality assessment for a given asset in the Risk Matrix. You can also view the revision history in the Criticality Checklist.
Before You Begin
Procedure
- Select the Analyses tab.The Analyses section appears, displaying a list of available analyses based on the current filter.
- Select an analysis.The Assessment section for the selected analysis appears.
- Select against the asset for which you want to view the revision history.The Criticality Assessment section appears.
- Select Revision History.The Revision History section for the selected asset appears.
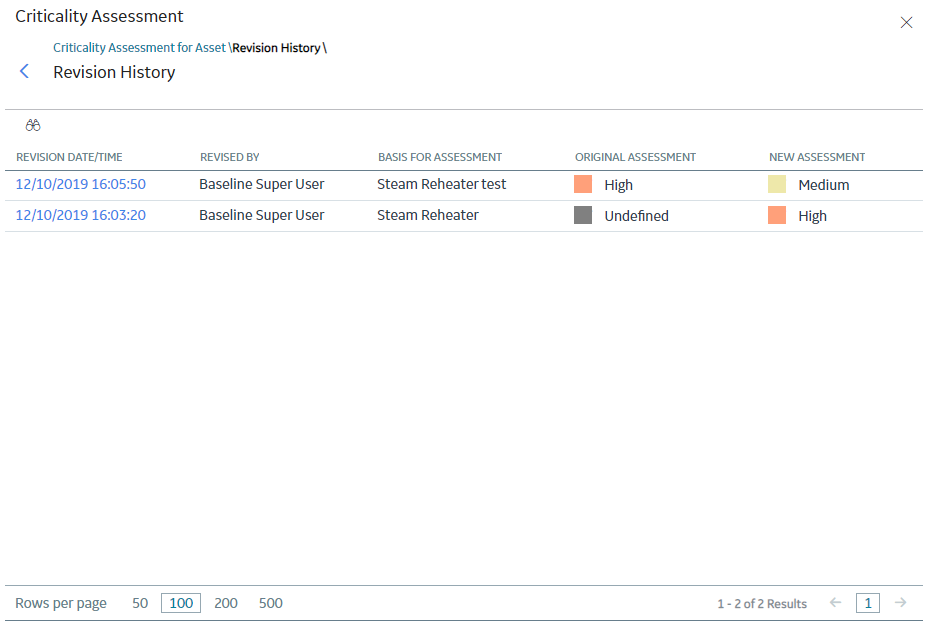
- Select a link in the REVISION DATE/TIME column for the record that you want to view.The revision history of the criticality assessment for the selected asset appear in the grid.
View the Revision History of a Criticality Assessment via the Criticality Checklist
This topic describes how to view the revision history of a criticality assessment for a given asset in the Criticality Checklist. You can also view the revision history in the Risk Matrix.
Before You Begin
- There must be an available analysis that contains assets.
- Asset Criticality Analysis must be configured to measure criticality with the Criticality Checklist.
Procedure
- Select the Analyses tab.The Analyses section appears, displaying a list of available analyses based on the current filter.
- Select an analysis.The Assessment section for the selected analysis appears.
- Select against the asset for which you want to view the revision history.The Criticality Assessment section appears.
- Select Revision History.The Revision History section for the selected asset appears.
- Select a link in the REVISION DATE/TIME column for the record that you want to view.The revision history of the criticality assessment for the selected asset appear in the Criticality Checklist datasheet.
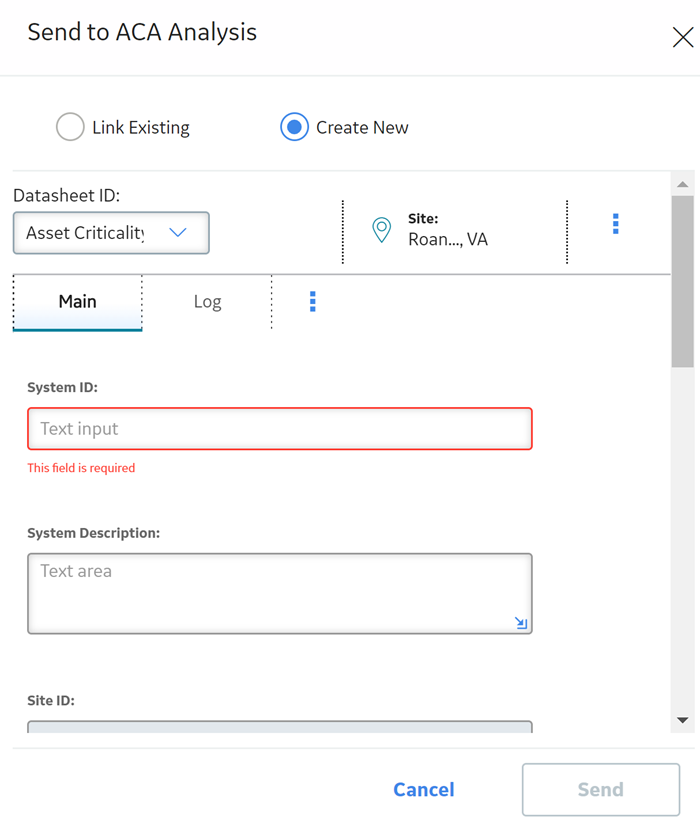
Send an Asset to a New ACA Analysis
This topic provides the steps for sending an asset to a new ACA Analysis.
Procedure
- Select the Assets tab.The Assets section appears, displaying a list of available assets based on the current filter.
- In the Assets section, select the check box in the row containing the asset you want to send to a new ACA Analysis.The asset is highlighted.
- In the Send to ACA Analysis window, if it is not already selected, select Create New.The window displays options for you to create a new ACA Analysis.
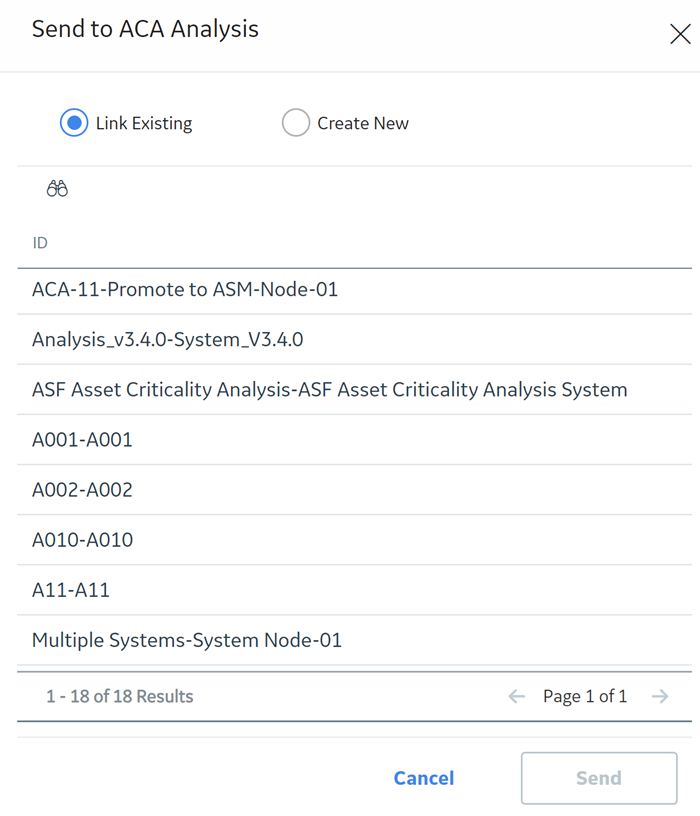
Send an Asset to an Existing ACA Analysis
This topic provides the steps for sending an asset to an existing ACA Analysis.
Procedure
- Select the Assets tab.The Assets section appears, displaying a list of available assets based on the current filter.
- In the Assets section, select the check box in the row containing the asset you want to send to an existing ACA Analysis.The asset is highlighted.
Note: If an ACA is listed in the ACA column, you cannot send it to another ACA. - In the section, select the Send To drop-down menu, and select ACA Analysis.A window appears, displaying a list of existing analyses that you can send to.
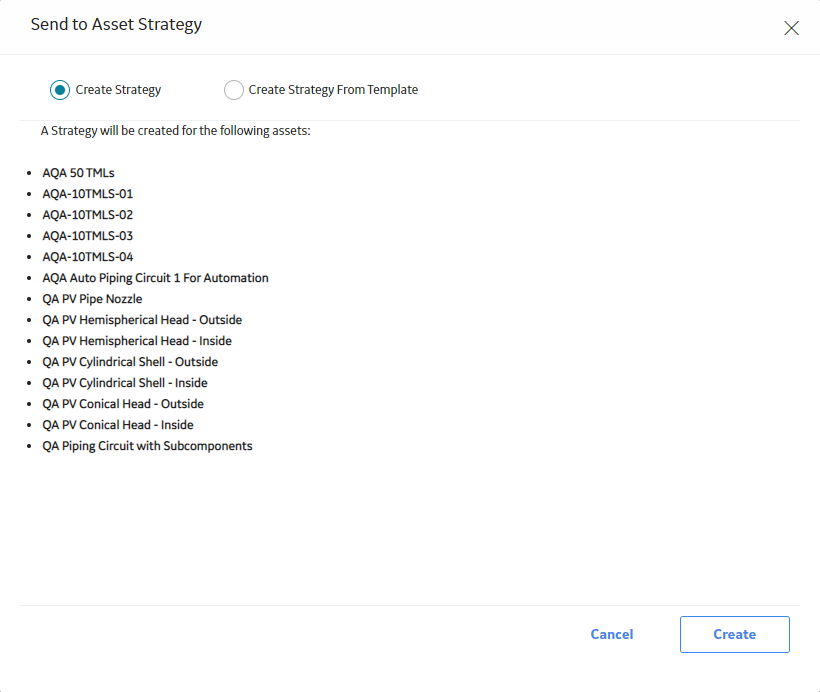
Send Assets to an Asset Strategy
This topic provides the steps for sending assets to an Asset Strategy or sending assets to an Asset Strategy and applying an Asset Strategy Template.
Procedure
- Select the Assets tab.The Assets section appears, displaying a list of available assets based on the current filter.
- In the Assets section, select the check boxes against the rows containing the assets that you want to send to an Asset Strategy.The selected assets are highlighted.
Note: You cannot send assets for which a strategy is already listed in the Strategy column to a different asset strategy. - Select Send To, and then select Asset Strategy.The Send to Asset Strategy window appears.
- To apply an Asset Strategy Template when creating an asset strategy for the selected assets, perform the following steps:
- Select the option Create Strategy From Template.The Select a Template section appears.
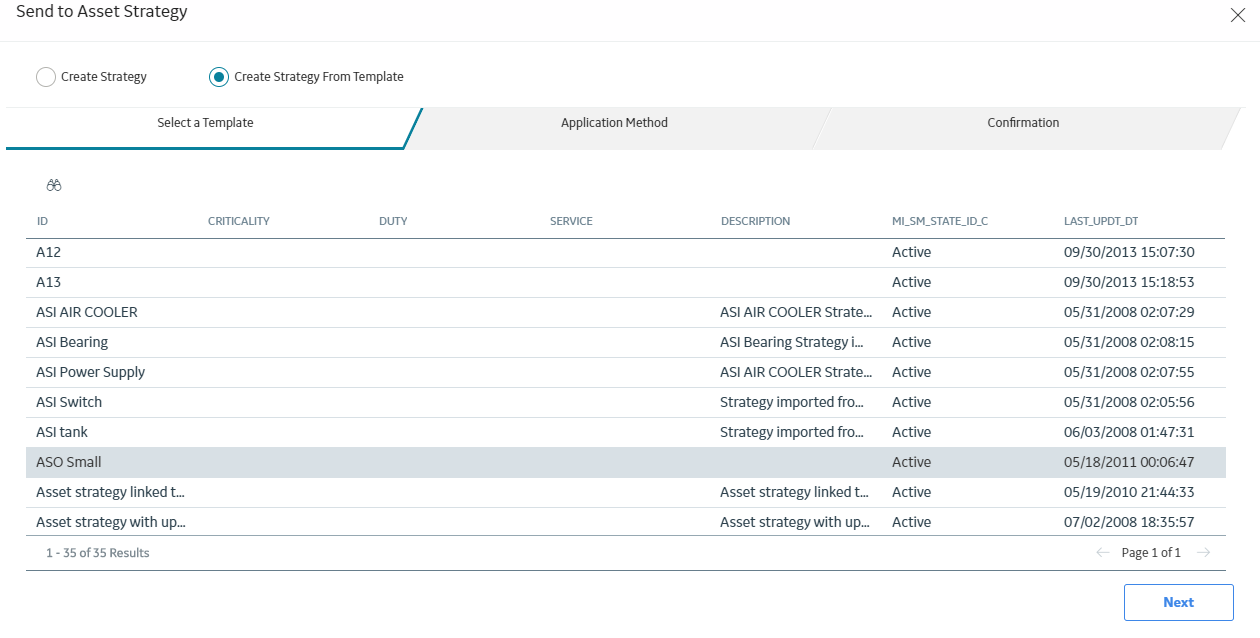
- Select a template that you want to apply and select Next.The Application Method section appears.
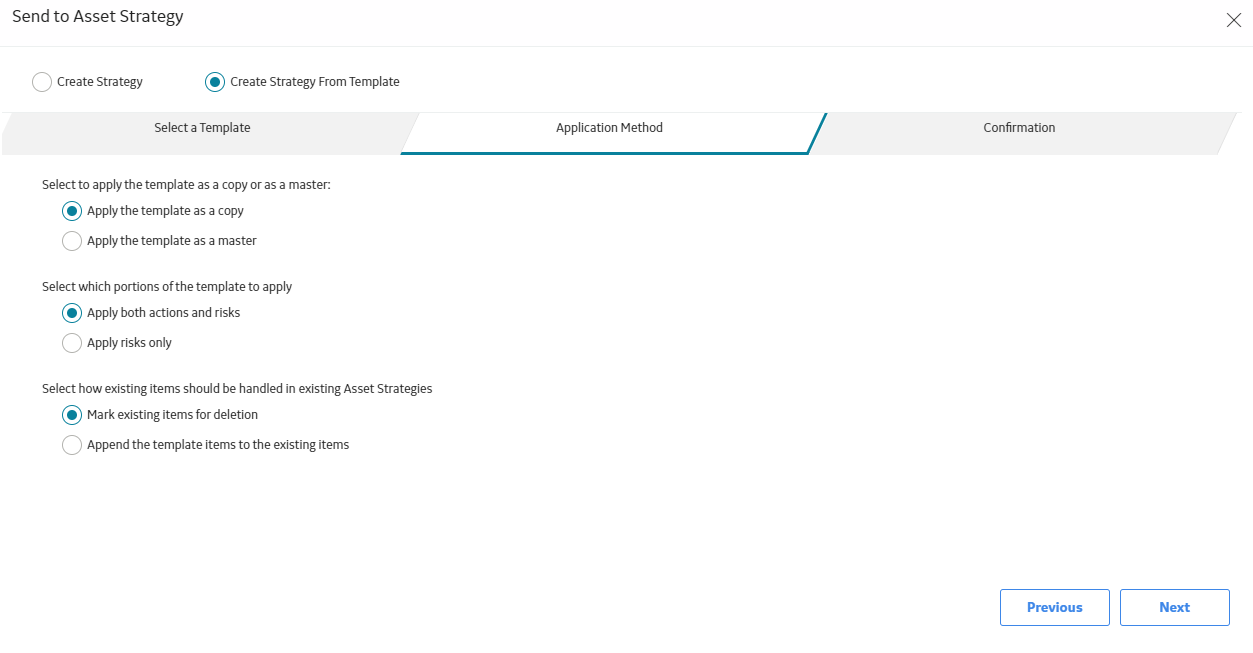
- Select the application method and select Next.The Confirmation section appears.
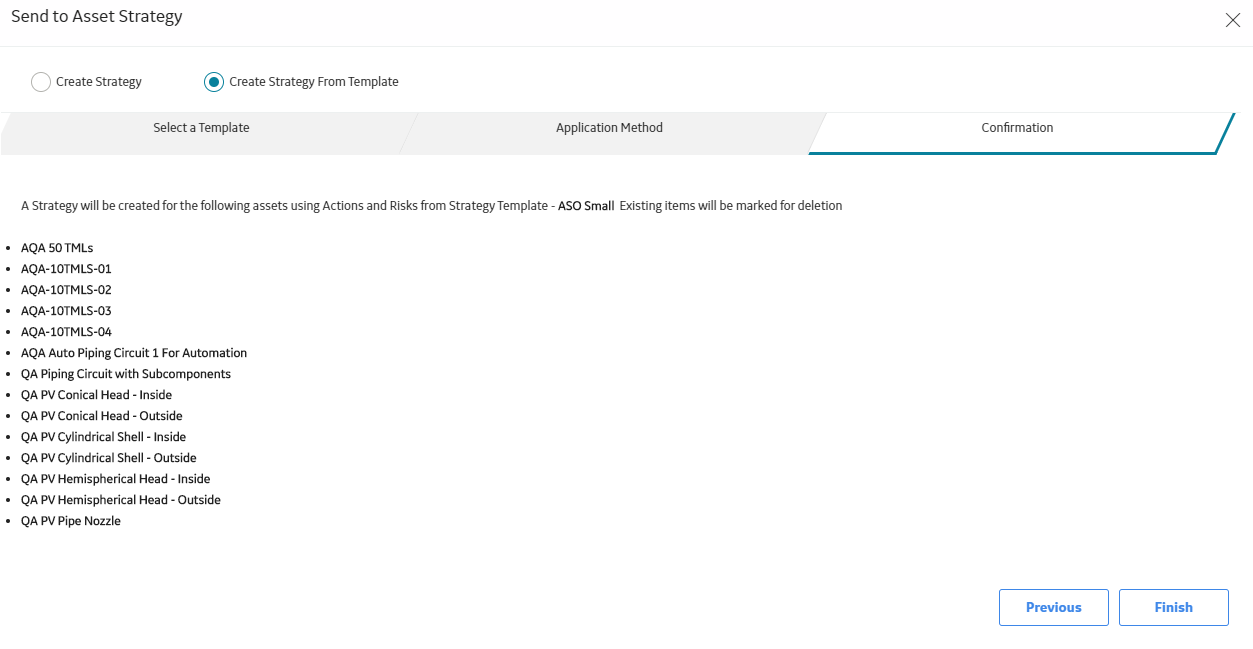
An Asset Strategy is created and the selected assets are sent to the Asset Strategy. The Asset Strategy Template is applied and the assets are connected to the Asset Strategy when the process is completed.Note:- The status of the process can be viewed from the Send To Status process indicator.
- Upon successful completion, a link to the Asset Strategy appears in the Strategy column for the asset.
- Select the option Create Strategy From Template.
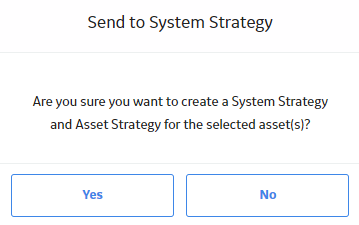
Send an Asset to a System Strategy
This topic provides the steps for sending an asset to a System Strategy.
Procedure
- Select the Assets tab.The Assets section appears, displaying a list of available assets based on the current filter.
- In the Assets section, select the check box in the row containing the asset you want to send to a System Strategy.The asset is highlighted.
Note: If a strategy is listed in the Strategy column, you cannot send it to another strategy. - In the section, select the Send To drop-down menu, and select System Strategy.A window appears.
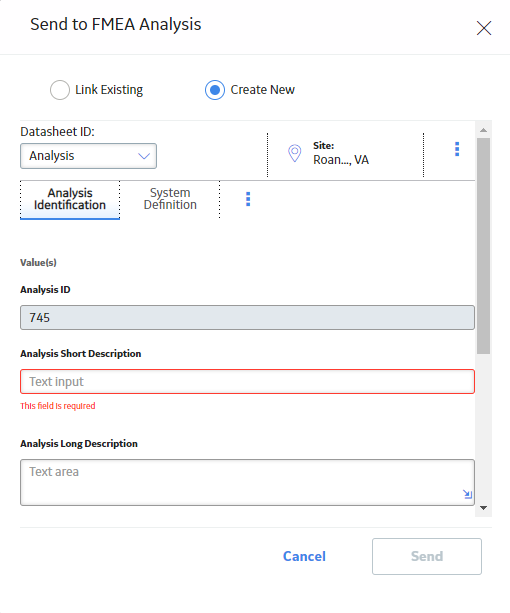
Send an Asset to a New FMEA Analysis
This topic provides the steps for sending an asset to a new FMEA Analysis.
Procedure
- Select the Assets tab.The Assets section appears, displaying a list of available assets based on the current filter.
- In the Assets section, select the check box in the row containing the asset you want to send to a new FMEA Analysis.The asset is highlighted.
Note: If an FMEA Analysis is listed in the Other Analyses column, you cannot send it to another FMEA Analysis. - In the Send to FMEA Analysis window, if it is not already selected, select Create New.A window appears, allowing you to create a new FMEA Analysis.
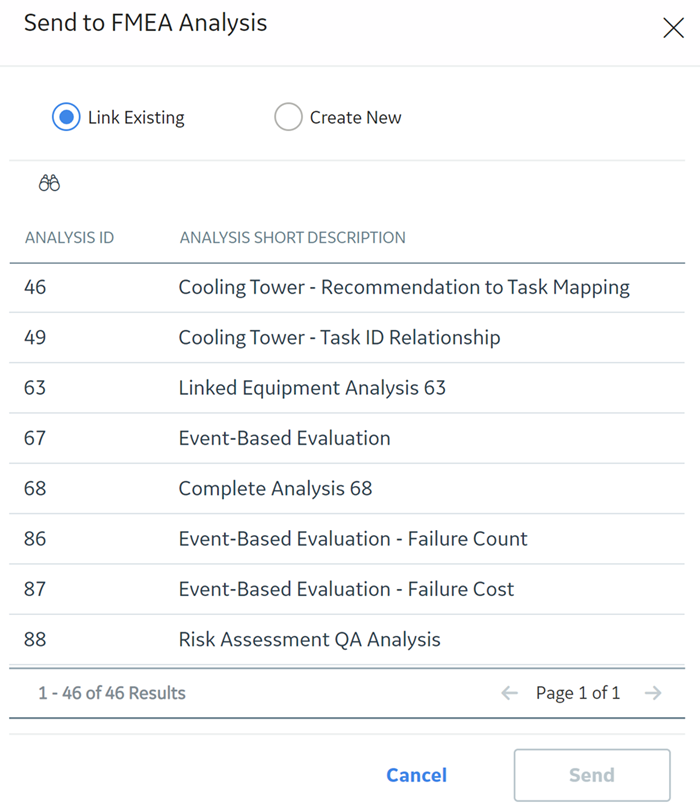
Send an Asset to an Existing FMEA Analysis
This topic provides the steps for sending an asset to an existing FMEA Analysis.
Procedure
- Select the Assets tab.The Assets section appears, displaying a list of available assets based on the current filter.
- In the Assets section, select the check box in the row containing the asset you want to send to an existing FMEA Analysis.The asset is highlighted.
Note: If an FMEA Analysis is listed in the Other Analyses column, you cannot send it to another FMEA Analysis. - In the section, select the Send To drop-down menu, and select FMEA Analysis.A window appears, displaying a list of existing analyses that you can send to.
Send an Asset to an FMEA Analysis using the Asset Template
This topic provides the steps for sending assets to an FMEA Analysis using an Asset Template.
Procedure
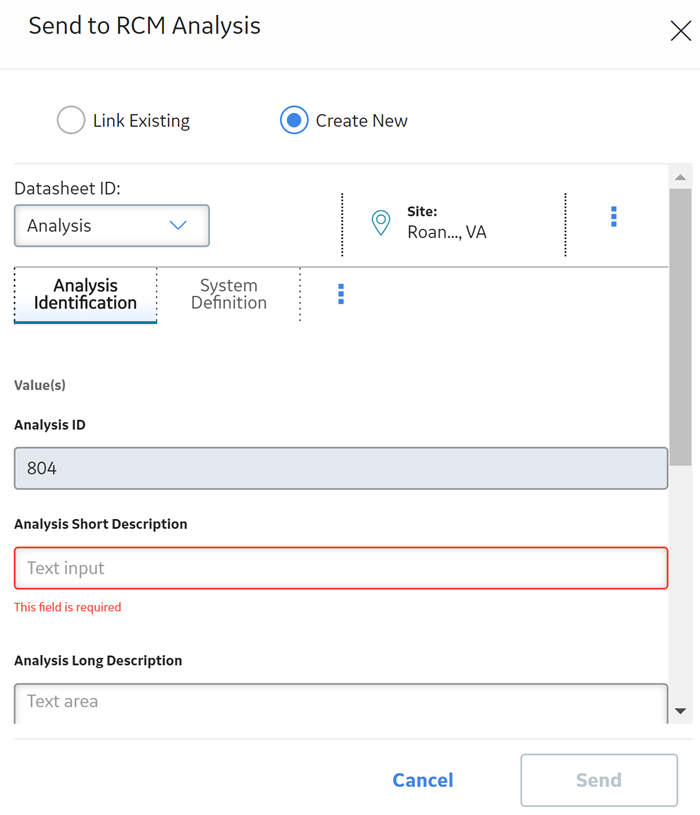
Send an Asset to a New RCM Analysis
This topic provides the steps for sending an asset to a new RCM Analysis.
Procedure
- Select the Assets tab.The Assets section appears, displaying a list of available assets based on the current filter.
- In the Assets section, select the check box in the row containing the asset you want to send to a new RCM Analysis.The asset is highlighted.
Note: If an RCM Analysis is listed in the Other Analyses column, you cannot send it to another RCM Analysis. - In the Send to RCM Analysis window, if it is not already selected, select Create New.A window appears, allowing you to create a new RCM Analysis.
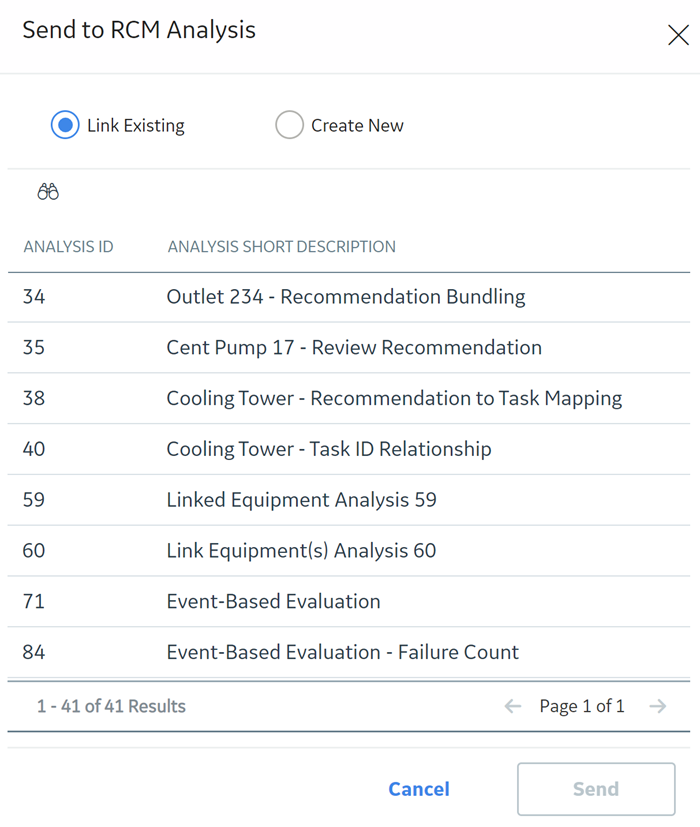
Send an Asset to an Existing RCM Analysis
This topic provides the steps for sending an asset to an existing RCM Analysis.
Procedure
- Select the Assets tab.The Assets section appears, displaying a list of available assets based on the current filter.
- In the Assets section, select the check box in the row containing the asset you want to send to an existing RCM Analysis.The asset is highlighted.
Note: If an RCM Analysis is listed in the Other Analyses column, you cannot send it to another RCM Analysis. - In the section, select the Send To drop-down menu, and select RCM Analysis.A window appears, displaying a list of existing analyses that you can send to.
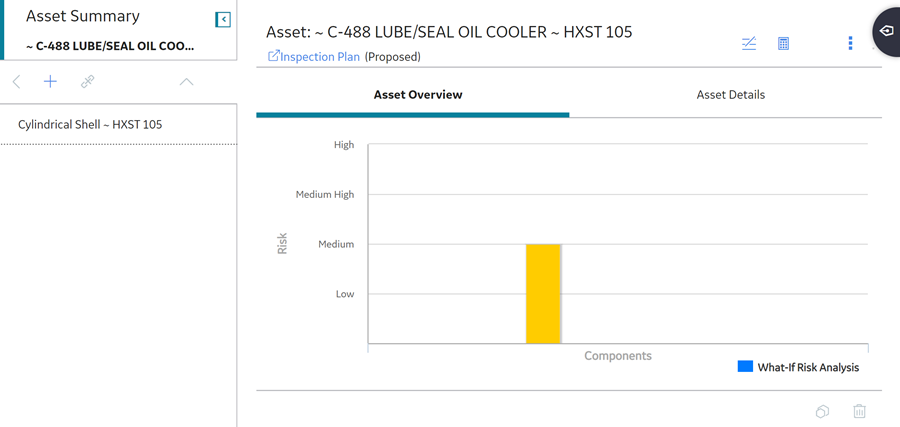
Send an Asset to the RBI Asset View
This topic provides the steps for sending an asset to an RBI Asset View.
Before You Begin
Procedure
- Select the Assets tab.The Assets section appears, displaying a list of available assets based on the current filter.
- In the Assets section, select the check box in the row containing the asset you want to send to an RBI Asset View.The asset is highlighted.Note: If an RBI Asset View is listed, you cannot view the asset in RBI Asset View.

- In the section, select the Send To drop-down menu, and select RBI Asset View.A new section appears, displaying the Asset Summary of the asset.
Send an Asset to RBI Asset View from Analysis View
This topic provides the steps for sending an asset to an RBI Asset View.
Before You Begin
Procedure
- Select the Send To drop-down menu, and select RBI Asset View.A new section appears, displaying the Asset Summary of the asset.
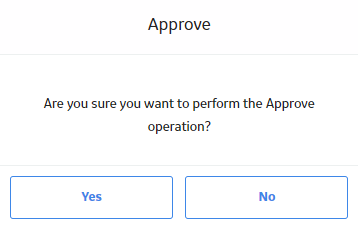
Approve an Analysis
This topic provides the steps to approve an analysis.
Before You Begin
- MI ACA Administrator
- MI ACA Member
- MI ACA Owner
Procedure
- Select the Analyses tab.The Analyses section appears, displaying a list of available analyses based on the current filter.
- Select Done.A window appears.
What To Do Next
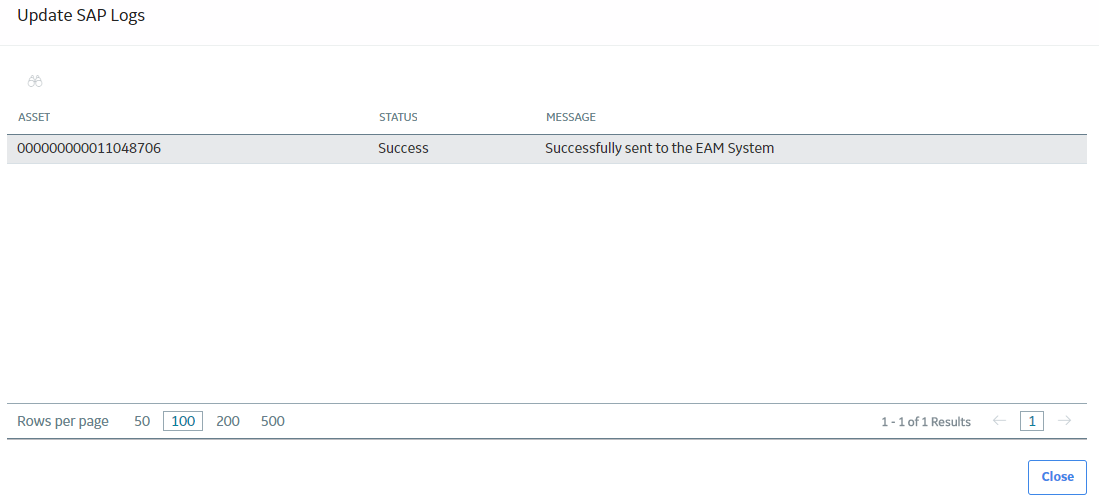
Update SAP
This topic describes how to update SAP from the Analysis View.
Procedure
- Select the Analyses tab.The Analyses section appears, displaying a list of available analyses based on the current filter.
- Select an analysis.The Assessment section for the selected analysis appears.
- Select
 , and then select Update SAP.A window appears, asking you to confirm that you want to update SAP.
 - Select Yes.SAP is updated.Note: When the process is completed, you can select the completion date or the View Error Logs link to view the status and the status message in the Update SAP Logs page.
Access Reference Documents for an ACA
This topic describes how to access reference document for an ACA.
Procedure
- Select the Reference Documents tab.The Reference Documents section appears, displaying the list of available reference documents.
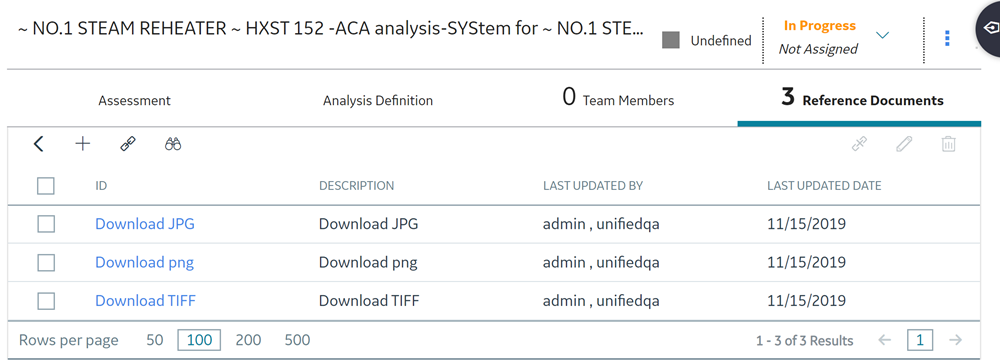 Tip: For more information, refer to the Reference Documents section of the documentation.
Export an ACA from Analysis View
This topic describes how to export an ACA from Analysis View.
Procedure
- Select the Analyses tab.The Analyses section appears, displaying a list of available analyses based on the current filter.
- Select an analysis.The Assessment workspace for the selected analysis appears.
- Select , and select Export.The Export to a File window appears.
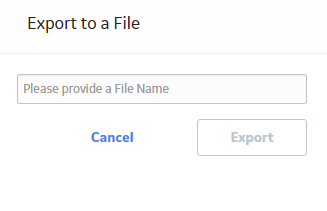
Export Analyses from the Overview Page
This topic describes how to export analyses.
Procedure
- Select
 .The Export to a File window appears.
Remove an ACA from the ACA Overview Page
About This Task
You can remove an ACA record from the ACA Overview page using  . When you remove an ACA record:
- The record is removed from the ACA Overview page.
- The links between that record and the other records associated with the ACA are deleted.
Procedure
- Select the row for the record that you want to remove, and select .The ACA record is removed.Note: Though the record is removed from the ACA Overview page, it can still be accessed on the Predix Essentials database in the search results under the name of the record itself, or a search under Asset Criticality Analysis.
Clear Assessment for an Asset
This topic describes how to clear assessments associated with an asset. You can clear assessments associated with multiple assets at a time.
Procedure
- Select
 .The assessment associated with the assets is cleared.