Scenarios
About Scenarios
Scenarios are based on one or more assets or groups of assets that help evaluate the cost of ownership over defined accounting periods or planned asset life. An analysis can have one or many scenarios to cover all of the costs over the lifespan of an asset. On the LCC Overview page, scenario performance can be compared when an analysis has more than one scenario.
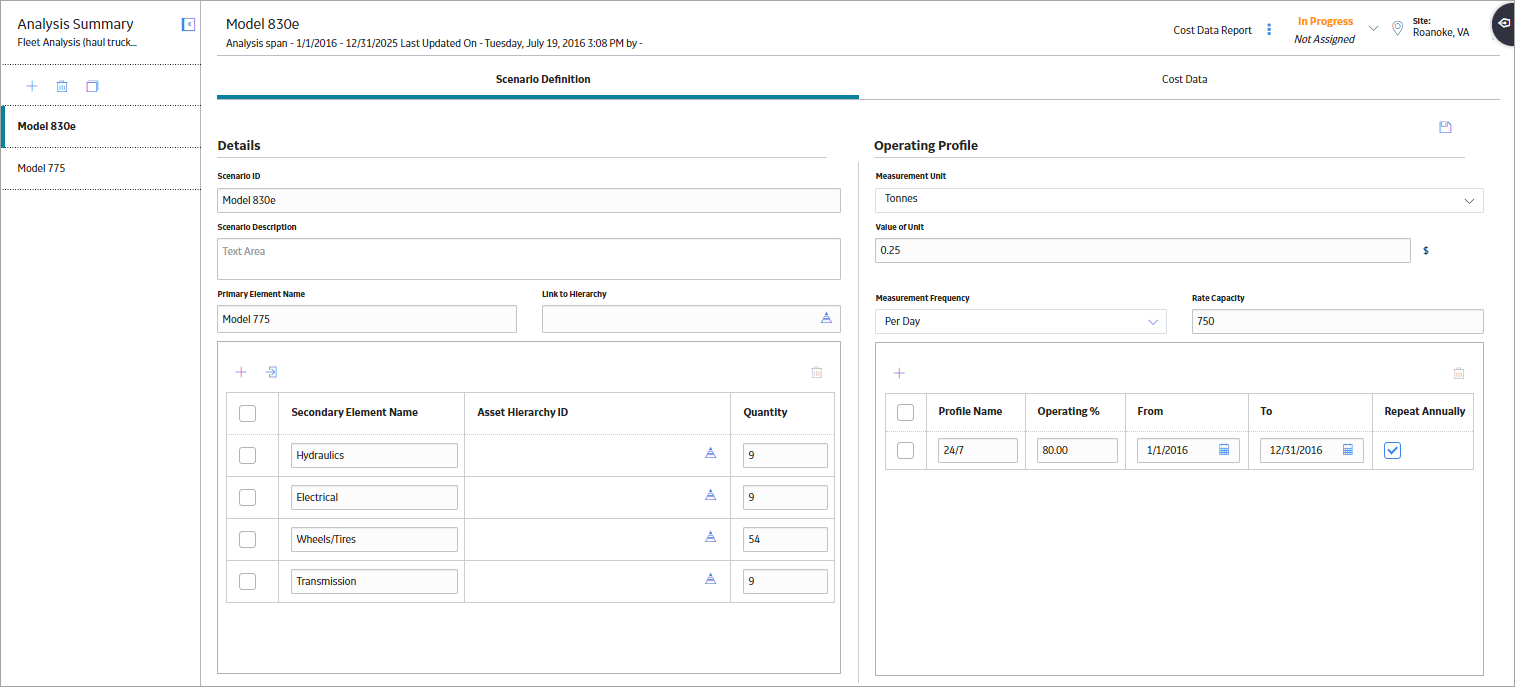
Scenarios are made up of an Operating Profile and a Cost Data grid.
For example, a construction company owns a fleet of trucks and would like to assess the cost of trucks over a lifespan. A scenario will include different trucks based on their life expectancy. Within the scenario, the company will keep track of maintenance, repairs, and fuel usage to determine the exact cost of the truck in that scenario.
About Operating Profiles
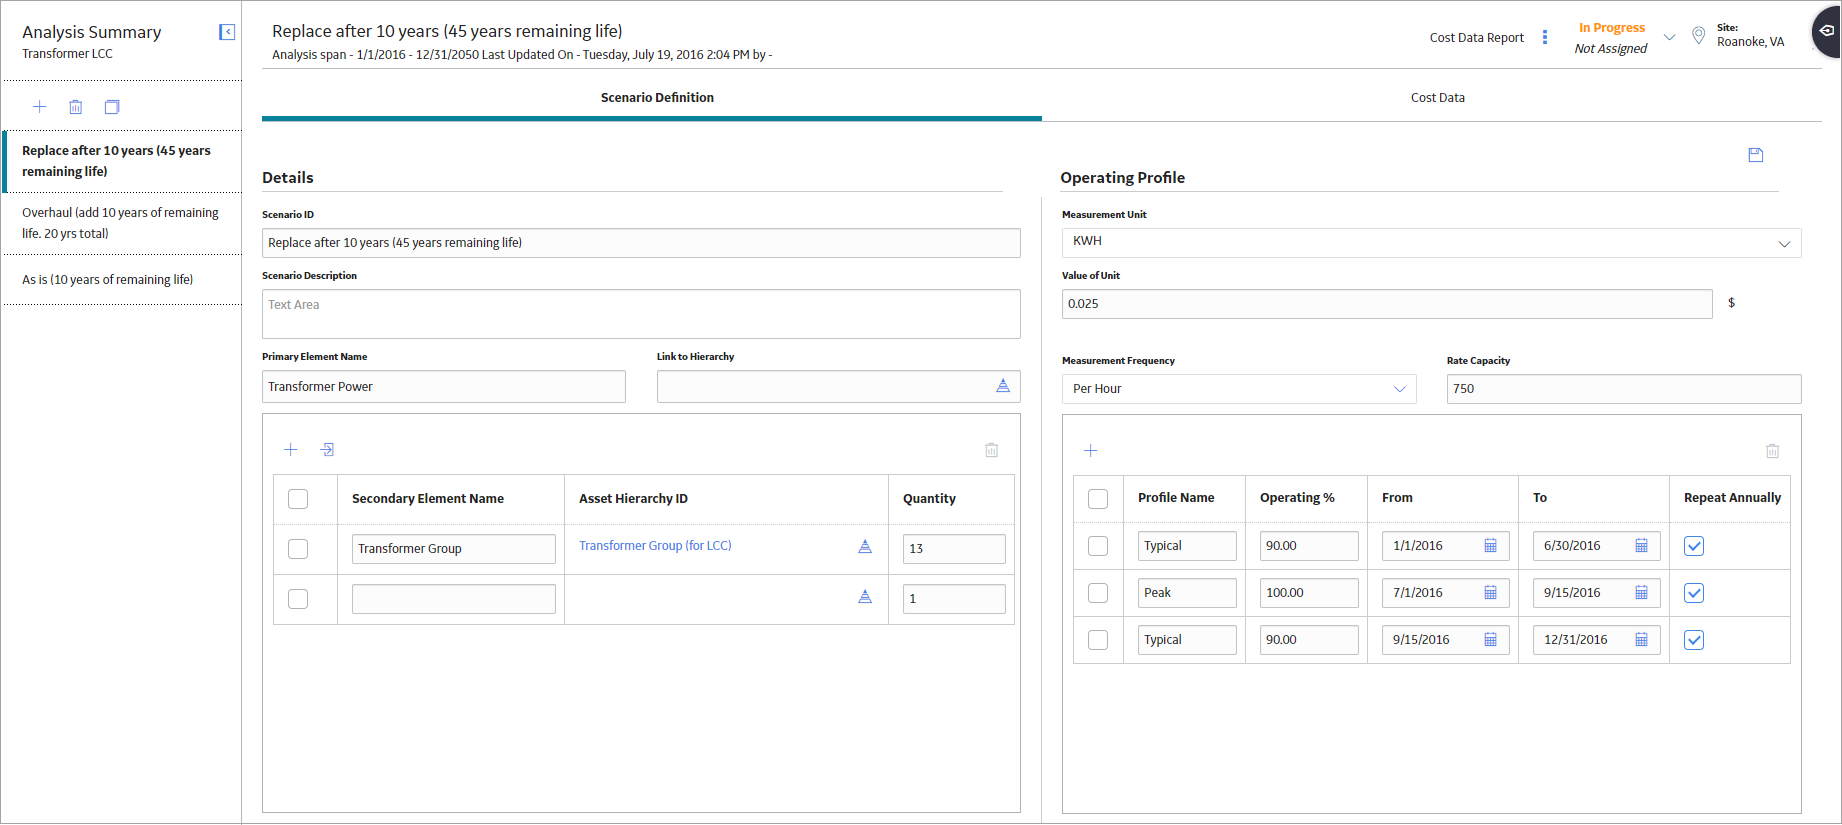
Multiple Operating Profiles can be used within a scenario, enabling you to establish different revenue rates for different periods within the analysis. Profiles within scenarios define the production operating rate for a prescribed operating condition by allowing production output values to be added to an analysis. The analysis will then have a value to analyze asset ownership costs.
For example, assume that you have been tasked with determining the lifecycle costs of an air compressor. Your compressor will operate at one operating profile during the summer months and a second operating profile during the winter months, due to the greater density of air in winter. The two profiles allow the performance between two different time spans with different production rates to be captured.
About LCC Elements
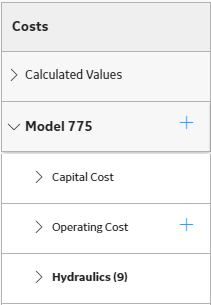
Life Cycle Cost Analysis uses two different types of elements: primary and secondary. Elements are organized in a two level hierarchy with the primary level as the top level. One or many secondary elements can be added below the primary element, and all element costs are distributed up to the primary element and shown under the scenario calculated costs.
Primary Elements
Primary elements are assets that apply directly to the scenario and can be supplemented with an infinite amount of secondary elements.
Secondary Elements
Secondary elements are used to add other assets or groups of assets from the hierarchy to scenarios that will contribute to the operating cost. Secondary elements are subcomponents that contribute to the costs of a primary element.
For example, Hydraulics would be secondary elements to a haul truck, contributing to the overall cost of the primary element.
About Asset Groups in LCC
When you create secondary elements in LCC, you can associate them with a single asset or a previously defined Asset Group. Multiple assets can be added and related by selecting an Asset Group.
For more information about the different Asset Group functions, refer to the Asset section of the documentation. Functions include, but are not limited to, creating and modifying an Asset Group.
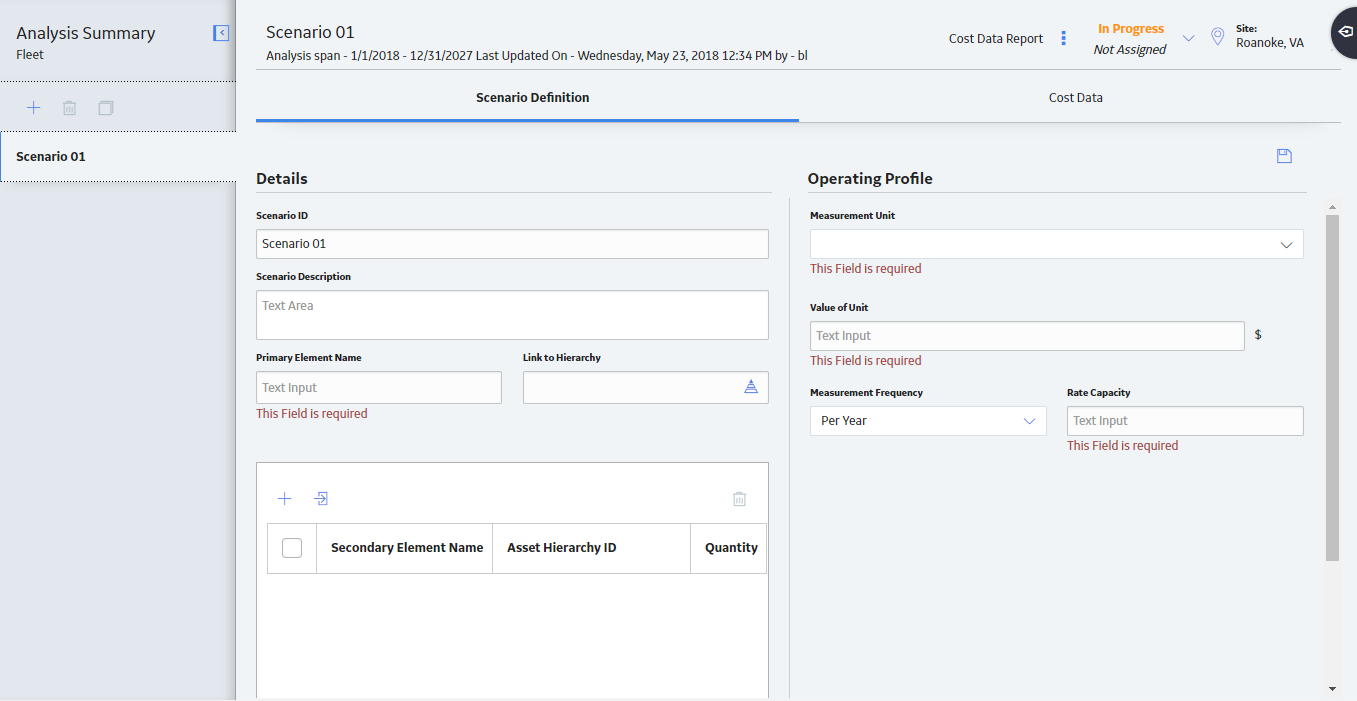
Access a Scenario
Before You Begin
Procedure
- In the left pane, select a scenario.The workspace for the selected scenario appears, displaying the Scenario Definition section.
Create a Scenario for an LCC Analysis
Procedure
- In the left pane, select
 .The workspace for the new scenario appears, displaying the Scenario Definition section.
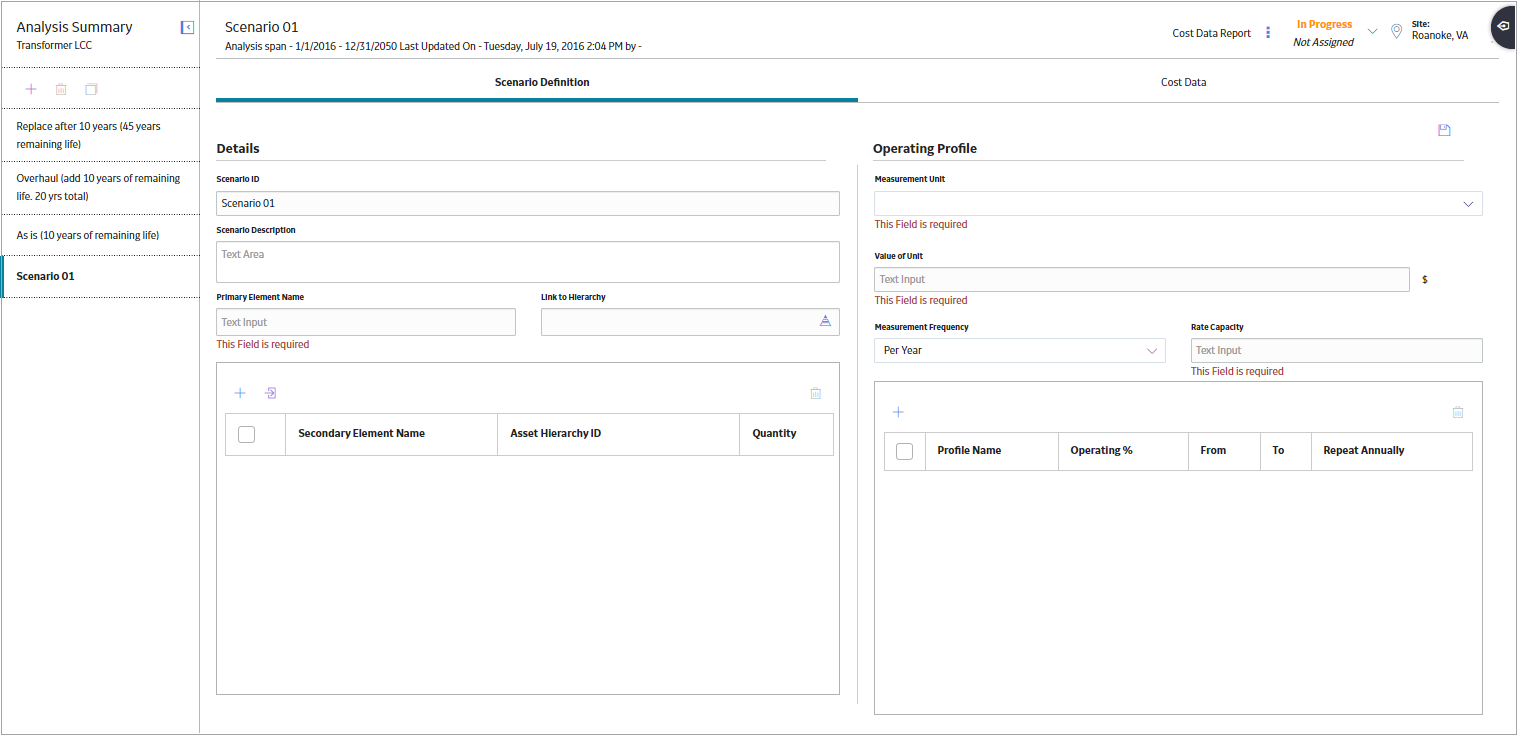
- In the Link to Hierarchy box, select
 .The Asset Finder window appears.
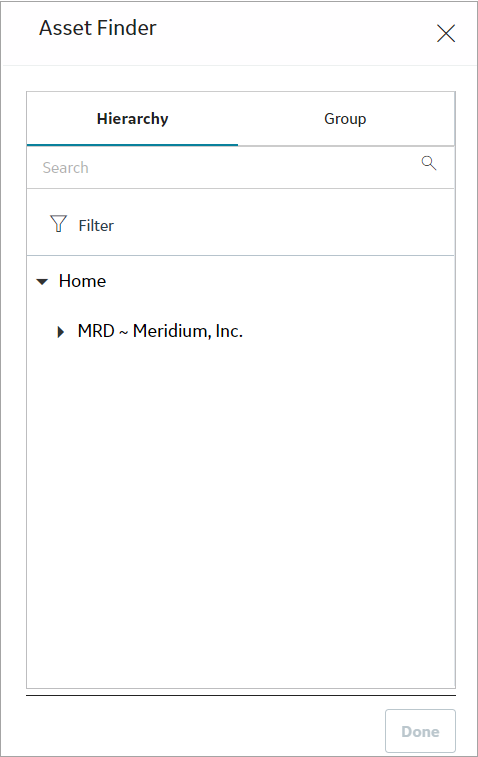
- In the Operating Profile subsection, in the grid, select .A new row appears in the grid.
- Select
 . The scenario is saved.
Create a Scenario for a Fleet Analysis
Procedure
- In the left pane, select .The workspace for the new scenario appears, displaying the Scenario Definition section.
- In the Link to Hierarchy box, select .The Asset Finder window appears.
- In the grid, select select .A new row appears.
- To associate the secondary element with either an Asset or an Asset Group, in the Asset Hierarchy ID cell, select .The Asset Finder window appears.
- In the Operating Profile subsection, in the grid, select .A new row appears.
- Select . The scenario is saved.
Create a Profile
Procedure
- In the Operating Profile subsection of the Scenario Definition section, select .A new row appears in the grid.
- Select .The profile is created.
Create a Secondary Element
Procedure
- In the Details subsection, in the upper-left corner of the grid, select .A new row appears in the grid.
- To associate the secondary element with either an Asset or an Asset Group, in the Asset Hierarchy ID cell, select .The Asset Finder window appears.
Delete a Secondary Element
Procedure
- In the row for the secondary element that you want to delete, select the check box, and then select
 .A confirmation message appears.
Import Scenario Elements Into an Analysis
About This Task
You can use the import feature within the Scenario Definition section to create a new, comprehensive analysis by adding primary and secondary elements from previously created analyses. These will appear as secondary elements in the target scenario.
Procedure
- In the Details subsection, select
 .The Import Secondary Elements window appears, displaying a list of scenarios. The list is comprised of scenarios with the same site, start date, period type, and number of periods as the target analysis.
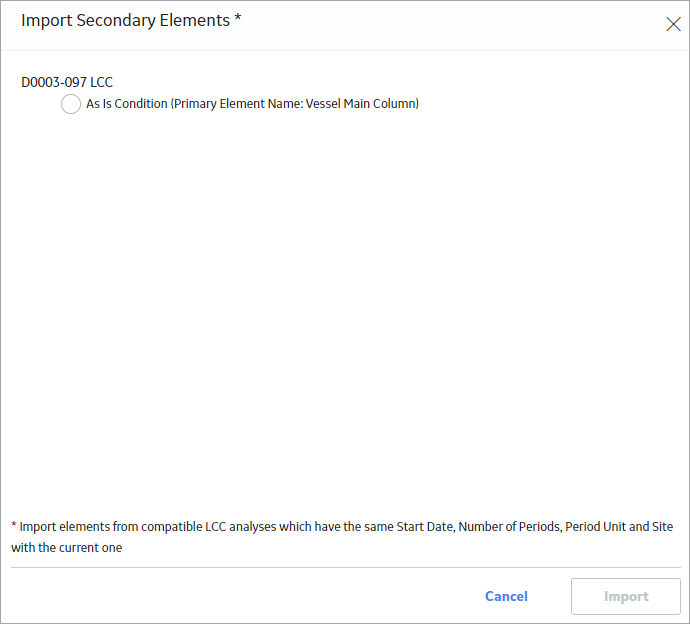
Copy a Scenario Within an Analysis
Procedure
- In the left pane, select
 .A confirmation message appears.
 - Select Yes.The workspace for the copied scenario appears, displaying all the copied information from the original scenario. The scenario is saved, with its name based on the following format: <Name of the original scenario> Copy
If you want to change the name of the scenario, you can enter the new name in the Scenario ID field, and then select
.
Delete a Profile
Procedure
- Select .A confirmation message appears.
Delete a Scenario
Procedure
- In the left pane, select the scenario that you want to delete, and then select .A confirmation message appears.