Import Data in to an Entity

About this task

This topic describes how to import data in to an entity from a Microsoft Excel workbook. You can also add a row manually in the entity.

Procedure

  1. In the main navigation menu, select ENTITIES.
    The ENTITIES workspace appears.

  2. Select the entity in to which you want to import data.
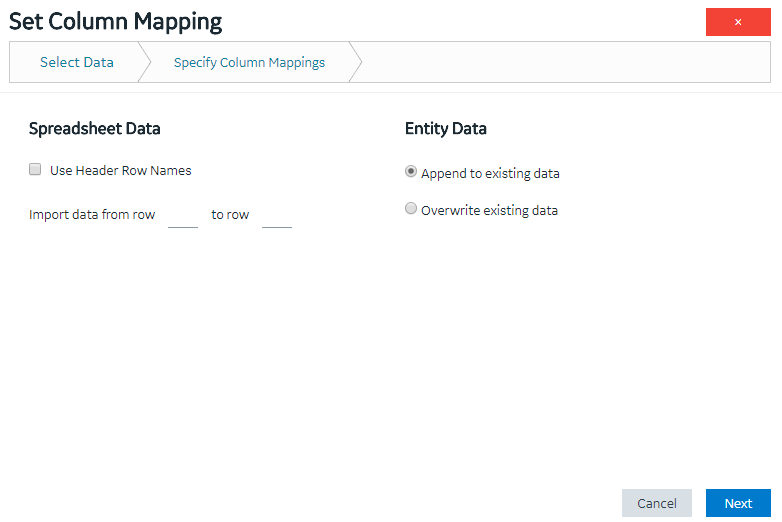
  3. Select Import Excel, navigate to and select the workbook that you want to import, and then select Open.
    The Set Column Mapping window appears.

  4. If you want to use the names in one of the rows of the workbook as field names:
    1. Select Use Header Row Names.
      The Header Row Number box appears.
    2. Enter the row number in the workbook that you want to specify as the header row. By default, this box contains the value 1, which indicates that the first row is used as the header row.
  5. In the Import data from row and to row boxes, enter the first and the last row numbers in the workbook that you want to import. For example, if you want to import data from rows 3 through 6, enter 3 and 6 respectively. By default, the Import data from row box contains the row number that is immediately next to the header row that you have specified.
  6. If the entity already contains data and you want to add to it, select Append to existing data. If, however, you want to delete existing data before importing, select Overwrite existing data.
  7. Select Next.
    A list of fields in the entity appears. Next to each field, a text box appears in the Column Name in Spreadsheet column.
  8. For each field, specify the column name in the header row in the workbook that you want to map, and then select Import.
    A message appears, stating that the process is irreversible and asking you to confirm that you want to import data.
  9. Select OK.
    A message appears, indicating that the data has been imported successfully.
  10. Select OK.
    The data is imported.