 Historian
Add and Configure a HAB Collector
About this task
Procedure
- Access Configuration Hub.
-
In the NAVIGATION section, select
Collectors.
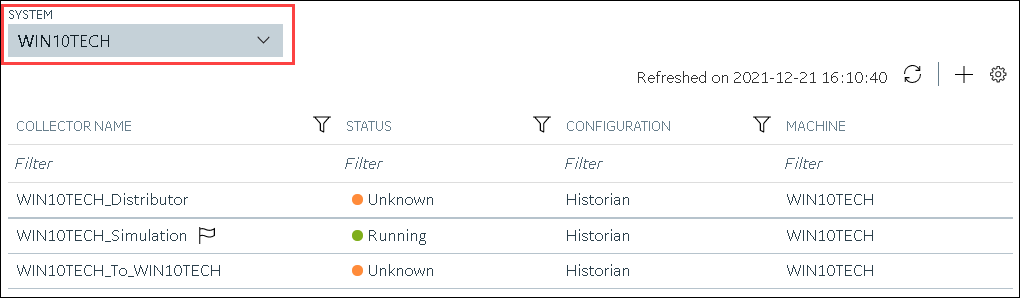
A list of collectors in the default system appears.
-
If needed, select the system in which you want to add a collector
instance.
-
In the upper-right corner of the main section, select
 .
.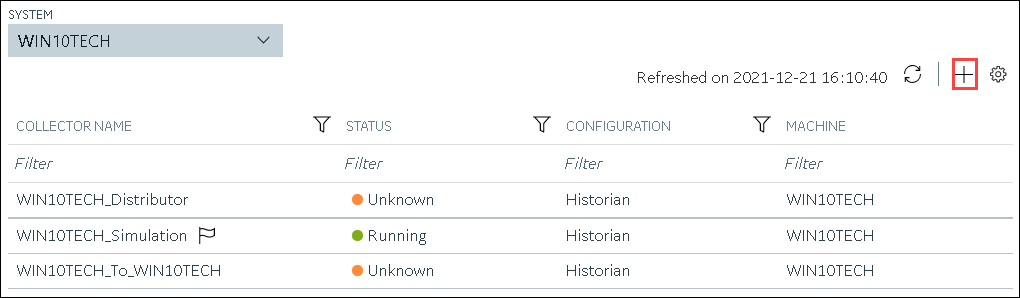
The Add Collector Instance: <system name> window appears, displaying the Collector Selection section. The MACHINE NAME field contains a list of machines on which you have installed collectors. - In the MACHINE NAME field, select the machine in which you want to add a collector instance.
-
In the COLLECTOR TYPE field, select Hab
Collector, and then select Get Details.
The INSTALLATION DRIVE and DATA DIRECTORY fields are disabled and populated.
-
Select Next.
The Source Configuration section appears.
-
Enter values as described in the following table.
Field Description SERVER SITE Enter name that you want to assign to the site. A value is required and must be unique. It is used by Habitat to identify the collector instance. By default, this field is populated with a value in the following format: <Historian server name>HabSERVER 1 (under NODE 1) Enter the host name or IP address of the Habitat server in the site from which you want to collect data. This server acts as the primary/active server from which the collector receives data. A value is required. SERVER 2 (under NODE 1) Enter the host name or IP address of the Habitat server that you want to use as a standby server. For example, if you want to connect to MachineA, MachineB, MachineC, and MachineD, enter MachineA and MachineB in the SERVER 1 and SERVER 2 fields under NODE 1, and then enter MachineC and MachineD in the corresponding fields under NODE 2.
SOCKET The socket number (port number) used by the Habitat Sampler application to connect. Each collector instance can connect to only one socket. The default value is 8040. RETRY The duration, in seconds, after which the collector tries to communicate with the site. The default value is 5 seconds. -
Select Next.
The Destination Configuration section appears. Under CHOOSE DESTINATION, the Historian Server option is selected by default. The other options are disabled because you cannot send data to a cloud destination using the HAB collector.
- If you want to connect to a remote Historian server, enter values in the USERNAME and PASSWORD fields.
-
Select Next.
The Collector Initiation section appears. By default, the COLLECTOR NAME field is populated with a value in the following format:
<Historian server name>_Hab -
If needed, modify the value in the COLLECTOR NAME field.
The value must be unique, must not exceed 15 characters, and must contain the
string
Hab. -
In the RUNNING MODE field, select one of the following
options.
- Service - Local System Account: Select this option if you want to run the collector as a Windows service using the credentials of the local user (that is, the currently logged-in user). If you select this option, the USERNAME and PASSWORD fields are disabled. By default, this option is selected.
- Service Under Specific User Account: Select this
option if you want to run the collector as a Windows service using a
specific user account. If you select this option, you must enter values
in the USERNAME and
PASSWORD fields. If you have enabled the Enforce Strict Collector Authentication option in Historian Administrator, you must provide the credentials of a user who is added to at least one of the following security groups:
- iH Security Admins
- iH Collector Admins
- iH Tag Admins
-
Select Add.
The collector instance is added. In addition, the following files are created:
- <collector name>_Config.xml
- <collector name>_Tag.xml
- Access the <collector name>_Config.xml file, and provide values for the parameters. For information, refer to Configure the HAB Collector for Tags and Configure the HAB Collector for Alarms.
- In Configuration Hub, in the Collectors section, select the collector instance, and provide values in the available fields.
-
In the upper-left corner of the page, select Save.
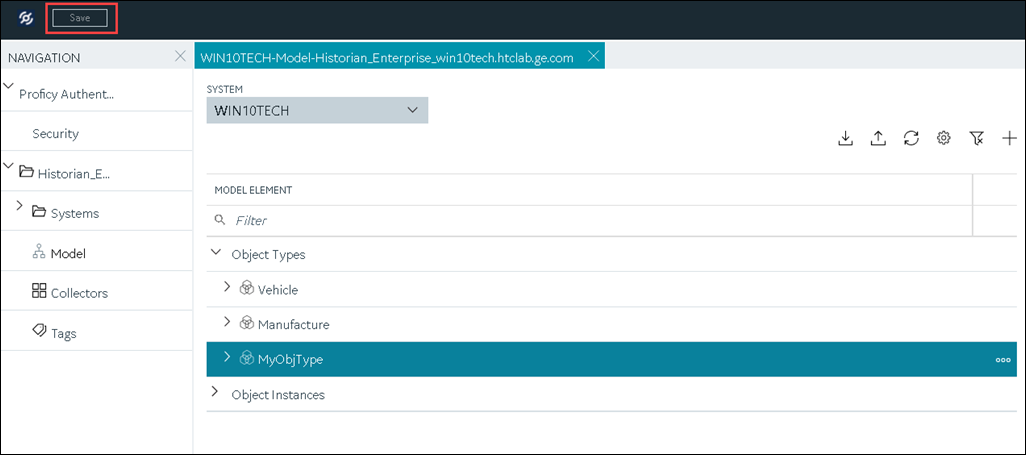
The changes to the collector instance are saved. - Start the collector.
What to do next
Note: If you have enabled the
automatic tag sync option, tag changes are automatically reflected in Historian; no
manual steps are needed.