Users
Add a User
You can add users to Predix Essentials directly or add individuals who are registered with a supported identity provider as new users.
About This Task
When adding a user from your identity provider currently linked with Predix Essentials, ensure that the user information entered matches your identity management system.
Important: User information such as the username, password, first and last names, and email address are subject to any limitations implemented by your identity provider.
Procedure
What To Do Next
- Add assets to the user.
-
After the user has been added, the user must log into Predix Essentials at least once before their account becomes available for certain assignment operations.
Note: This step is not required in Predix Essentials.
Upload Multiple User Accounts
Before You Begin
- Ensure that at least one user group is added to Predix Essentials.
- Create a CSV file with the user information of the users that you want to upload.Important: If you select GE SSO in the Identity Source drop-down list box, the CSV file should contain only one column with SSO IDs. This column is case-sensitive. The following image shows an example of this type of CSV file:
If you select another identity provider, the CSV file should contain multiple columns with the same information you would input when manually creating each user.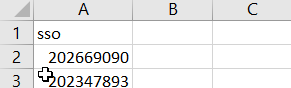
About This Task
You can add multiple users to Predix Essentials through CSV upload.
Procedure
Results
Add Assets to Users
Before You Begin
- You must be logged in with administrator privileges.
- You must have added at least one user.
About This Task
You can add individual assets to each user. You can also assign users to any level in the context browser. For example, assigning an Enterprise gives the user access to all levels (sites, segments, and assets) within that Enterprise.
Important: If the Foundation permission set is available in a tenant, you must assign at least one permission from this set to all the users of the tenant. We recommend that the users are assigned the MI APM Viewer permission for the assets they need to access.
Procedure
- Select the row containing the user to which you want to add assets.Tip: To freeze a column so that it remains visible when you scroll horizontally, or to hide a column, hover over the name of the column you want to freeze or hide, select
 , and then select your desired action.The Edit User page appears.
 - In the Select Context window, in the pane containing assets, in the row containing the asset that you want to select, select
 , and then select one of the following:
Option Description Select all Selects the asset and the hierarchy of assets below it. Select all children Selects only the hierarchy of assets below the asset. Tip: Select this option when you want to assign permissions to most but not all assets in a hierarchy. You can then remove undesired assets individually.Note: Assigning permissions to an asset also assigns permissions to the hierarchy of assets below it.
Results
Remove an Asset from a User
Before You Begin
- You must be logged in with administrator privileges.
- You must have added at least one user and at least one asset to that user.
Procedure
- Select the row containing the user from which you want to remove an asset.Tip: To freeze a column so that it remains visible when you scroll horizontally, or to hide a column, hover over the name of the column you want to freeze or hide, select, and then select your desired action.The Edit User page appears.
- In the Permission Sets & Assets section, in the row containing the asset that you want to remove from the user, select , and then select Remove Assignment.The asset is no longer assigned to the user.