Protection Level Slider
About the Protection Level Slider
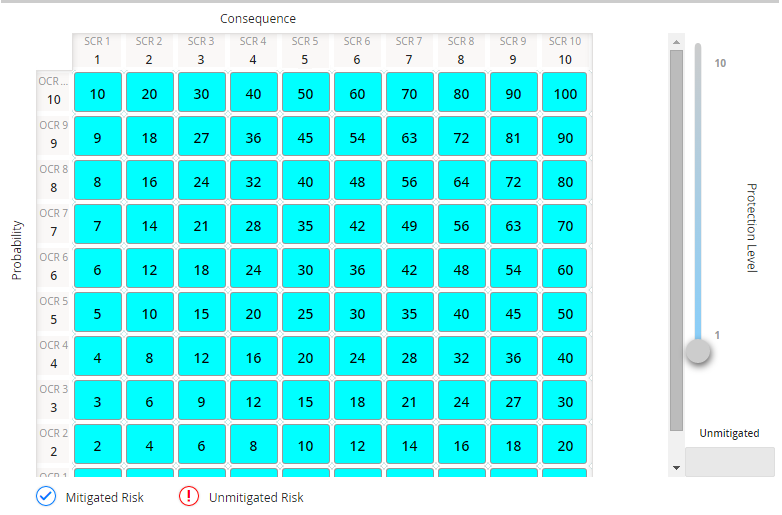
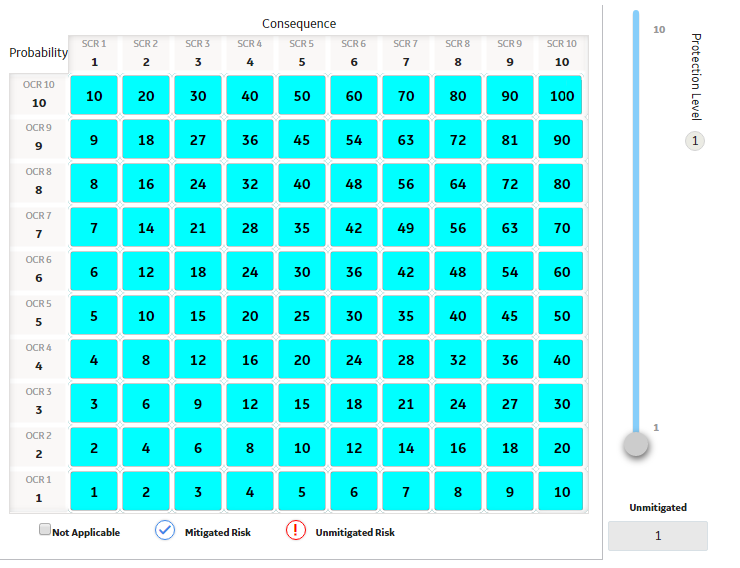
In this image, you can see that the protection level slider name is Normal, and the description is Procedural controls; inherent design controls. You can also see in the Unmitigated cell (below the slider) that the factor for this protection level is 1. In this case, any number that is selected in the Environment section will be multiplied by 1 to determine the total risk value for the Environment risk category.
Note that when the protection level slider is displayed in a section, the values in the cells in that section change depending on the level at which the slider is positioned. The factor associated with the current position of the slider is multiplied by the baseline values in the matrix cells to determine the new numbers that are displayed in each cell.
Add a Protection Level Slider with Default Name and Description
About This Task
The baseline Risk Matrix does not display a protection level slider by default, but the appropriate System Codes exist to allow you to add a protection level slider to the baseline Risk Matrix. Using these baseline System Codes, the default name and description of the protection level slider is Default. The name and description are concatenated in the tooltip when you pause on the protection level slider, as shown in the following image.

- You want to add the protection level slider to the Safety section of the Risk Matrix.
- You want the protection level slider to contain levels 1 through 10.
Procedure
- In the Record Explorer pane, expand the Risk Category node, and then expand the Safety node.
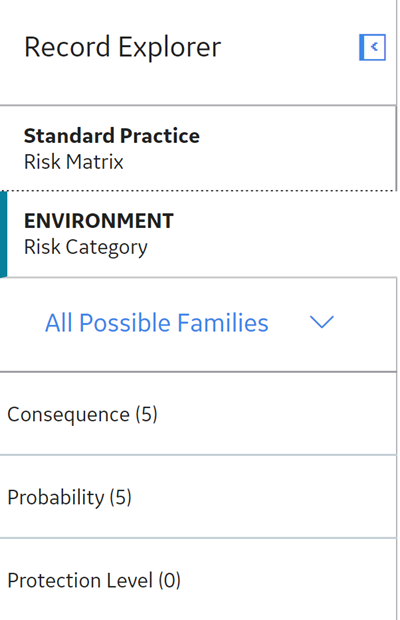
- Below the Safety node, select the Protection Level node, then select
 , and then select Add New Record.Tip: If you do not see the Protection Level node at the bottom of the Record Explorer pane, select
 next to Related Families, and then select All Possible Families.
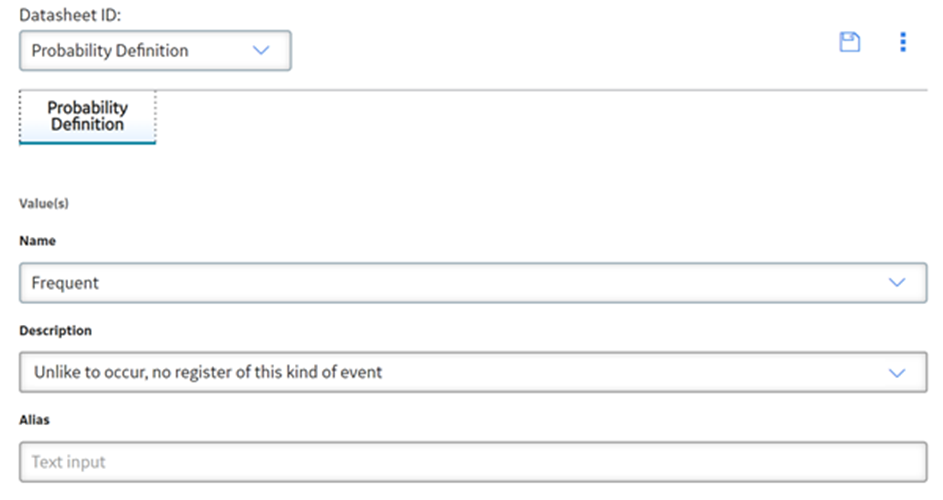
 - In the new Protection Level record, in the Name list, select Default.Note: The Description cell is populated automatically with the value Default.
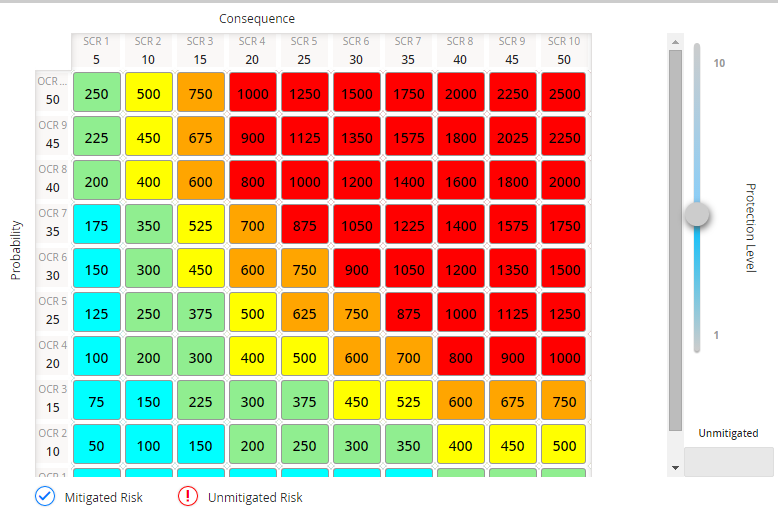
- Repeat steps 3 through 7 until you have created ten Protection Level records with the factors 1 through 10.When you are finished completing these steps, when you access the Safety section for an item that uses this Risk Matrix (e.g., an Action in ASM), the protection level slider will look like this:
In this image, you can see that the highest level of the slider is selected (with the factor of 10), causing the value in the selected cell to be 50 (the result of the calculation 1 x 5 x 10, where 1 is the selected consequence and 5 is the selected probability). You can also see that the tooltip displays the default name and description as a concatenated value, Default: Default.