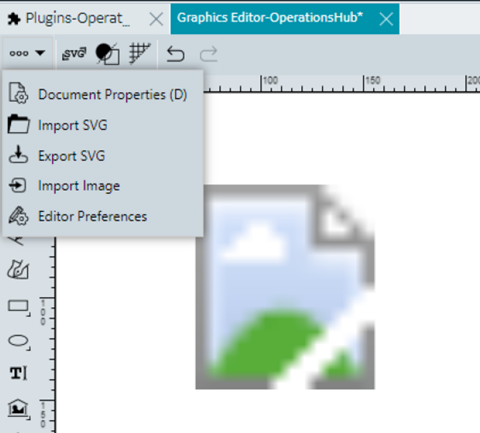
Scalable Vector Graphic (SVG) Editor Tools
Scalable Vector Graphic (SVG) is a vector image file type. The SVG images are scalable, that is, you can modify the shapes, lines, curves, and so on or, resize the SVG images without affecting the image quality.
You can edit the SVG vector graphics by importing the SVG images to editor tools such as Figma, PowerPoint, Adobe Illustrator, and others. The SVG images can be rendered over the supporting web browsers such as Google Chrome, Mozilla Firefox, and Apple Safari. When compared to the common image types (JPEG, PNG) the SVG format images can be exported to other editor tools without affecting the image quality. You can customize the SVG images as per the design specific needs and animate the images for interactive sessions. As the SVG vector format images are based on XML code language, you can edit the elements such as <svg>, <rect>, <circle>, and <path>. These elements can be modified using the CSS or JavaScript thus provides the flexibility to create vector images and publish the SVG images over the web.
Troubleshooting SVG Issues
When you import the SVG images into Operations Hub SVG Editor tool, if the import is not successful due to the additional features provided by the third-party SVG editing tool that are incompatible, you can troubleshoot these issues using the SVG file XML coding. When you try to import the SVG files into Operation Hub, you may notice some transformation issues in your SVG file. To rectify, you can apply the following steps to troubleshoot the issues while you import SVG files using the SVG editing tools such as: Figma, PowerPoint, and Adobe Illustrator.
Working with SVG Editor Tools
You can choose to import the SVG files from your computer to Figma tool using the File menu import option or, you can drag and drop the SVG file into the canvas and edit the SVG files as desired. As the SVG files are vector format files you can edit individual elements, resize, adjust the properties using the Figma tools and different layers. You can also add new elements to the SVG file and design the shapes, lines, and edit the text, as required. The advantage of using working on Figma tool using SVGs is that you can easily collaborate with other members working on the same SVG file, share the files, and provide comments on specific elements in the file.
- Save the file format to SVG (that is <file name>.SVG).
- Set the file size using scale factor (you will not lose the clarity or resolution using scale factor).
- Export the specific section of the file or, entire Figma file.
- Set the background color or, image to the exported SVG file (if required).
- Use custom fonts (if you want the text to be editable and animated).
- If you want the text to be editable and animated in Operations Hub, ensure not to select the Outline text in the settings.
- To browse and search for a specific element in SVG image, ensure to select Include ID attribute in the settings.
- Save the above settings to persist the Figma settings.
For Figma help guide, refer to https://help.figma.com/hc/en-us/articles/360040028114-Guide-to-exports-in-Figma for more information.
The PowerPoint tool is not used to create complex HMI graphics, however you have the access to SVG editor in Operations Hub that have same capabilities as that of PowerPoint to edit simple SVG graphics. You can export SVG images into PowerPoint to project SVG images in the PowerPoint presentation mode. Following examples illustrate the troubleshooting steps for various issues you may come across in the SVG files.
Sample SVG: PowerPoint SVG Export
<svg width="1741" height="903"
    xmlns="http://www.w3.org/2000/svg"
    xmlns:xlink="http://www.w3.org/1999/xlink" xml:space="preserve" overflow="hidden">
    <defs>
        <clipPath id="clip0">
            <rect x="268" y="277" width="1741" height="903"/>
        </clipPath>
    </defs>
    <g clip-path="url(#clip0)" transform="translate(-268 -277)">
        <text font-family="Arial,Arial_MSFontService,sans-serif" font-weight="400" font-size="83" transform="matrix(1 0 0 1 317.751 383)">Left Aligned Text
            <tspan font-size="83" x="967.083" y="334">Right Aligned Text</tspan>
            <tspan font-size="83" x="456.248" y="728">Center Aligned Text</tspan>
        </text>
    </g>
</svg>
When you save the Power Point slide as an SVG file, the text elements in the saved SVG image or the slide will be exported as SVG text elements. And if the SVG text elements contains nested tspan elements then the same tspan elements will be exported into SVG file. When you try to import the PowerPoint SVG image to the SVG editor in the Operations Hub, the SVG editor tool do not support the tspan elements, but the SVG editor tool will convert each tspan elements into text elements. Thus, using the SVG editor tool in Operation Hub for an imported PowerPoint SVG image, you can format and animate each text element. Following is the example of tspan element transformation into text element.
<svg width="1741" height="903"
    xmlns="http://www.w3.org/2000/svg"
    xmlns:svg="http://www.w3.org/2000/svg" xml:space="preserve">
    <defs>
        <clipPath id="clip0">
            <rect height="903" id="svg_1" width="1741" x="268" y="277"/>
        </clipPath>
    </defs>
    <g class="layer">
        <title>Layer 1</title>
        <g clip-path="url(#clip0)" id="svg_2" transform="translate(-268 -277)">
            <text font-family="Arial,Arial_MSFontService,sans-serif" font-size="83" font-weight="400" id="svg_3_0" transform="matrix(1 0 0 1 317.751 383)" x="0" y="0">Left Aligned Text</text>
            <text font-family="Arial,Arial_MSFontService,sans-serif" font-size="83" font-weight="400" id="svg_3_1" transform="matrix(1 0 0 1 317.751 383)" x="967.08" y="334">Right Aligned Text</text>
            <text font-family="Arial,Arial_MSFontService,sans-serif" font-size="83" font-weight="400" id="svg_3_2" transform="matrix(1 0 0 1 317.751 383)" x="456.25" y="728">Center Aligned Text</text>
        </g>
    </g>
</svg>
When you import the SVG PowerPoint slide into SVG editor tool of Operations Hub, you can notice that the SVG text elements settings are not imported, because the SVG text elements have different attributes and values that do not align with the PowerPoint text alignments. To troubleshoot this issue, you must manually select the alignment options in the SVG editor tool settings. Following is the example with text alignment applied.
<svg width="1741" height="903"
    xmlns="http://www.w3.org/2000/svg"
    xmlns:svg="http://www.w3.org/2000/svg" xml:space="preserve">
    <defs>
        <clipPath id="clip0">
            <rect height="903" id="svg_1" width="1741" x="0" y="0"/>
        </clipPath>
    </defs>
    <g class="layer">
        <title>Layer 1</title>
        <g clip-path="url(#clip0)" id="svg_2">
            <text font-family="Arial,Arial_MSFontService,sans-serif" font-size="83" font-weight="400" id="svg_3_0" text-anchor="start" transform="matrix(1 0 0 1 0 0) matrix(1 0 0 1 317.751 383)" x="-268" y="-277">Left Aligned Text</text>
            <text font-family="Arial,Arial_MSFontService,sans-serif" font-size="83" font-weight="400" id="svg_3_1" text-anchor="end" transform="matrix(1 0 0 1 0 0) matrix(1 0 0 1 317.751 383)" x="699.08" y="57">Right Aligned Text</text>
            <text font-family="Arial,Arial_MSFontService,sans-serif" font-size="83" font-weight="400" id="svg_3_2" text-anchor="middle" transform="matrix(1 0 0 1 317.751 383)" x="188.25" y="451">Center Aligned Text</text>
        </g>
    </g>
</svg>
When you try to import multiple SVG files from PowerPoint to SVG Editor tool in Operations Hub, you will notice that the SVG elements with the same IDs from SVG files may overlap and thus create the problem while styling or scripting the SVGs. As a reason, you will not be able to transfer the SVGs between PowerPoint and SVG editor. Also, the animation and other graphic settings will be lost. You will also notice the items defined in the definition section such as clip path in the above example should be manually renamed such that each element will possess unique name (Example: element number 1, element number 2, and so on). If the SVG elements do not have unique IDs, the elements in the SVG graphic may not be generated accurately, that is, anything outside the clip path will be invisible or certain area will be clipped off from the view in the page builder and in end app. To troubleshoot this issue, you must rename the SVG element IDs with unique IDs, following is the example to rename the IDs.
<svg width="1741" height="903"
    xmlns="http://www.w3.org/2000/svg"
    xmlns:svg="http://www.w3.org/2000/svg" xml:space="preserve">
    <defs>
        <clipPath id="clip0_graphic1234">
            <rect height="903" id="svg_1" width="1741" x="0" y="0"/>
        </clipPath>
    </defs>
    <g class="layer">
        <title>Layer 1</title>
        <g clip-path="url(# clip0_graphic1234)" id="svg_2">
            <text font-family="Arial,Arial_MSFontService,sans-serif" font-size="83" font-weight="400" id="svg_3_0" text-anchor="start" transform="matrix(1 0 0 1 0 0) matrix(1 0 0 1 317.751 383)" x="-268" y="-277">Left Aligned Text</text>
            <text font-family="Arial,Arial_MSFontService,sans-serif" font-size="83" font-weight="400" id="svg_3_1" text-anchor="end" transform="matrix(1 0 0 1 0 0) matrix(1 0 0 1 317.751 383)" x="699.08" y="57">Right Aligned Text</text>
            <text font-family="Arial,Arial_MSFontService,sans-serif" font-size="83" font-weight="400" id="svg_3_2" text-anchor="middle" transform="matrix(1 0 0 1 317.751 383)" x="188.25" y="451">Center Aligned Text</text>
        </g>
    </g>
</svg>
When you create SVG graphics using Adobe Illustrator and when you try to import the SVG graphics to SVG editor tool in Operations Hub, the animations may not work correctly. This is because the Adobe Illustrator uses classes to apply styles and SVG editor tool uses attributes, the classes applied by the illustrator override the attributes in SVG code when imported. As a result, the animations will not work correctly or, do not appear when viewed in a browser. To troubleshoot this issue, you must edit the SVG code to manually remove the conflicting classes and apply the styles using the attributes as indicated in the following example.
<?xml version="1.0" encoding="UTF-8"?>
<svg id="Layer_1" data-name="Layer 1"
    xmlns="http://www.w3.org/2000/svg" viewBox="0 0 253.76 402.25">
    <defs>
        <style>
      .cls-1 {
        fill: #a7a9ac;
      }

      .cls-2 {
        fill: #6d6e71;
      }

      .cls-3 {
        fill: #808285;
      }
    </style>
    </defs>
    <g id="Mixer">
        <rect class="cls-1" y="187.12" width="253.76" height="97.85"/>
        <polyline class="cls-1" points="0 295.04 85.88 369.23 167.01 369.23 253.27 295.04"/>
        <path class="cls-1" d="M0,178.12c21.51-10.5,63.49-27.5,118.96-27.96,60.69-.5,113.17,16.93,134.8,27.96"/>
        <rect class="cls-1" x="101.61" y="376.45" width="50.54" height="25.81"/>
    </g>
    <g id="Motor">
        <rect class="cls-2" x="118.82" y="94.65" width="11.56" height="54.83"/>
        <g>
            <g>
                <rect class="cls-3" x="100.54" y="83.36" width="48.39" height="11.29"/>
                <path class="cls-3" d="M98.85,13.03c1.25-1.59,10.05-12.4,25.27-13,16.82-.67,26.94,11.71,27.96,13"/>
                <rect class="cls-3" x="163.44" y="19.38" width="5.38" height="63.98"/>
                <rect class="cls-3" x="154.84" y="26.37" width="11.29" height="50.54"/>
                <rect class="cls-3" x="94.62" y="19.38" width="60.22" height="63.98"/>
            </g>
            <g>
                <rect class="cls-1" x="101.75" y="24.99" width="5.99" height="52.69"/>
                <rect class="cls-1" x="111.42" y="24.99" width="7.3" height="52.69"/>
                <rect class="cls-1" x="122.72" y="24.99" width="5.99" height="52.69"/>
                <rect class="cls-1" x="132.04" y="24.99" width="5.99" height="52.69"/>
                <rect class="cls-1" x="142.03" y="24.99" width="5.99" height="52.69"/>
            </g>
        </g>
    </g>
</svg>
<svg width="253.76" height="402.25"
    xmlns="http://www.w3.org/2000/svg"
    xmlns:svg="http://www.w3.org/2000/svg" data-name="Layer 1">
    <g class="layer">
        <title>Layer 1</title>
        <g id="Mixer">
            <rect fill="#a7a9ac" height="97.85" id="svg_1" width="253.76" y="187.12"/>
            <polyline fill="#a7a9ac" id="svg_2" points="0 295.04 85.88 369.23 167.01 369.23 253.27 295.04"/>
            <path d="m0,178.12c21.51,-10.5 63.49,-27.5 118.96,-27.96c60.69,-0.5 113.17,16.93 134.8,27.96" fill="#a7a9ac" id="svg_3"/>
            <rect fill="#a7a9ac" height="25.81" id="svg_4" width="50.54" x="101.61" y="376.45"/>
        </g>
        <g id="Motor">
            <rect fill="#6d6e71" height="54.83" id="svg_5" width="11.56" x="118.82" y="94.65"/>
            <g id="svg_6">
                <g id="svg_7">
                    <rect fill="#808285" height="11.29" id="svg_8" width="48.39" x="100.54" y="83.36"/>
                    <path d="m98.85,13.03c1.25,-1.59 10.05,-12.4 25.27,-13c16.82,-0.67 26.94,11.71 27.96,13" fill="#808285" id="svg_9"/>
                    <rect fill="#808285" height="63.98" id="svg_10" width="5.38" x="163.44" y="19.38"/>
                    <rect fill="#808285" height="50.54" id="svg_11" width="11.29" x="154.84" y="26.37"/>
                    <rect fill="#808285" height="63.98" id="svg_12" width="60.22" x="94.62" y="19.38"/>
                </g>
                <g id="svg_13">
                    <rect fill="#a7a9ac" height="52.69" id="svg_14" width="5.99" x="101.75" y="24.99"/>
                    <rect fill="#a7a9ac" height="52.69" id="svg_15" width="7.3" x="111.42" y="24.99"/>
                    <rect fill="#a7a9ac" height="52.69" id="svg_16" width="5.99" x="122.72" y="24.99"/>
                    <rect fill="#a7a9ac" height="52.69" id="svg_17" width="5.99" x="132.04" y="24.99"/>
                    <rect fill="#a7a9ac" height="52.69" id="svg_18" width="5.99" x="142.03" y="24.99"/>
                </g>
            </g>
        </g>
    </g>
</svg>
iFIX
iFIX supports exporting SVG files, and you can import the SVG files into SVG Editor tool in Operations Hub. When you import an iFIX generated SVG file into the Operations Hub SVG Editor tool, some of the elements from iFIX will not be supported (scripts, animations, data binding) or, not translated in SVG editor tool within Operations Hub.
When you import the iFIX SVG file into the SVG editor tool in Operations Hub, you may notice text distortion issues due to tool tip elements in iFIX SVG file may not be compatible or supported in SVG editor tool within Operations Hub. To troubleshoot this issue, you must manually remove the tool tip elements from the original text in the SVG file.
<tooltipOption>TooltipDescription</tooltipOption>When you import the iFIX SVG file into the SVG editor tool in Operations Hub, you may notice that the referenced images in the SVG file may not display correctly or appear with broken icon image. This is because the referenced image file path is not accessible, or the image file path is not relative to the location of the SVG file. To troubleshoot this issue, you must import each SVG image separately using the SVG editor toolbar.