
Input
The input widget is a graphical user interface element that contains a text box.
The input widget differs from a standard text box in that its purpose is to allow the end user to insert information into a database.
Properties
| Field Name | Description |
|---|---|
| Type | There are several options for the type of data that can be added
via an input widget. Depending on the data type set, the system will
automatically validate and confirm specific data sets. For example,
while a Text type can be anything written in the input, an email address
may have specific requirements such as the use of an at sign character
(@). If the data type is set for email, the user must include an at sign
character (@). If not, an error message appears. The following options
are available:
Note: This DateTime output is not compatible with Historian
queries. Use Date Picker
instead. |
| Target Data | Check boxes can alter information in an entity via a query. Target Data indicates where this information will change and how depending on which query inputs are attached. |
| Source | The data source can be selected based on which queries have been added in the Page Data section. It is also possible to manually insert the data source or to use a formula. |
| Required | Specify if an input must be sent to the query. |
| Disabled | If selected, the data input is not allowed. |
Possible Uses
The input has a wide variety of uses. One basic example is that of a login or registration form. Such a form requires specific information to be stored in a database including data such as an email address, name, birthday, password, and other information. The input allows an end user to enter information in various forms in to a database.
In this example, we will create a simple input form using an entity and a query.
- Add two input widgets to a page for address and name.
- Add a button to indicate to add the information entered by the input widgets.
- Create an entity named Wiki Form, and add the following entity fields: ADDR and NAME (data type: string).
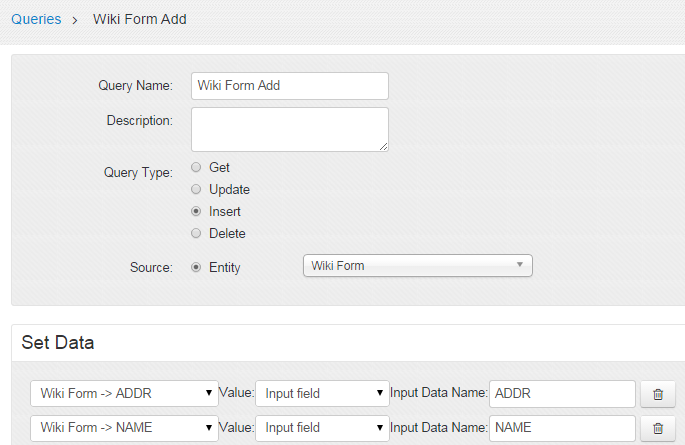
- Create an Insert query named Wiki Form Add to insert data into the entity, as shown in the following image.
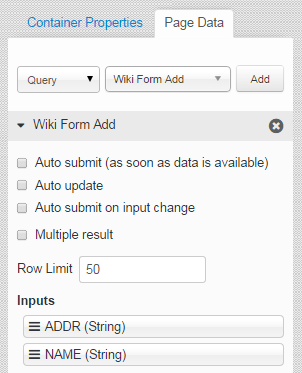
- Add the query to the application in the Data Page section, as shown in the following image.
- Drag and drop the query input fields to the connect them to the input widgets.
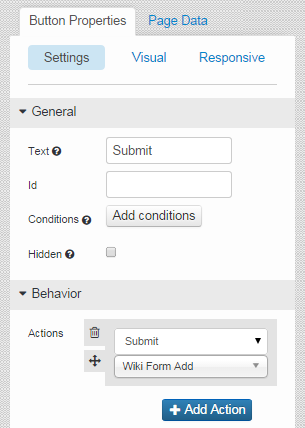
- In the Button Properties section for the button widget, specify the action to execute the insert query, as shown in the following image.
- Save the application, and preview it.
In the application, when you enter values and submit, the information is stored in the entity.