Manage the Customization of Individual Metadata String Translations
About the Localize <Strings> Window
The ![]() button appears throughout the Predix Essentials. This button typically appears to the right side of text boxes in which you will type the string that you want to translate. The string that is displayed in that text box will always be the default string (that is, the language in which it will appear). If you see this button, you can translate that string. This button provide access to the Localize <Strings> window.
button appears throughout the Predix Essentials. This button typically appears to the right side of text boxes in which you will type the string that you want to translate. The string that is displayed in that text box will always be the default string (that is, the language in which it will appear). If you see this button, you can translate that string. This button provide access to the Localize <Strings> window.
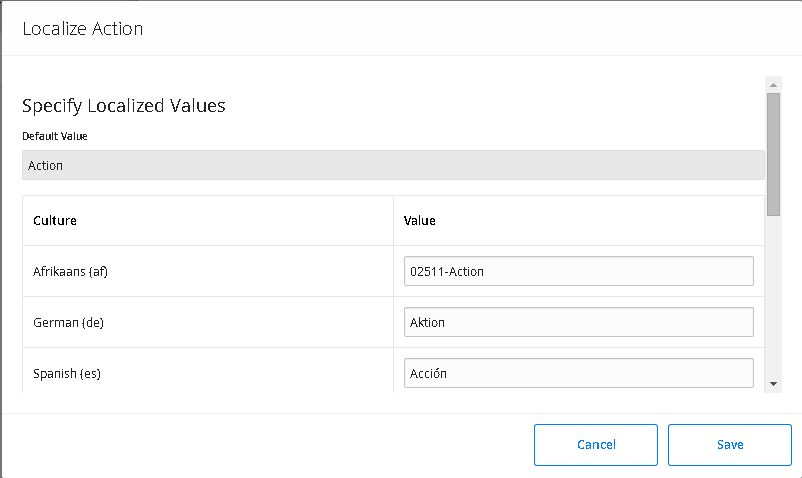
The title bar on the Localize <Strings> window will vary depending on your access point. For example, if you access the Localize <Strings> window from a Caption box for the Action family in the Configuration Manager, the title bar will contain Localize Action, where Action is the caption of the Action family.
- Default Value: A text box that contains the default string that was originally written and for which you can provide translations.
- Culture: Contains the names of the languages whose metadata string translation file (custom or baseline) contains a translation for the default string. Each Culture cell contains a list of all the languages that are available in the Predix Essentials system. You can select from this list the name of the language into which you want to translate the default string.
- Value: Contains the translated string for the language that appears in the Culture cell in that row. This value is determined by the string that exists in either the custom or baseline metadata string translation files that are stored in the Predix Essentials. You can enter a value directly in the Value cell. The combination of the translated string in the Value cell and the language specified in the Culture cell in that row make up the translation for the default string.
Access the Localize <Strings> Window
Procedure
Add New Translations for Strings
About This Task
The following instructions provide details on creating a new translation for a string using the Localize <Strings> window. A new translation for a string is one that does not exist in a metadata string translation file.
After you add a new translation for a string in this way, the Predix Essentials system will use your translation throughout Predix Essentials.
Procedure
Modify Existing Translations for Strings
About This Task
An existing translation for a string is one that is currently stored in a metadata string translation file that exists in the Predix Essentials. If you modify a translation that is stored in the baseline metadata string translation file, a custom metadata string translation file for that language will be updated automatically, or created automatically (if a translation file does not yet exist).
The following instructions provide details on using the Localize <String> window to modify an existing translation for a string that appears in the Predix Essentials.
After you modify an existing translation for a string, Predix Essentials system will use your translation throughout the application.