Configure Identity Provider (IDP) on Active Directory
About Configuring Identity Provider (IDP) on Active Directory
About This Task
You must configure IDP on Active Directory using the Active Directory Federation System (AD FS) Management Console.
Note: The strings and the URLs in AD FS are case-sensitive.
To configure IDP on Active Directory, you must perform the following tasks:
Procedure
Add Relying Party Trusts
Before You Begin
- You must have administrative privileges to configure AD FS.
- Ensure that the /adfs/Is endpoint exists for SAML v2.0.Note: To add adfs/ls endpoint, refer to the AD FS documentation.
- Ensure that the token encrypting certificates exist.
Procedure
- Select AD FS Management.The AD FS window appears.
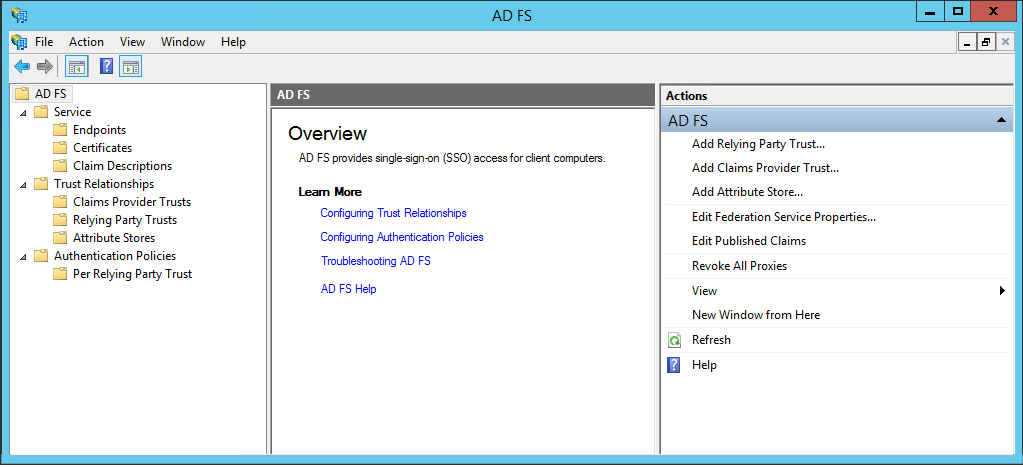
- In the Actions section, select Add Relying Party
Trust.The Add Relying Party Trust Wizard appears.
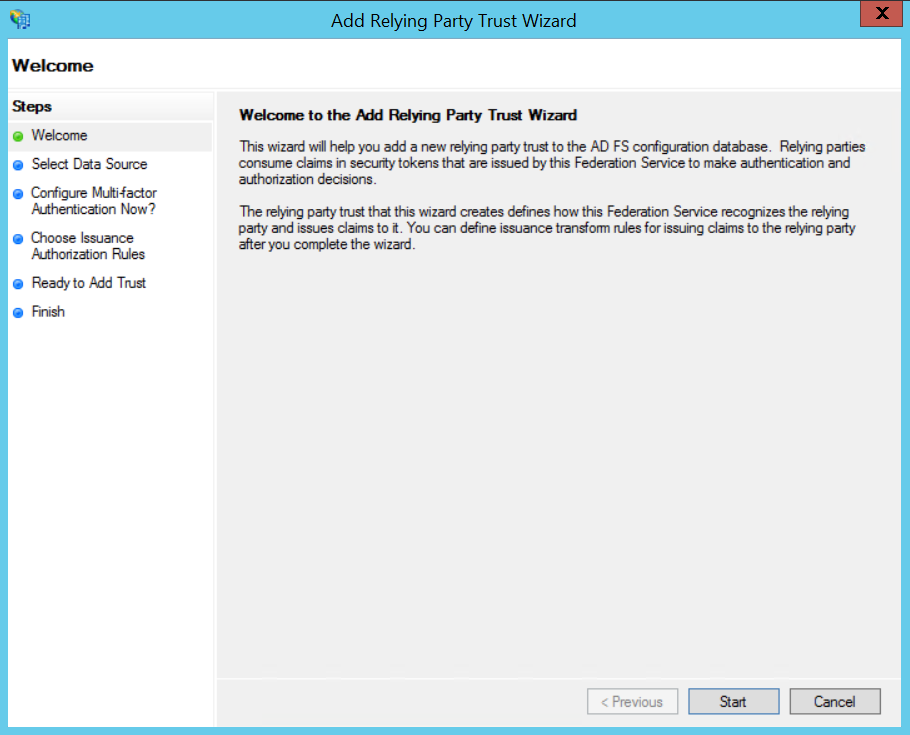
- Select Start.The Select Data Source page appears.
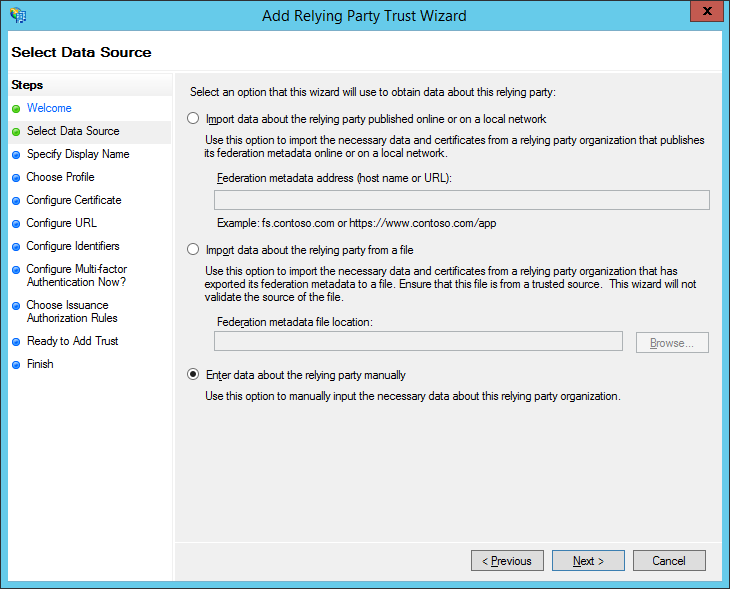
- Select Enter data about relying party manually, and then
select Next.The Specify Display Name page appears.
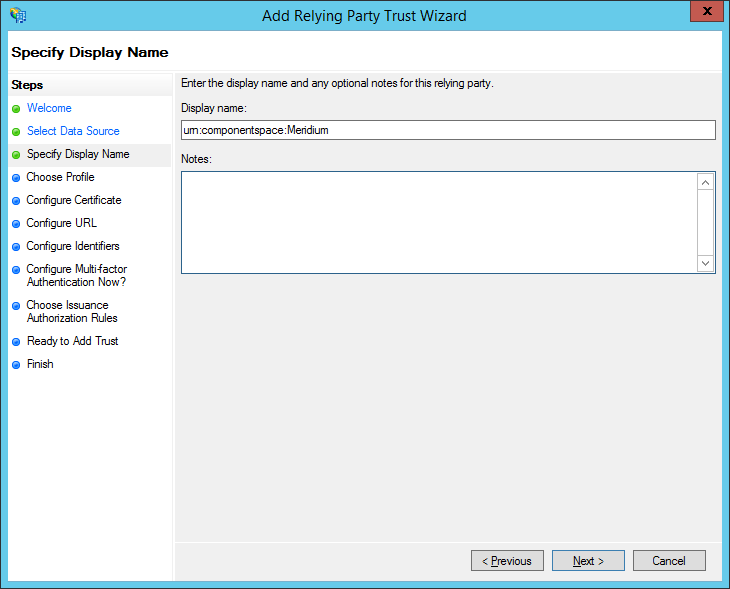
- In the Display name box, enter
urn:componentspace:Meridium, and then select
Next.The Choose Profile page appears.
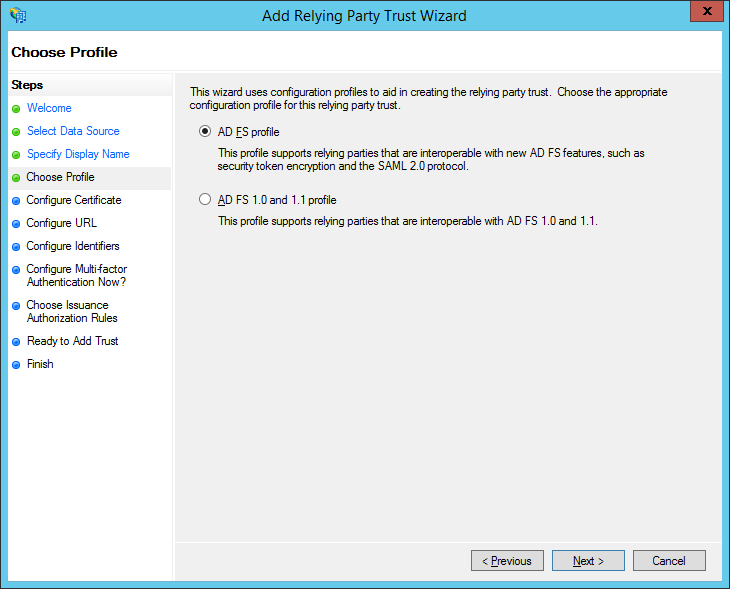
- Select the AD FS profile option, and then select
Next.The Configure Certificate page appears.
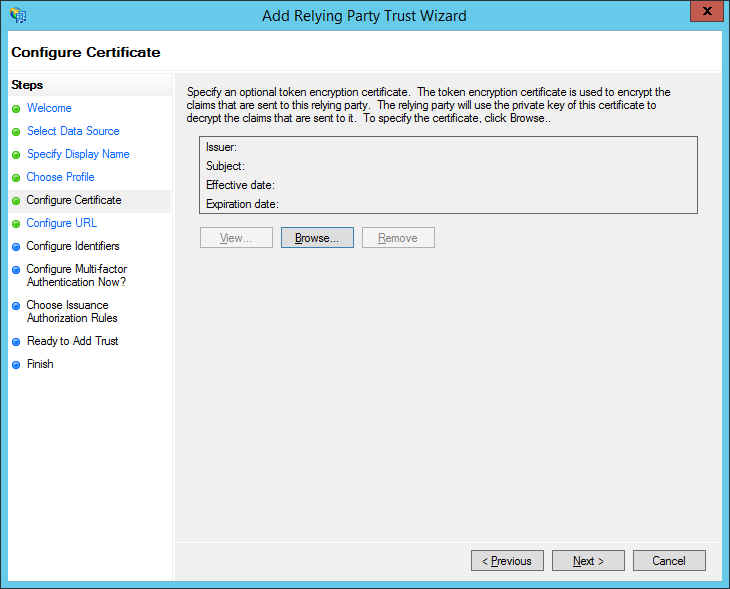
- Select Next.The Configure URL page appears.
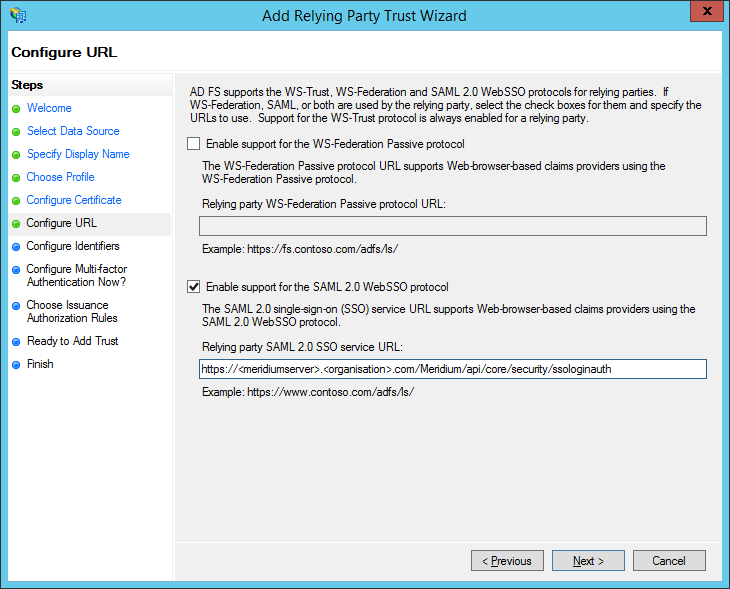
- In the Relying Party SAML 2.0 SSO service URL box,
enterhttps://<name of the GE Digital APM
server>/Meridium/api/core/security/ssologinauth , and then
select Next.Note: The word Meridium is case-sensitive. Therefore, ensure that the first letter of the word is capitalized. Also, the URL must be same as the URL in the saml.config file.The Configure Identifiers page appears.
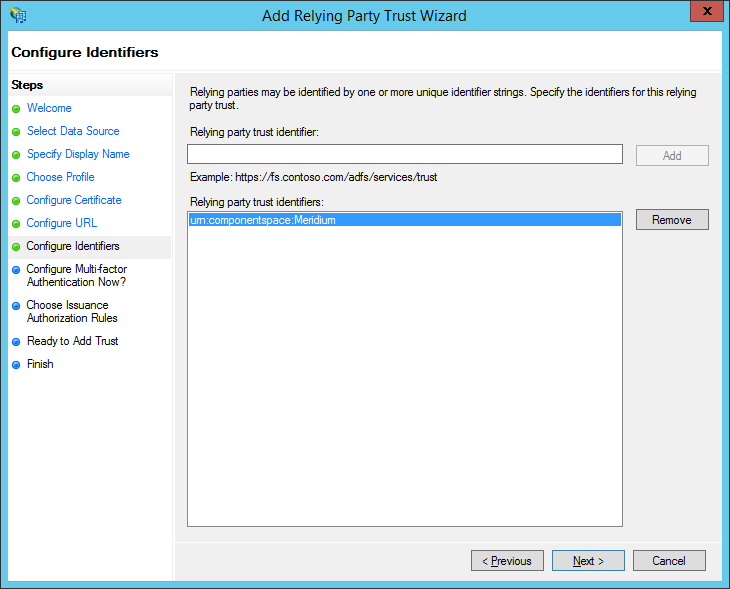
- In the Relying party trust identifier box, enter
urn:componentspace:Meridium, then select
Add, and then select Next.The Configure Multi-factor Authentication Now page appears.
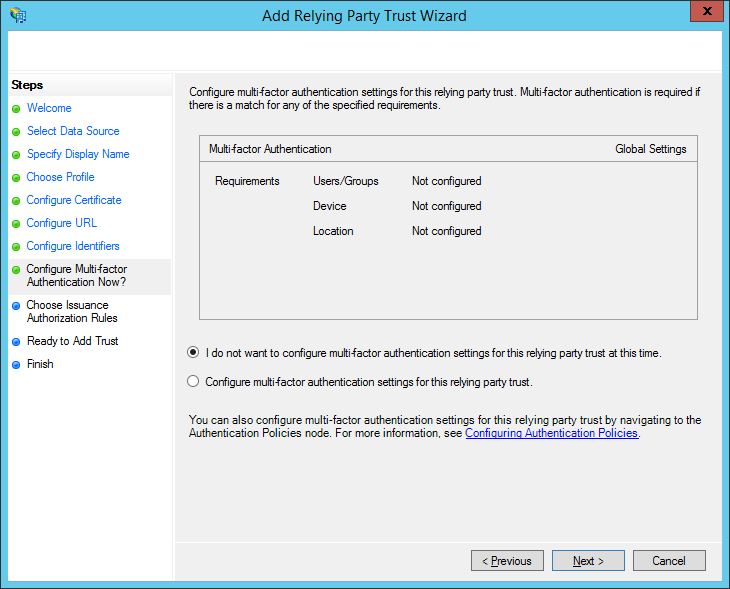
- Select I do not want to configure multi-factor authentication settings
for this relying party trust at this time, and then select
Next.The Choose Issuance Authorization Rules page appears.
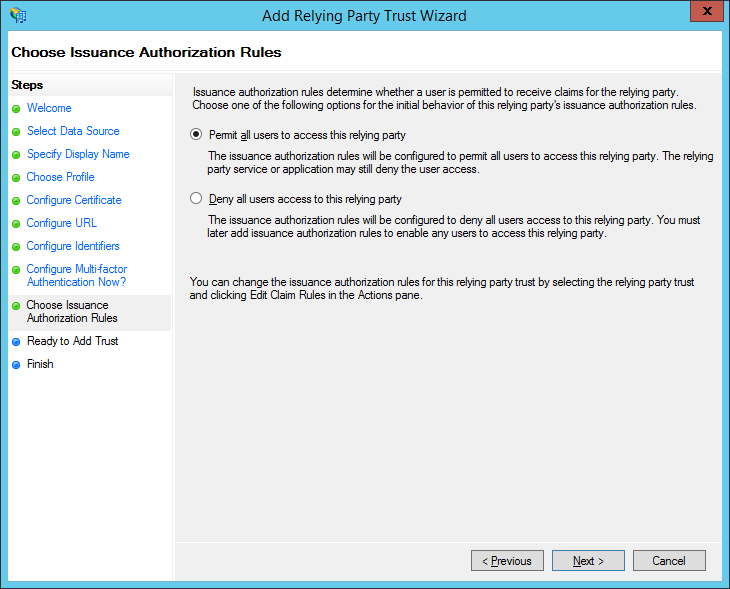
- Select Permit all users to access this relying party, and
then select Next.The Ready to Add Trust page appears.
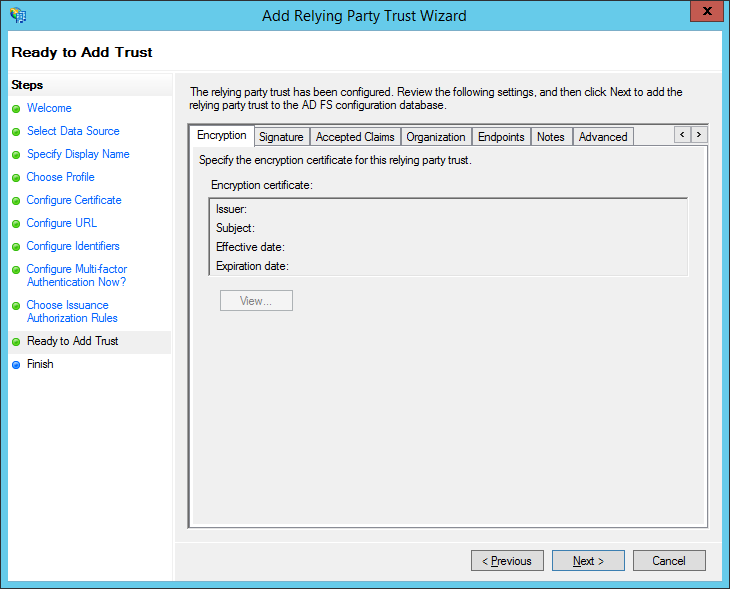
- Select Next.The Finish page appears.
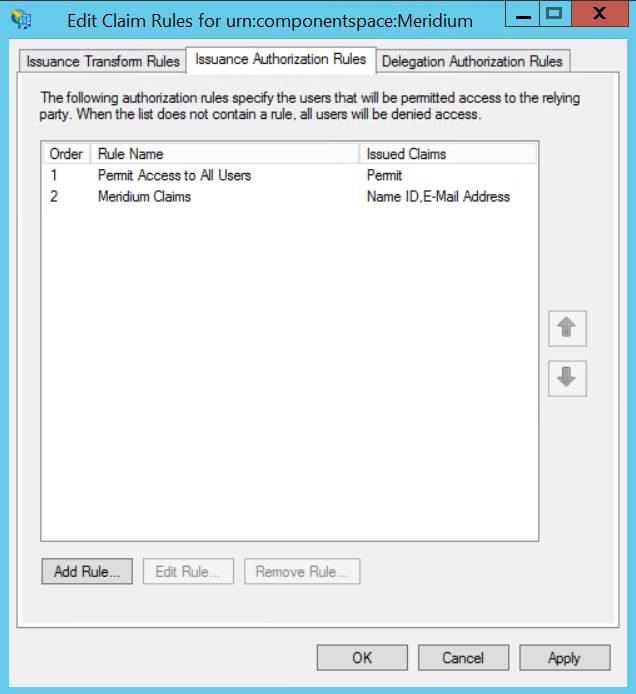
Add Claim Rules
Procedure
- In the AD FS window, expand the Trust Relationships
folder, and then select Relying Party
Trusts.The Relying Party Trusts page appears.
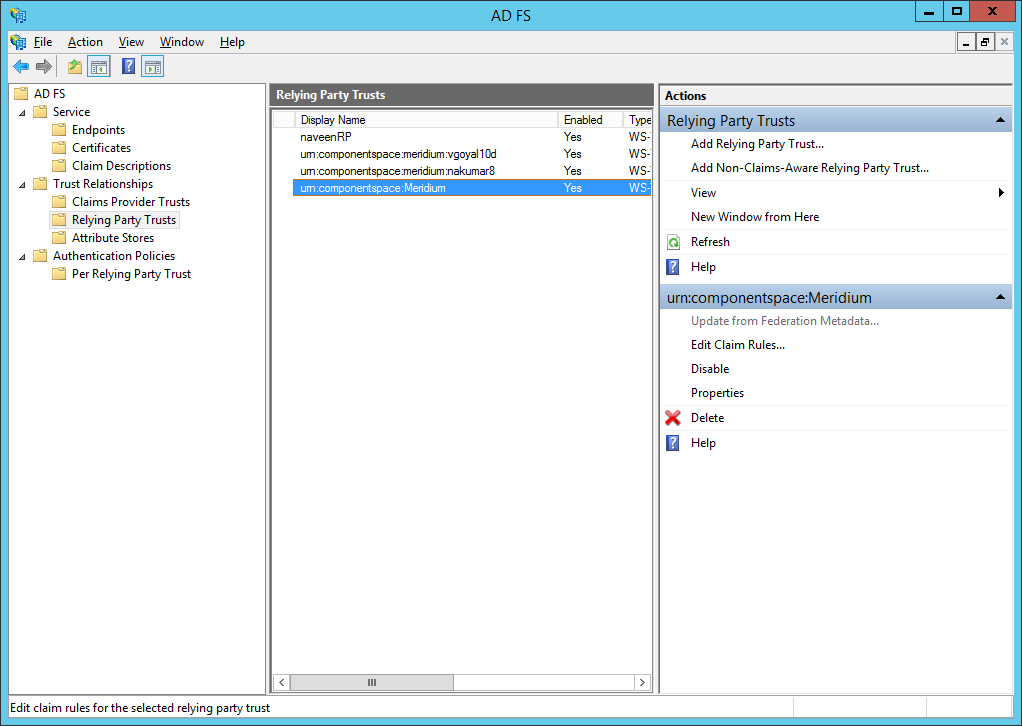
- Select urn:componentspace:Meridium, and then, in the
Actions section, select Edit Claim
Rules.The Edit Claim Rules for urn:componentspace:Meridium window appears.
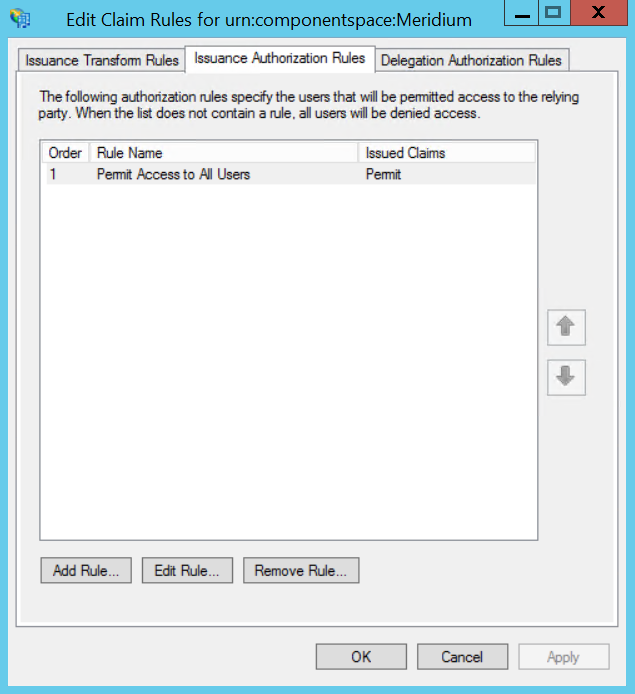
- Select the Issuance Transform Rules tab, and then select
Add Rules.The Add Issuance Authorization Claim Rule Wizard appears.
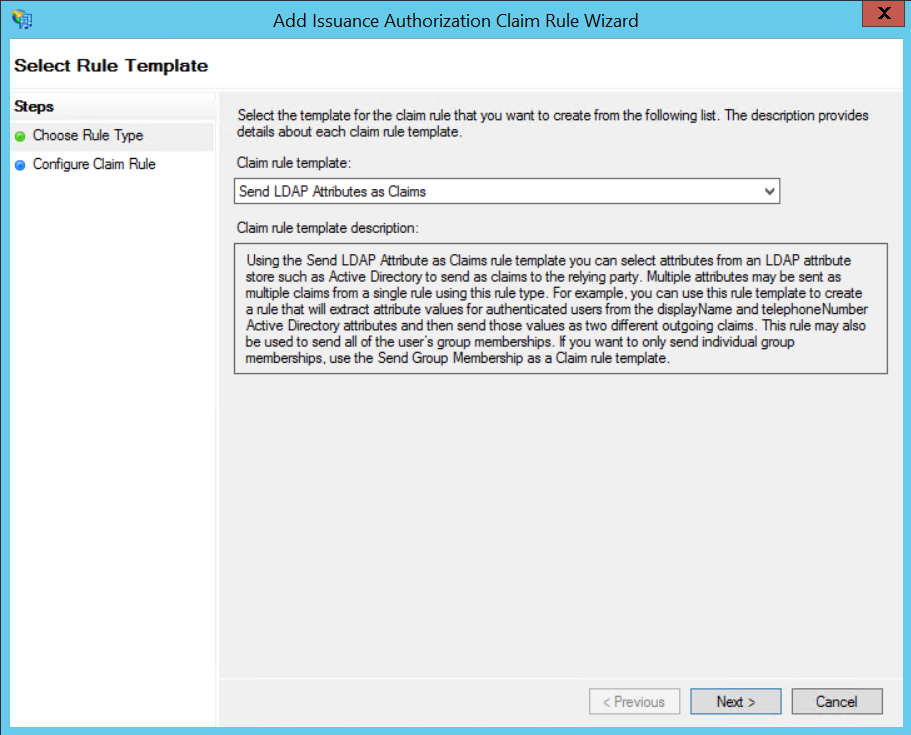
- In the Claim Rule Template drop-down list box, select
Send LDAP Attributes as Claims, and then select
Next.The Configure Rule page appears.
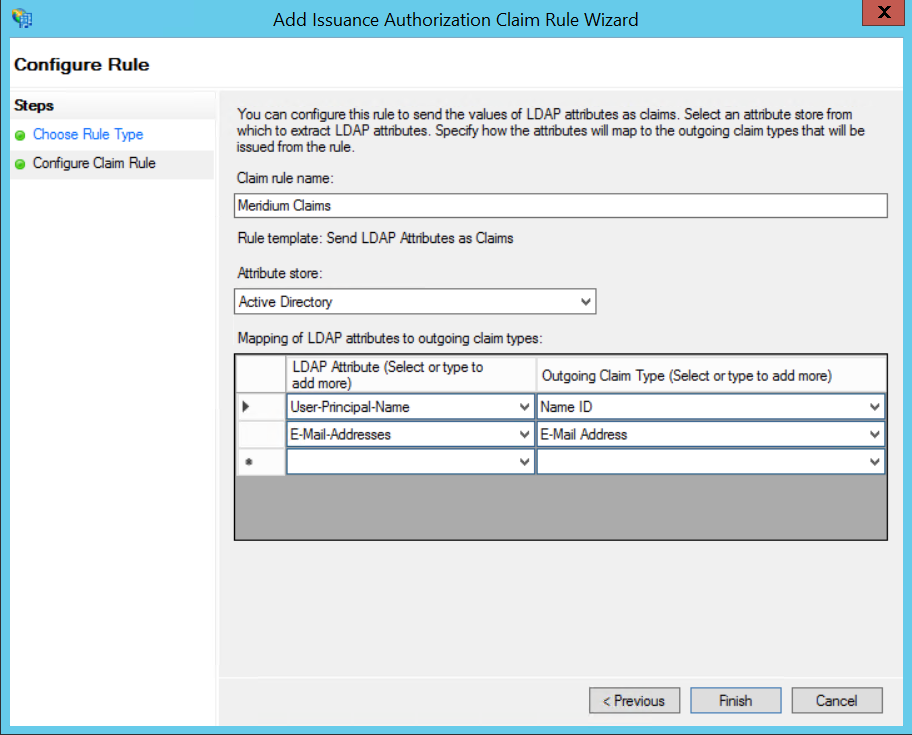
- Select Finish.The Edit Claim Rules for urn:componentspace:Meridium window appears.
Add Certificates
About This Task
Procedure
Install the Public Key Certificate File (sp.pfx)
Procedure
- Right-click sp, and then select Install
PFX.The Certificate Import Wizard appears.
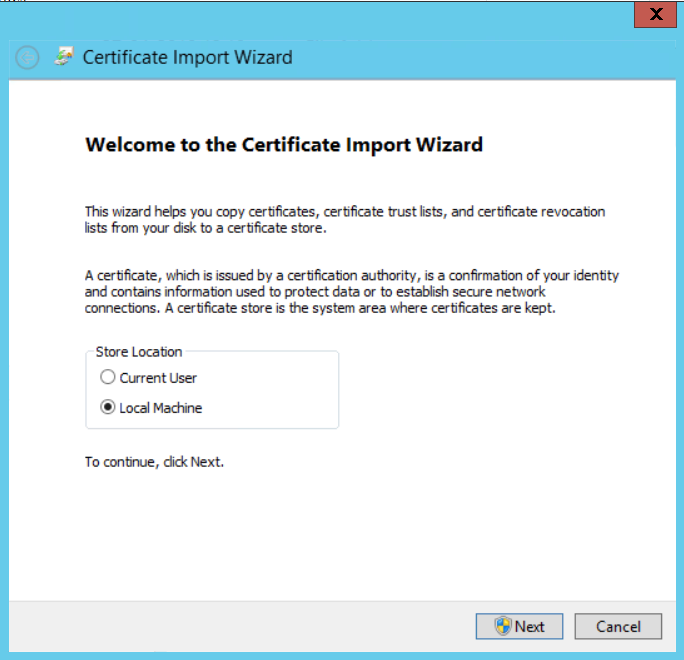
- Select Local Machine, and then select
Next.The User Account Control window appears.
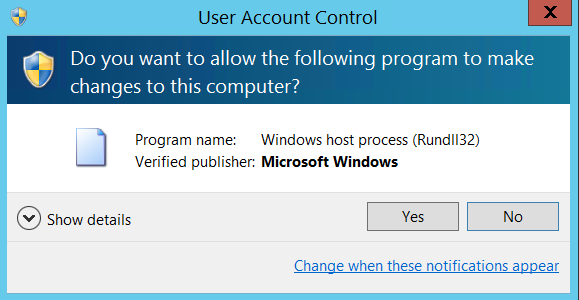
- Select Yes.The Certificate Import Wizard appears, and the File Name box displays the file path where the certificate is located.
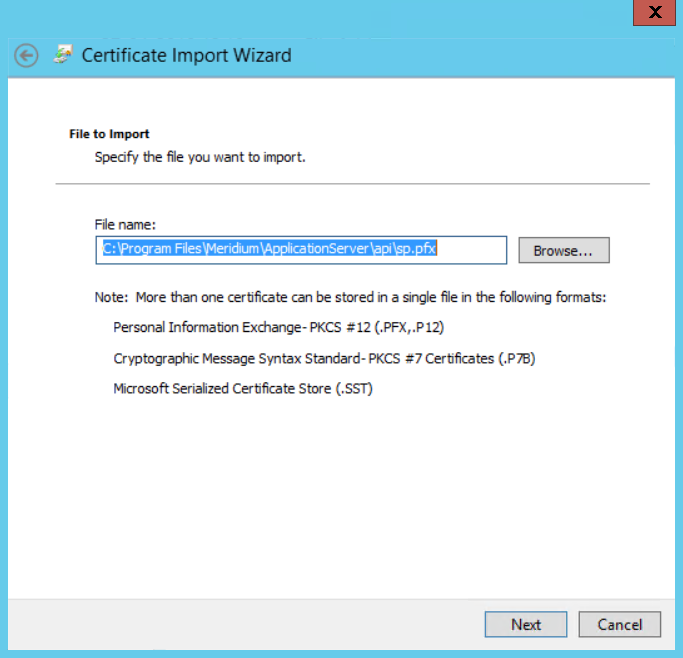
- Select Next.
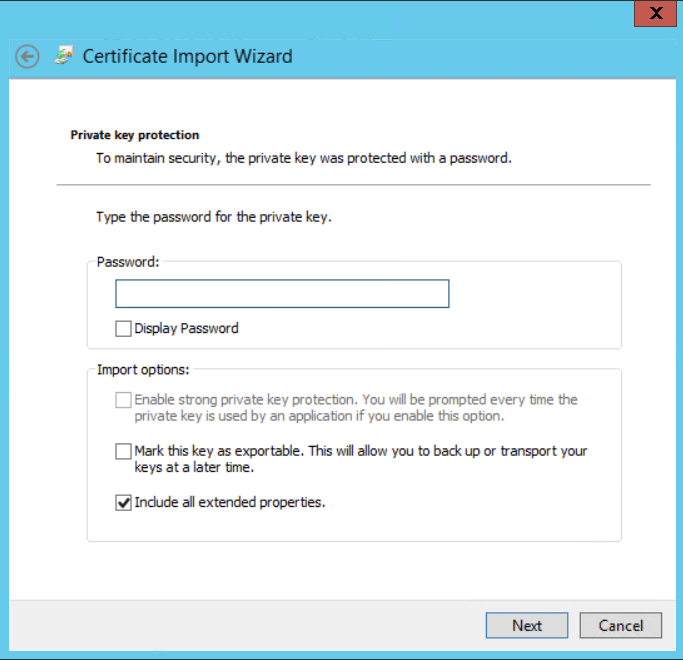
- Enter a password, and then select Next.

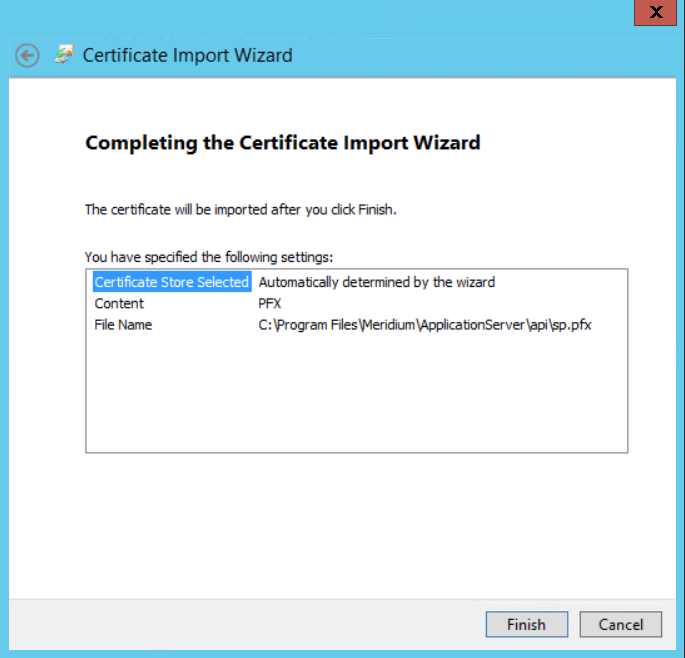
- Select Automatically select the certificate store based on the type of
certificate.The Completing the Certificate Import Wizard appears.
Export the Certificate
Procedure
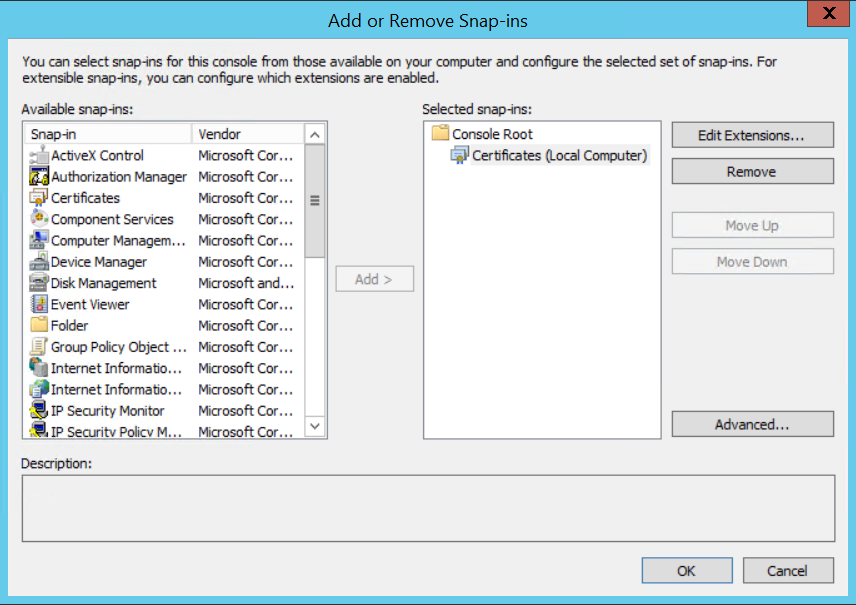
- In the main navigation bar, select File, then select
Add/Remove Snap-in, and then select
Certificates.The Add or Remove Snap-ins window appears.
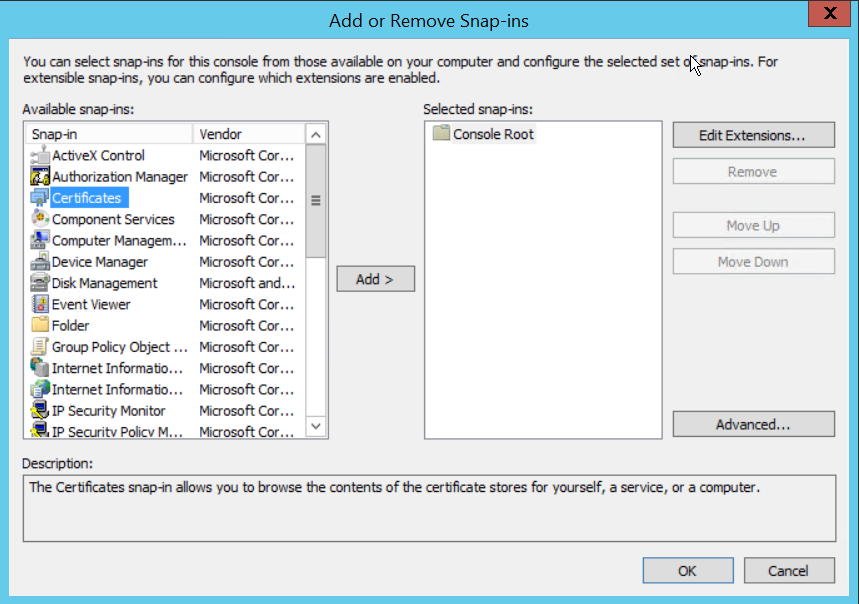
- Select Add.The Certificates snap-in window appears.
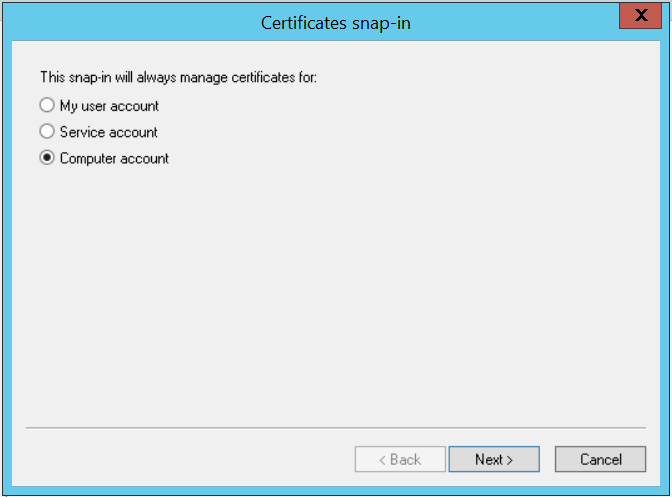
- Select the Computer account option, and then select
Next.The Select Computer window appears.
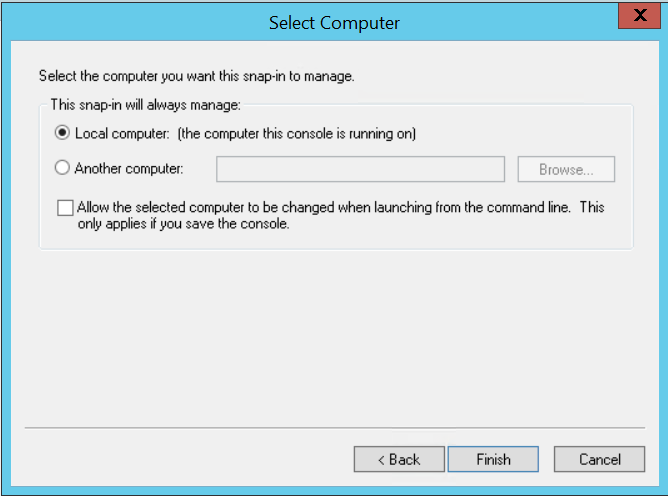
- Select the Local computer option, and then select
Finish.
- Select Certificates (Local Computer), then select
Personal, and then select
Certificates.
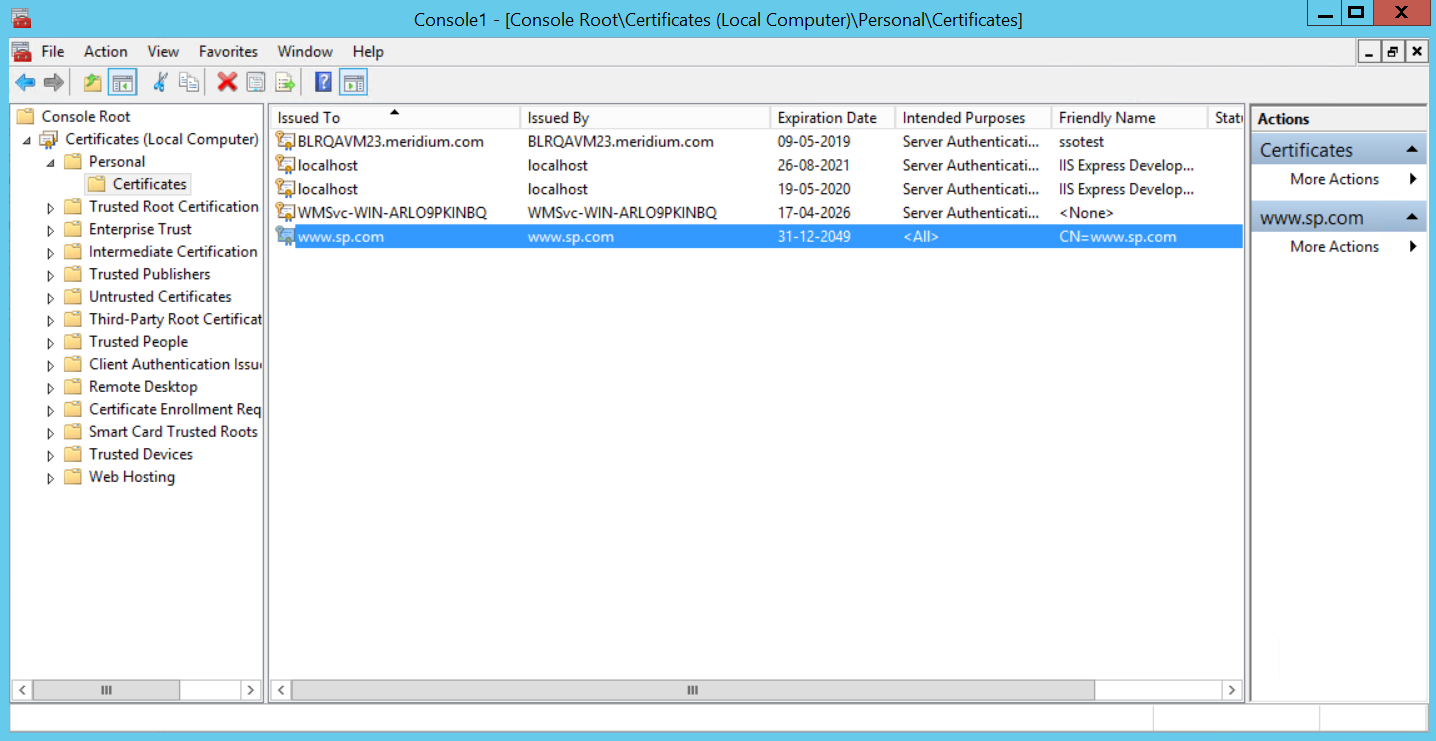
- Right-click the certificate that you have installed, select All
Tasks, and then select Export.The Certificate Export Wizard appears.

- Select Next.
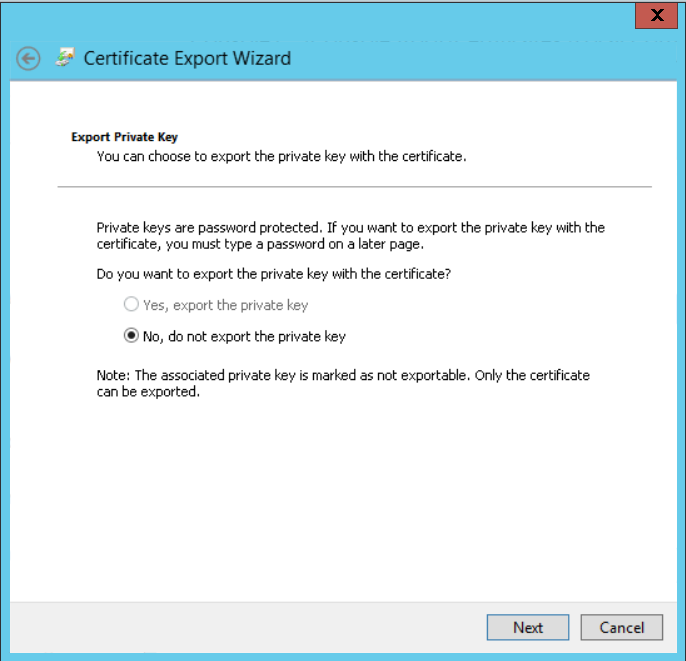
- Select the No, do not export the private key option, and
then select Next.
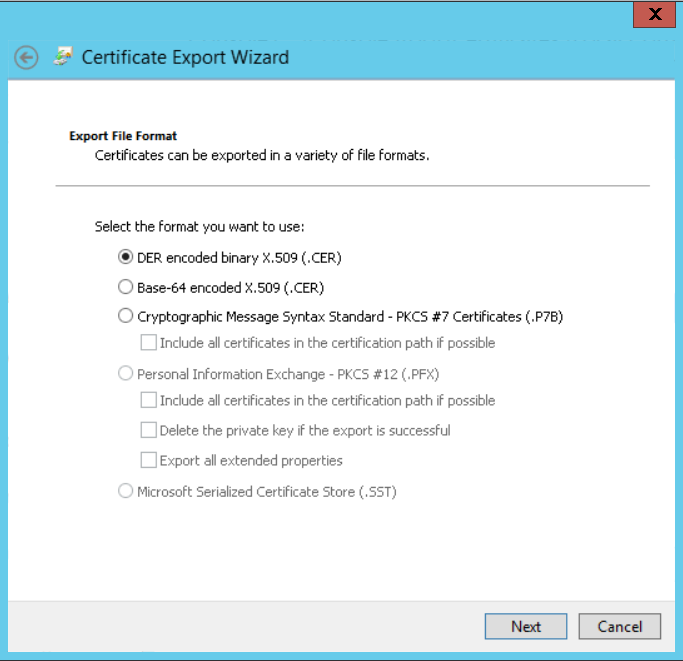
- Select DER encoded binary X.509 (.CER), and then select
Next.
Copy the Certificate to Active Directory
Procedure
- Select AD FS Management.The AD FS window appears.
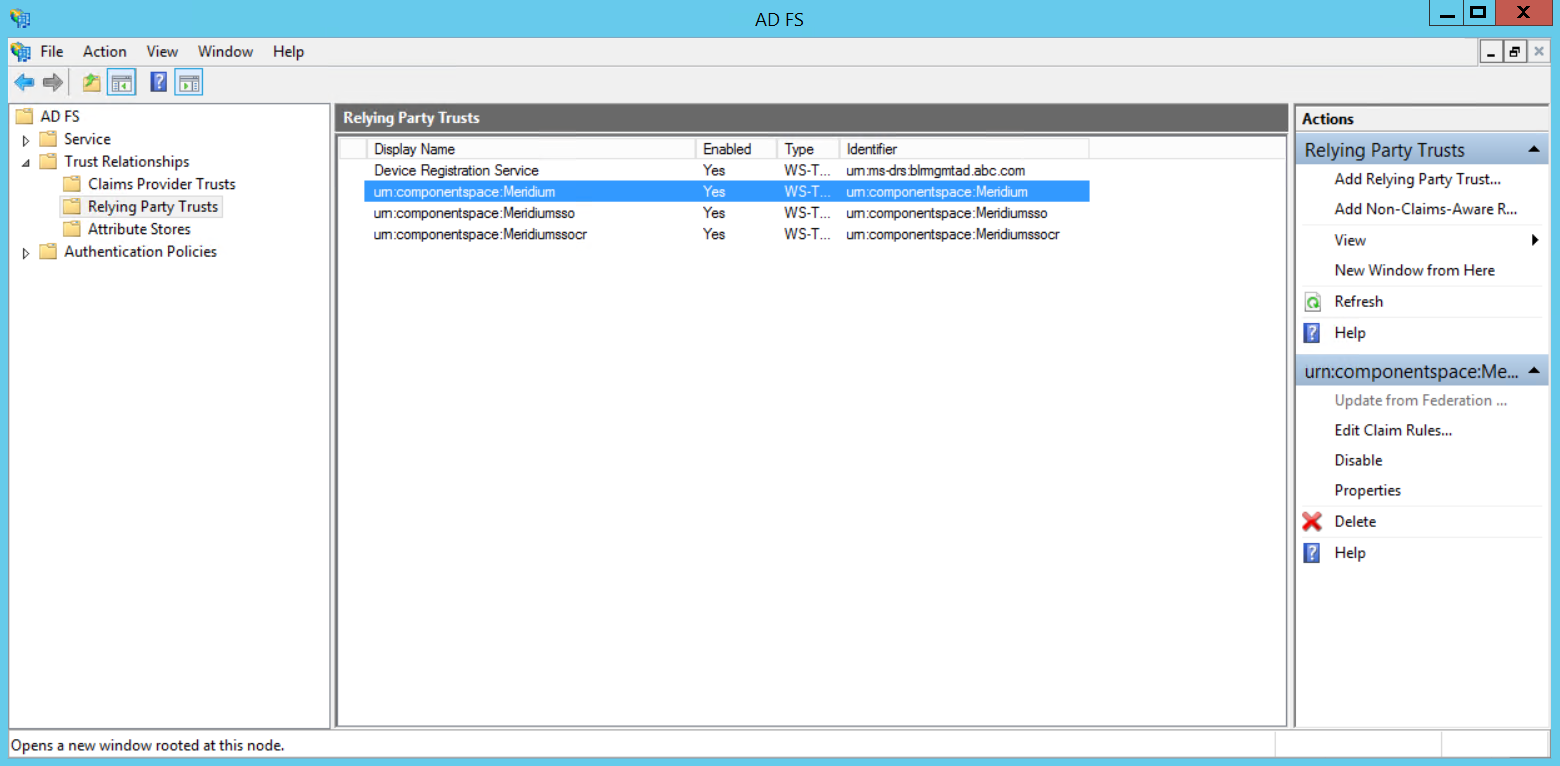
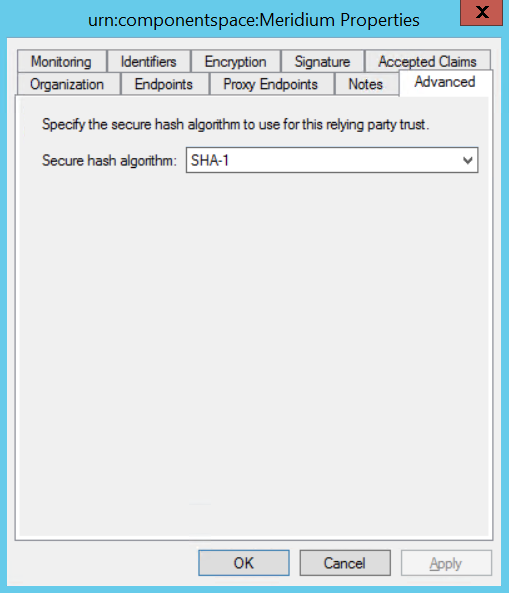
- Select urn:componentspace:Meridium, and then, in the
Actions section, select
Properties.The urn:componentspace:Meridium Properties window appears.
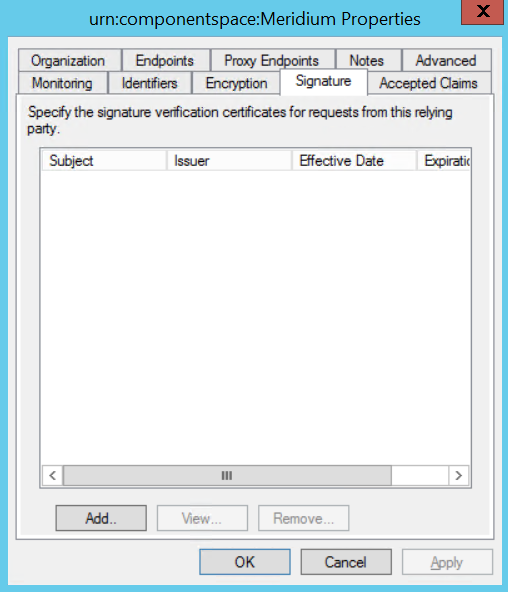
- In the Secure hash algorithm drop-down list box, based on
the policy of your organization, select SHA-1 or
SHA-256.
Install the Token Signing idp.cer Certificate on the Application Server
Procedure
- Right-click the file, and then select Install
Certificate.The Certificate Import wizard appears.
- Select Local Machine, and then select
Next.