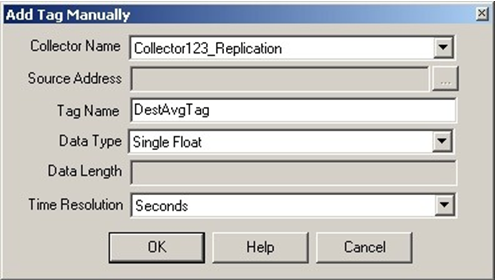
This adds the tag to the Historian Database with the properties you specified and returns you to the
Tag Maintenance screen.
Important: If you manually add a Server-to-Server tag, ensure that you set the Time Adjustment field for the tag to the Adjust for Source Time Difference option, after you add the tag. The Time Adjustment field is located on the Advanced tab in the Tag Maintenance screen. This field only applies to Server-to-Server tags that use a polled collection type.