 Web HMI
Get Started with CIMPLICITY and GE Web HMI
When using the CIMPLICITY HMI/SCADA system as your data source, follow this quick walkthrough to successfully get data and alarms flowing for the first time into Web HMI.
Note: For detailed integration instructions, see Integrating CIMPLICITY with Web HMI in the CIMPLICITY help.
- Install CIMPLICITY 10 and Web HMI on different servers or on the same server.
- In CIMPLICITY, do the following:
- Check Enable Server (OPC UA), as shown below:
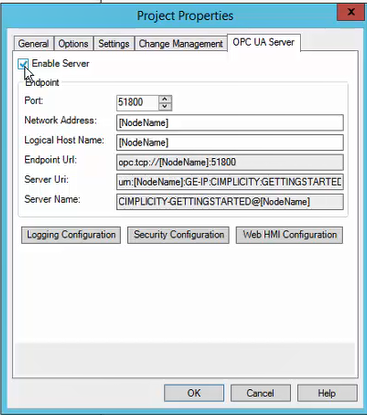
- Check Enable Server (OPC UA), as shown below:
- In the Administration section of Web HMI, do the following:
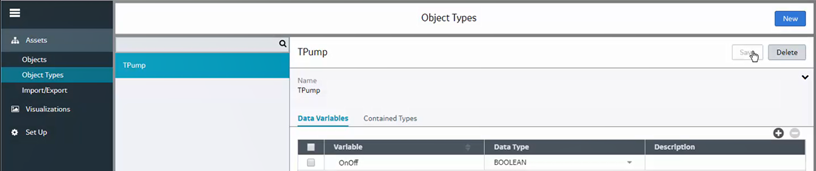
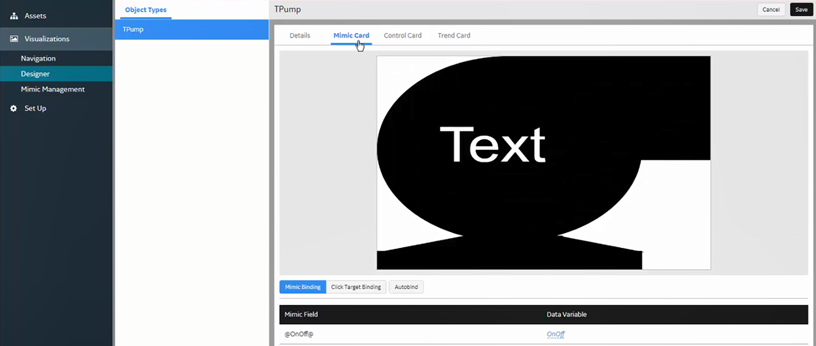
- Define a model by creating a TPump object type with an OnOff variable and a Pump01 object to match the class and object created in CIMPLICITY, as shown below:

- Set up the Web HMI server to CIMPLICITY project connection by selecting Set Up and setting these values on the Server Details Management screen:
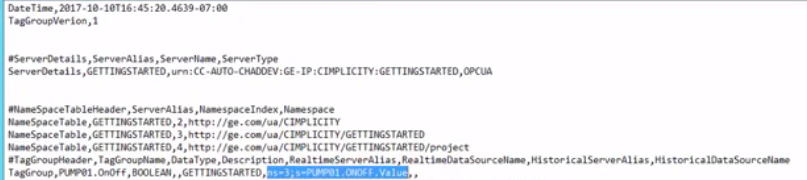
Server Alias CIMPLICITY project name. Server Type OPCUA. Server Name CIMPLICITY Uniform Resource Name (URN) of the server. You find this URN in CIMPLICITY by selecting Export to Web HMI on the Project menu to generate a CSV containing this value. The following shows a sample URN value in the last line:  Note: You can also find the URN on the OPC UA tab of the Project Properties screen.

- Define a model by creating a TPump object type with an OnOff variable and a Pump01 object to match the class and object created in CIMPLICITY, as shown below:
- In CIMPLICITY, do the following:
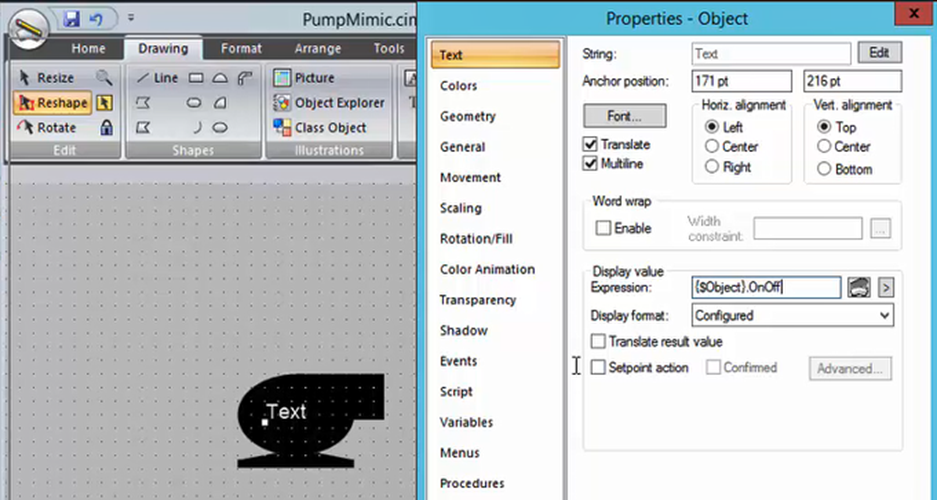
- On Properties, type $Object in the Variable column. CIMPLICITY uses this value to reference the context in the Web HMI model, which is the TPump in this example.
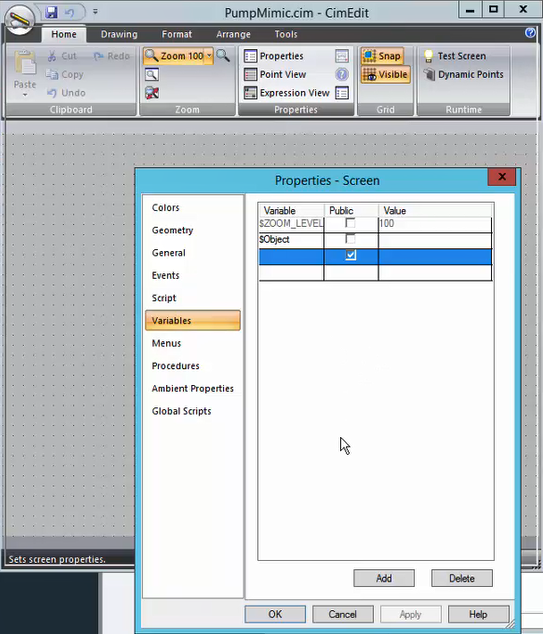
- On Text, type ($Object).OnOff in the Display value Expression field. This value represents the OnOff value on the TPump object type in the Web HMI model.
- Export the mimic into a Web HMI format by selecting Export as Web HMI Mimic:

- On Properties, type $Object in the Variable column. CIMPLICITY uses this value to reference the context in the Web HMI model, which is the TPump in this example.
- In the Administration section of Web HMI, navigate to to do the following:
- Import the mimic:
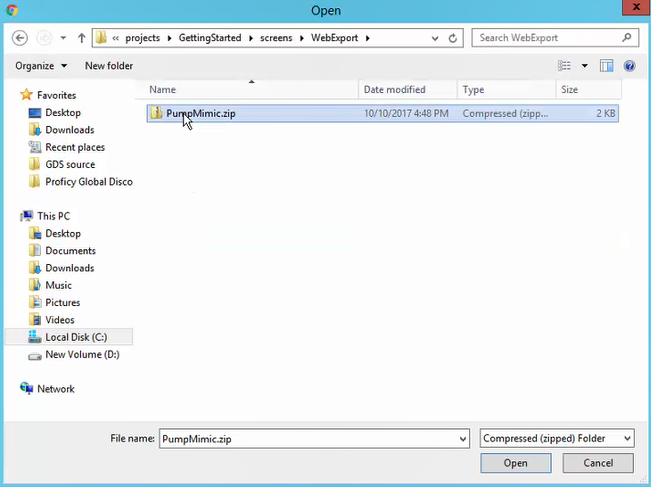
- Import the mimic:
- Click
 on your desktop to open the GE HMI Server Configuration Manager, and click the OPC UA Endpoints tab to do the following:
 - Discover and select an OPC UA endpoint and its security. The following shows a CIMPLICITY endpoint with its available security options found at the w2012r2:51800 URL:
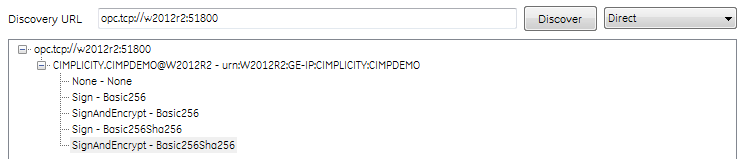
- Discover and select an OPC UA endpoint and its security. The following shows a CIMPLICITY endpoint with its available security options found at the w2012r2:51800 URL:
- In the Runtime section of Web HMI, check to see if data and alarms are appearing in the correct context.