Steps to Install Historian Server
Important: Be aware that Historian data files (C:\Proficy Historian Data) can consume a lot of disk space. Be sure that you have a disk with plenty of space before you start the install. See the Historian 9.1 System Requirements section for details.
Note: Be aware for troubleshooting, by default, that the Historian install logs are copied here: C:\Users\UserName\AppData\Local\Temp\Historian_DateTime\Historian_DateTime.log
- Log in to Windows with Administrator privileges. You must be an Administrator to install Historian Server.
- Double-click the Historian-9.0.4657.0.iso file to open the install media. (Be aware that the file name may change depending on the current version number.)
- From the install media, open the Historian installation screen by right-clicking the InstallLauncher.exe file and selecting Run as Administrator. A message may appear with a security warning. If it does, select Run to proceed.
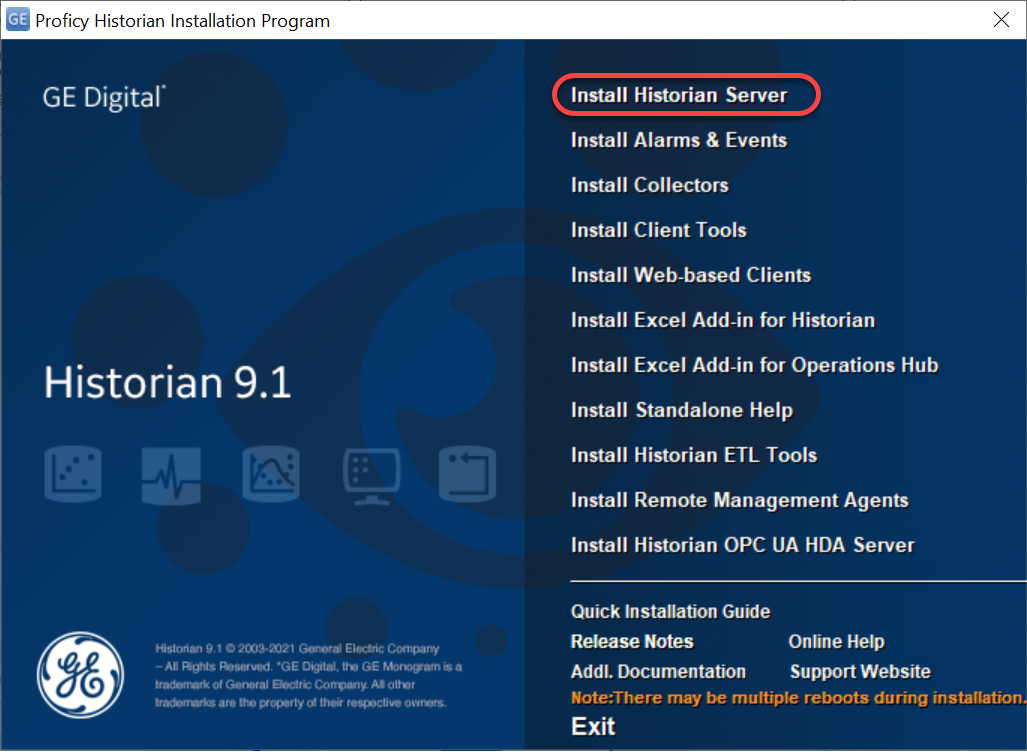
- Select Install Historian Server. The welcome page appears.
- Select Next. The license agreement appears.
- Select the Accept check box, and then select Next. The Path screen appears.
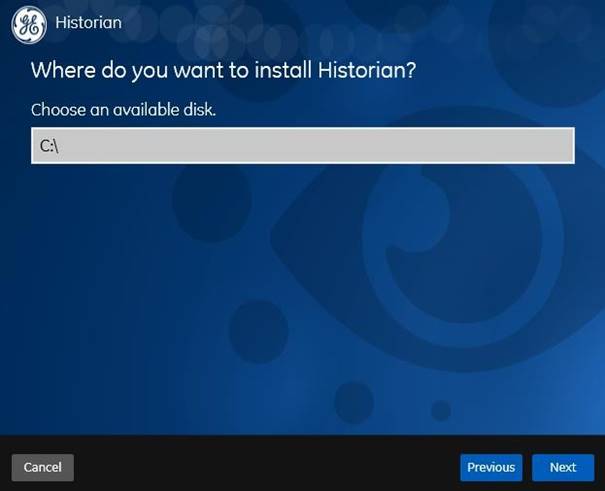
- Leave the default and click Next. The Default Data Path screen appears.

- Leave the defaults and click Next. TheOverride the default Historian data Path? page appears.
- Leave the default folder of the log files, and then select Next. The UAAConfiguration page appears. (UAA is required for user authentication on the Web-based Clients. UAA provides identity-based security for applications and APIs. It supports open standards for authentication and authorization, including Oauth2.)
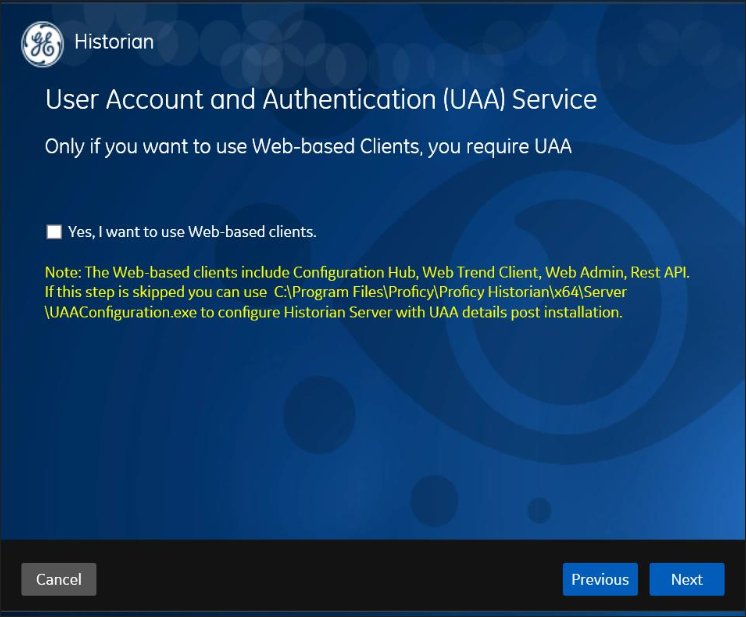
- Leave the default value in the Confirm the UAA details box (since we are not installing the web clients at this point in time). Note: UAA details are required for use with Configuration Hub. By default, the local hostname and the port number of 443 are considered. If the UAA service is on the same machine on which you are installing the Historian server, you can accept the default value. If, however, the UAA service is on a different machine or uses a different port number, replace those values in the URL as follows: https://<UAA server>:<port number>/uaa where: <UAAserver> is the name of the machine on which UAA is installed. If the machine uses a fully qualified domain name (FQDN), provide the FQDN. <Port number>is the one that you have specified for the public https port in the TCP Port Assignments page during Web-based Clients installation. You can install a UAA service using Operations Hub or Historian Web-based Clients. You can provide the URL of an existing UAA instance. Or, if a UAA service is not available, you can install it during Web-based Clients installation. If you are installing a distributed/mirror node, provide the same UAA details that you entered while installing the primary server.
- Select Next. TheHistorian Security Groups page appears. Using Historian security groups provides an added layer of control over access to your Historian system.
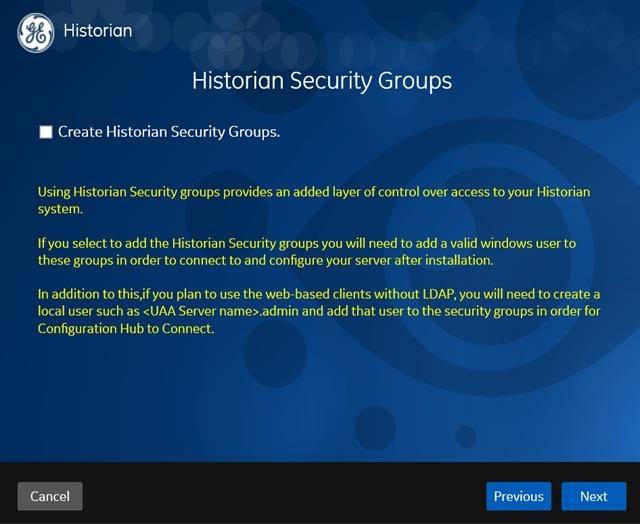
- Leave this check box cleared (the default), and click Next. The Choose Type of Install page appears.
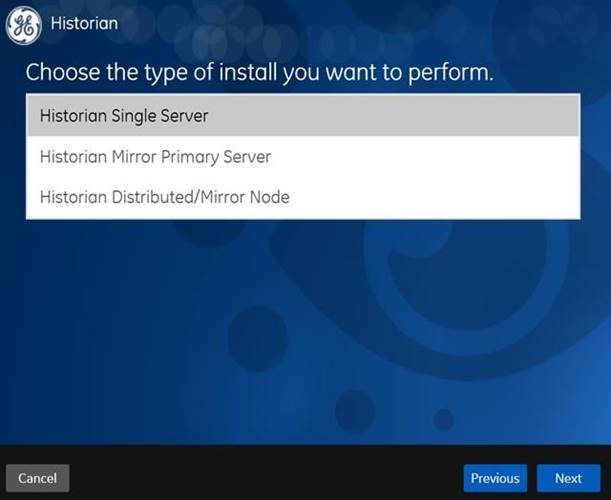
- Leave the default of Historian Single Server selected, and then click Next. (This option is for a stand-alone Historian system, which contains only one Historian server. This type of system is suitable for a small-scale Historian setup.)
- Click Install. The installation begins.
- When the successful installation screen appears, click Exit. A message appears to reboot your computer.
- When you are asked to reboot your system, click Yes.
- After the restart, open the Windows Services console app to confirm that the Historian Data Archiver shows up in the Services panel and is in a Running state. If it is not, see important note below.
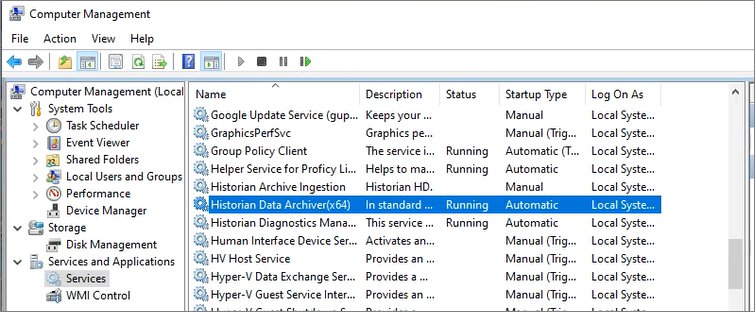 Important: If for some reason, you do not see the Historian Data Archiver in this list and Running, attempt to reinstall Historian Server (without an uninstall). If something went wrong during your install, this troubleshooting step should fix it. The Data Archiver is an important application that needs to be running for use of the Historian Server. You will not be able to get data in iFIX if the Historian Data Archiver is not installed and running.
Perform Historian Server Post Install Tasks
