Run the Integrated Installer
The Integrated Installer can drastically cut your install time when installing multiple GE Digital products. In the steps that follow, we will install iFIX, Historian, the IGS driver, and the common components Configuration Hub and Proficy Authentication.
Steps to Install
- Log in to Windows with Administrator privileges. You must be an Administrator to install these products.
- Double-click the GE_iFIX_Proficy_Installer_English.iso file to open the install media.
- From the install media, open the Historian installation screen by right-clicking the
setup.exe file. A message may appear with a security warning. If
it does, select Yes to proceed. The main install screen appears.
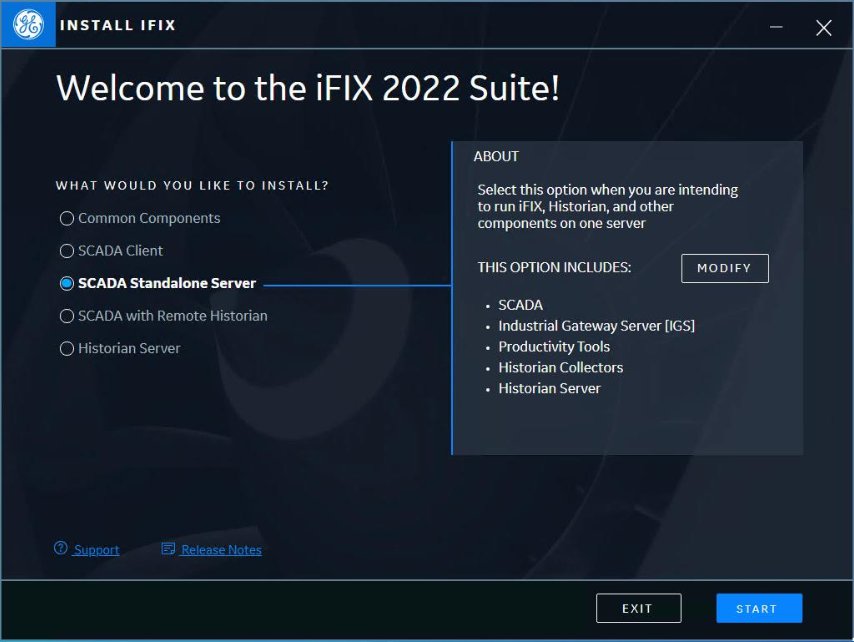
- Leave the default option of SCADA Standalone Server selected, which includes the SCADA, IGS, Productivity Tools, Historian Colleoctors, and Historian Server installs.
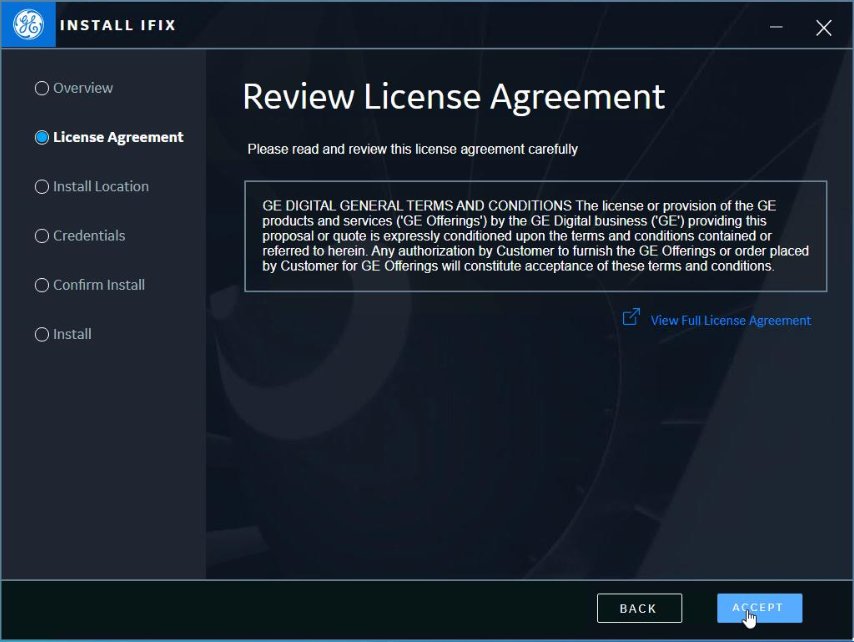
- Click Start. The License Agreement screen appears.
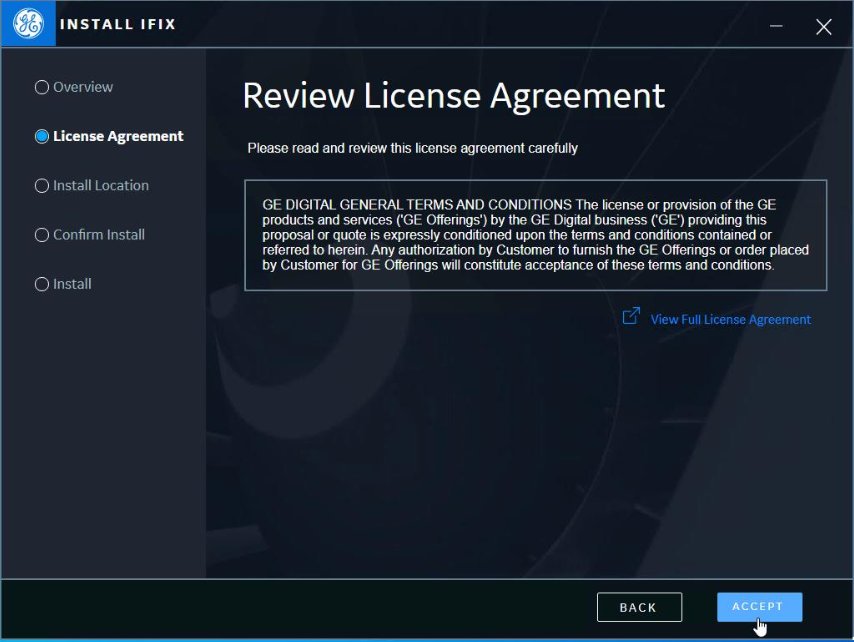
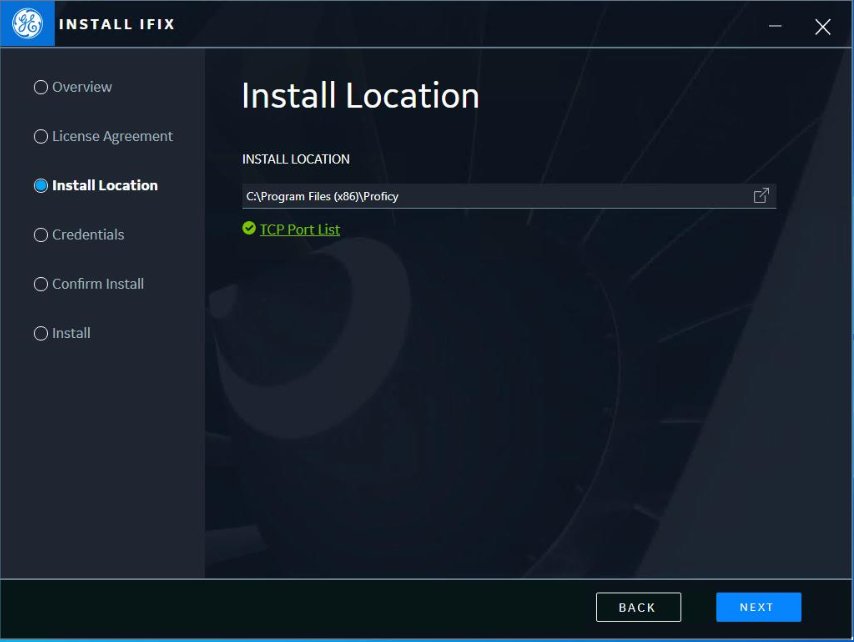
- Click Accept to continue with the install. The Install Location
screen appears.
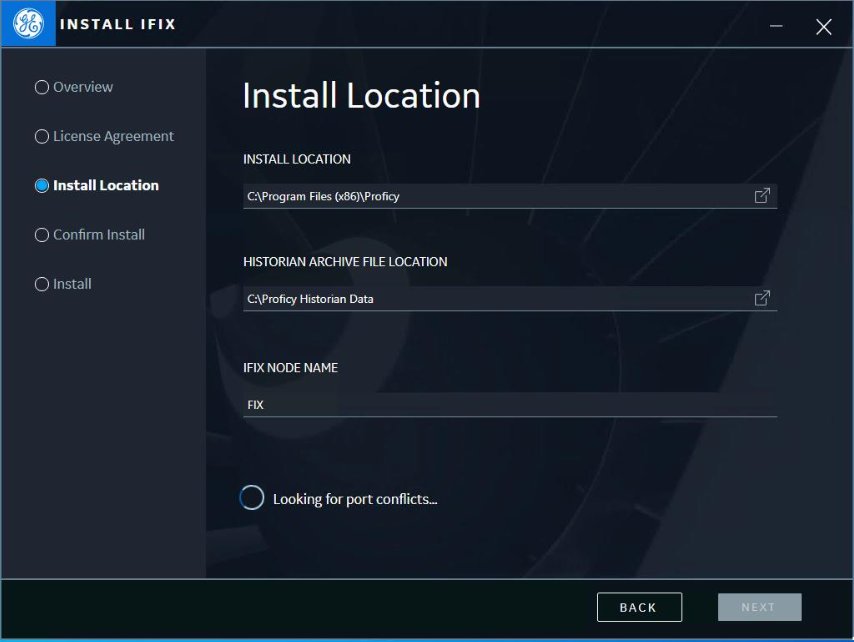
- Leave the defaults, and wait to confirm that no port conflicts appear.
- Click Next. The Start Install screen appears.
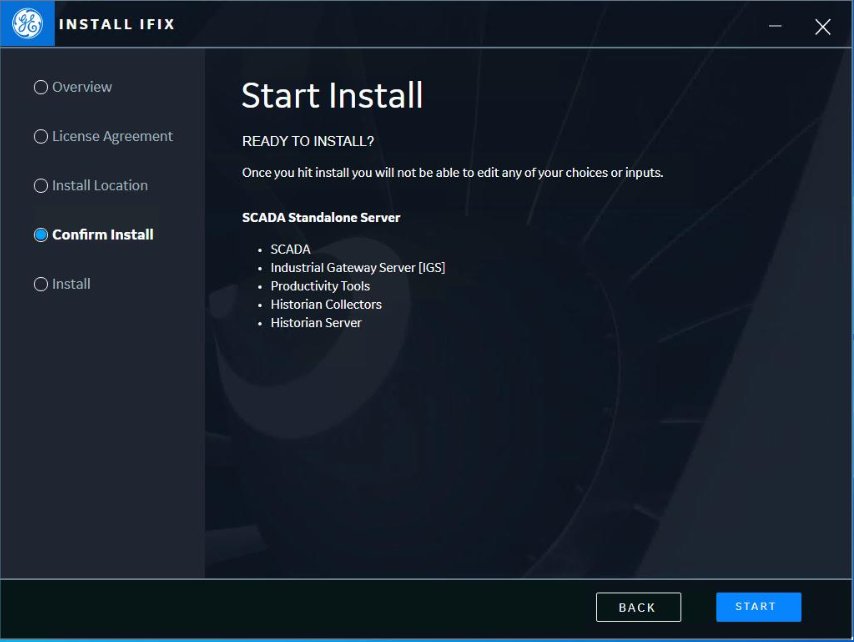
- Click Start to continue the install. The actual installation of products now begins.
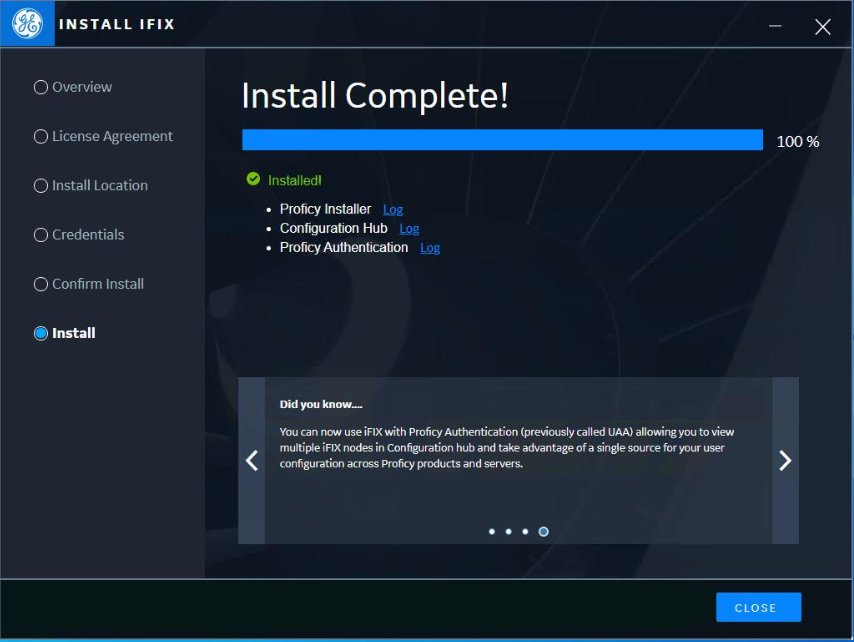
- Wait as the install progresses. When finished, the Install Complete screen
appears.
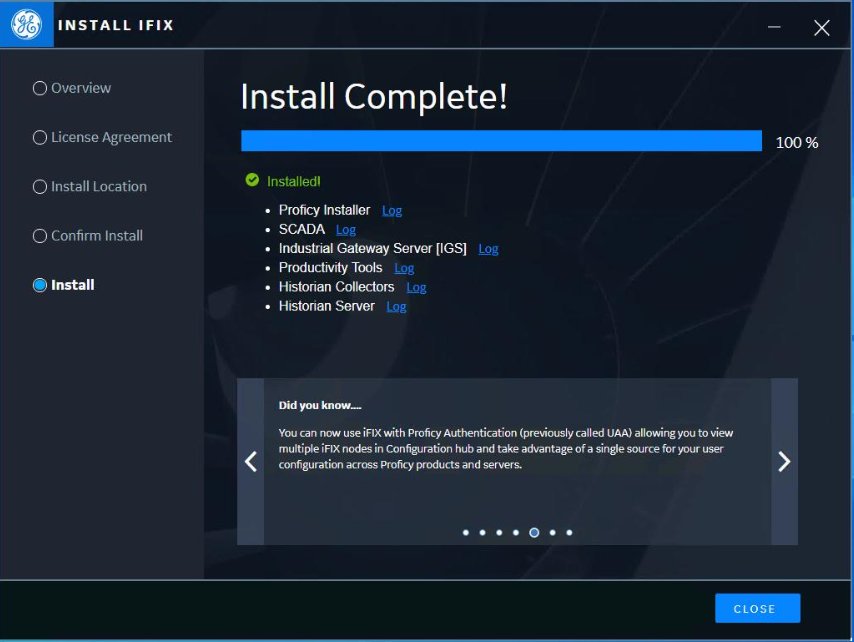
- Click Close. A message box appears asking whether you want to
restart your computer or do another install.
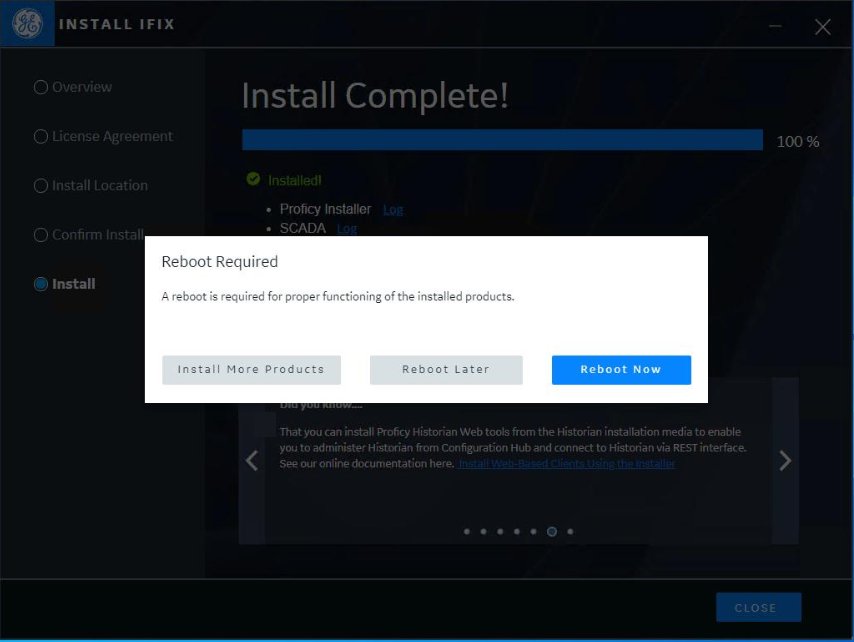
- Click Install More Products so that you can install Configuration
Hub and Proficy Authentication. The Welcome screen returns.

- If not already selected, click Common Components.
- Leave the defaults, and click Start. The License Agreement screen
appears again.
- Click Accept to continue with the install. The Install Location
screen appears again.
- Leave the default, and wait to confirm that no port conflicts appear.
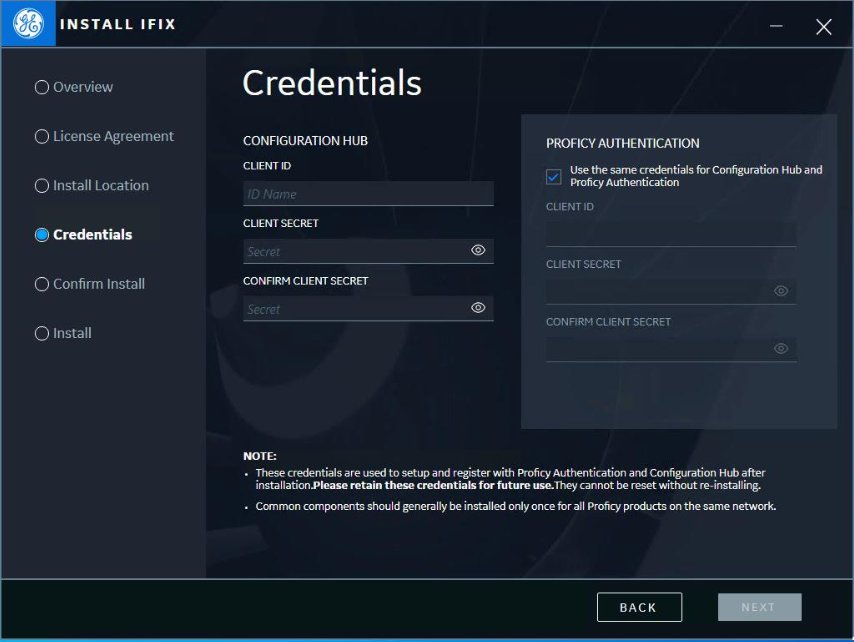
- Click Next. The Credentials screen appears.
-
For Configuration Hub, enter a Client ID and Client Secret.Note: Be sure to save the information you enter here, as you will need it later; if you lose this information, you'll need to reinstall common components later to set it up again.
-
For Proficy Authentication, enter a Client ID and Client Secret. Optionally, you can choose the option to use the same credentials as Confirmation Hub.
Note: Be sure to save the information you enter here too, as you will need it later; if you lose this information, you'll need to reinstall common components later to set it up again. -
Click Next to Continue. The Start Install screen appears.

-
Click Start to continue the install of the Common Components. When the install is finished, the Install Complete screen appears.
-
Click Close. A final message appears.
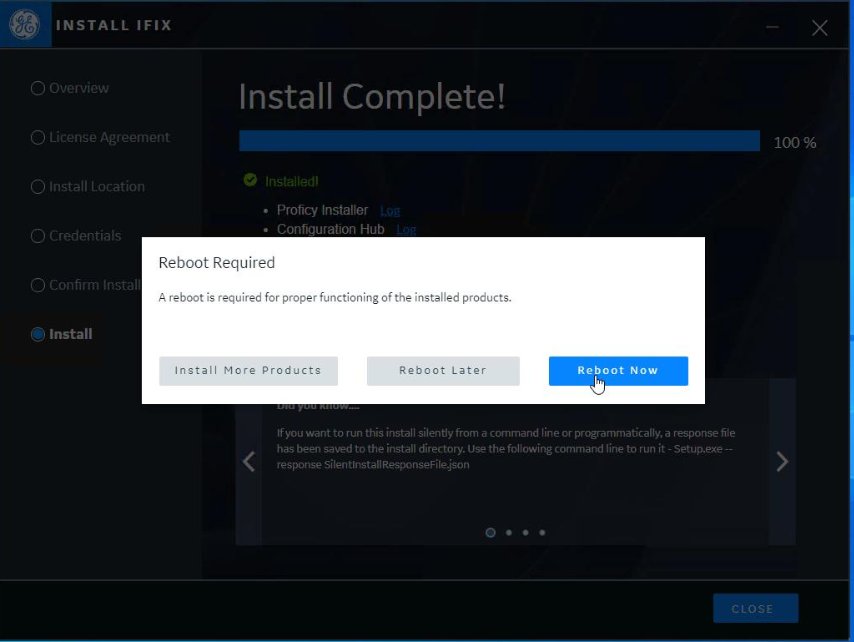
-
Click Reboot Now to complete the install and restart your computer.
- As your computer restarts, wait for all processes related to the install to finish running before you start any applications. You will see on screen prompts as the install completes.
