Quick Start: iFIX, IGS, and Historian
First time installing iFIX, IGS, Historian, and their common components all on the same computer? Want to quickly set up a system so that you can get up and running fast? The following sections outline a few simple steps to get going right away!
In very little time, you can set up iFIX, IGS, Historian, Configuration Hub, and Proficy Authentication all on the same computer and feel assured that your system is configured correctly and running as it is supposed to.
While there are many flexible ways to configure your system, most users will go through the following steps:
Prereqs | Step 1: Download | Step 2: Integrated Install | Step 3: Licensing | Step 4: IGS | Step 5: Historian | Step 6: Configuration Hub | Step 7: Test Picture

After everything is installed and configured, you can begin to realize the full potential of your GE Digital solution! Click this link for a PDF download of these steps.
PreReqs
Before you set up your system it is really important that you make sure the computer that you want to install everything on meets the minimum requirements. Use the links below to check the system requirements before you proceed. Make sure you have enough disk space and memory:
The steps that follow assume that you are installing the iFIX, IGS, and Historian for the first time on your computer.
1. Download Your GE Digital Software
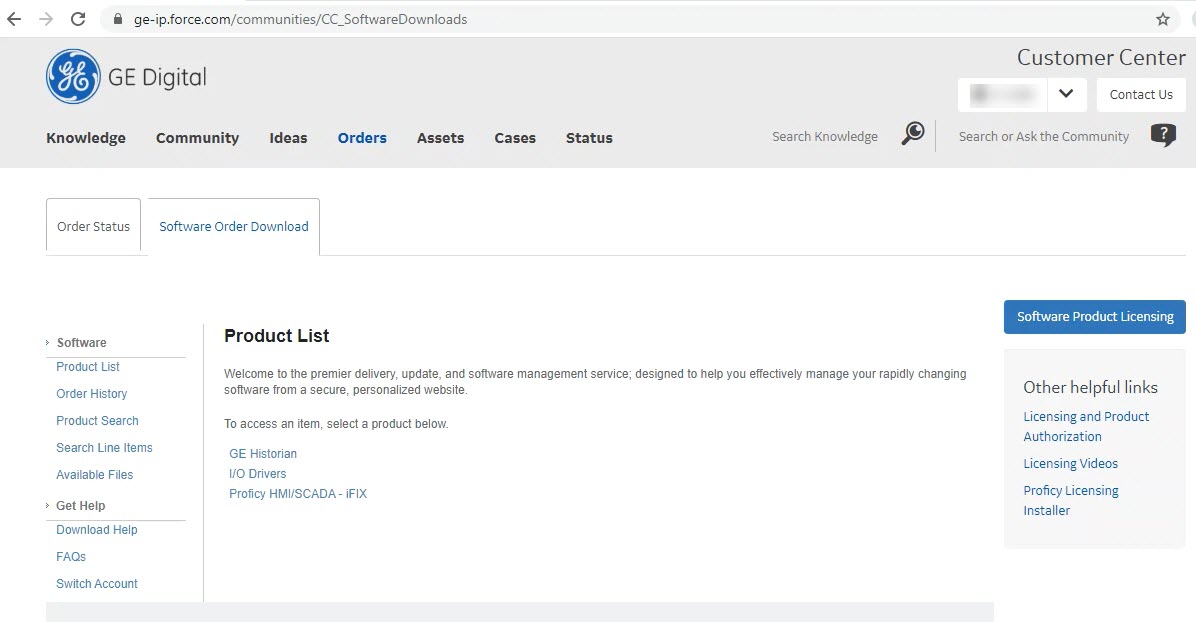
After you get an e-mail from GE Digital with your product download links and activation codes, login in to the web site specified in e-mail using the same e-mail address that the activation codes were sent to. You will need an Internet connection to complete these steps. For more details, use the link below for guided details on how to obtain your product downloads from Orders page.
Steps to Download Your GE Digital Software
2. Run the Integrated Install
Next, install iFIX, Historian, IGS, and Common Components (Configuration Hub and Proficy Authentication) using the integrated installer.
Be sure to write down the client ID and client secret you enter during the install, as you will need that if you want to use Configuration Hub at another time. Be aware that only English alphanumeric characters values and the following symbols are supported in the client ID and client secret fields: "-><~!@#$%^&*?|"

3. Install and Configure Licensing
After you download Proficy Common Licensing, you'll want to use this executable to install the 1) Local License Server, 2) License Server Tools, and 3) License Client:
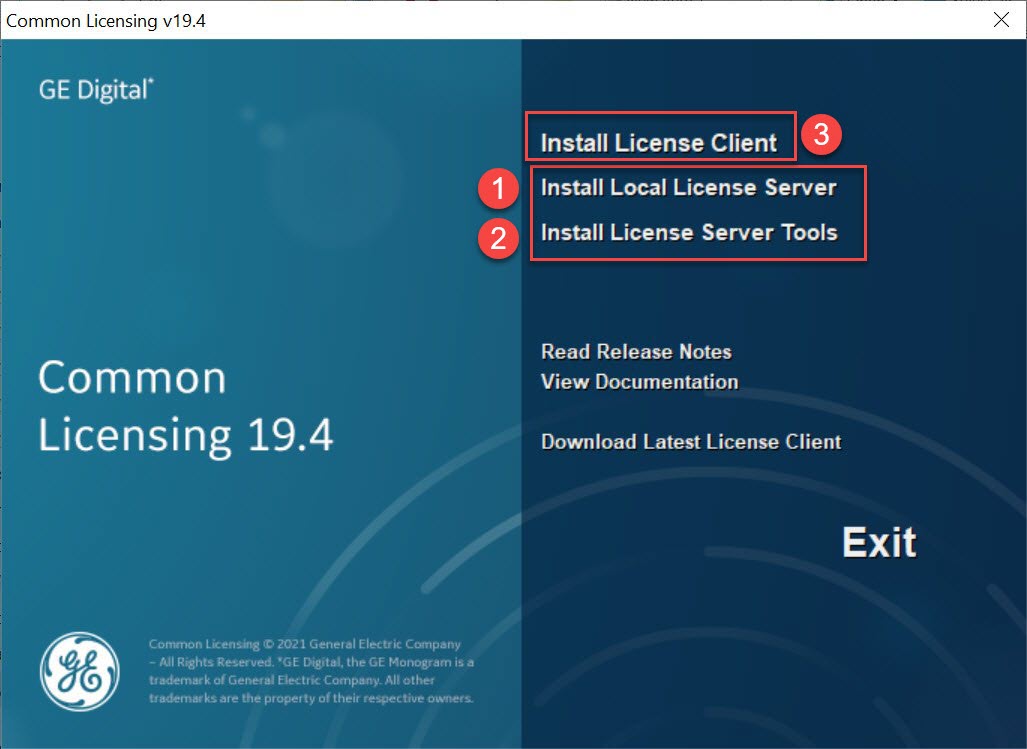
Be sure to run the licensing installer as an Administrator. After installing the licensing components, restart your computer.
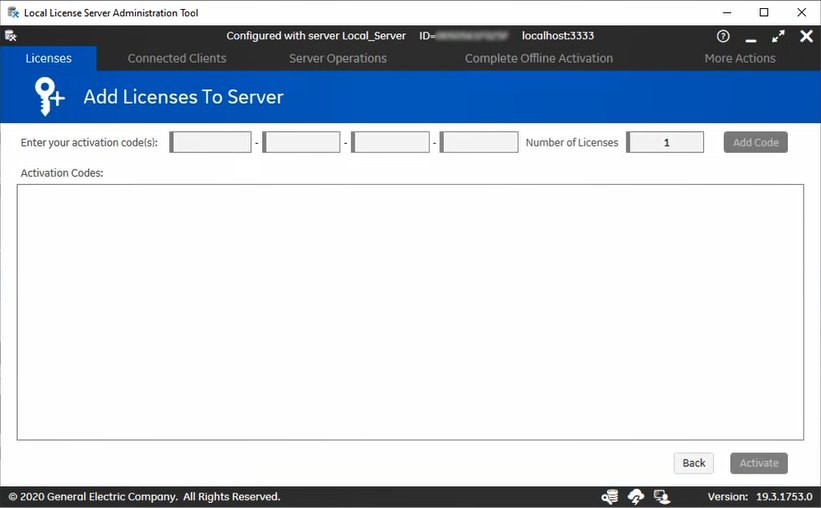
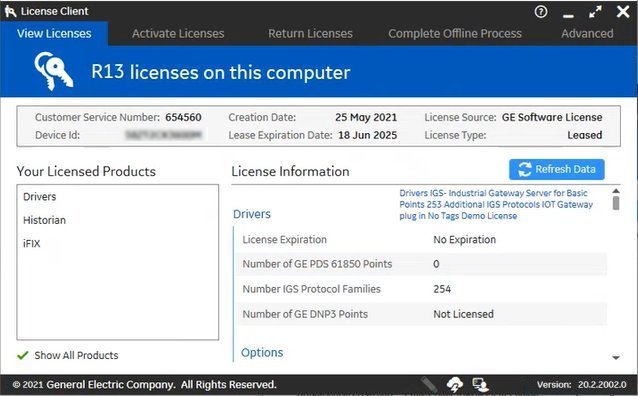
Download your codes using the Local License Server Administration Tool. Run the License Client to activate your entitlements. After doing these steps, be sure to confirm that all licenses appear in the License Client. Use the link below for detailed steps.
Steps to Install and Configure Licensing
4. Configure IGS for iFIX
Next you want to configure the IGS for iFIX. This includes setting both the Enable and Enable HTTP settings to Yes in the Configuration API Service settings for the IGS. You also need to add the IGS driver to the SCU.5. Configure Historian to iFIX Connection
After Historian is intalled.,it is recommended that you disable the Enforce Strict Client Authentication and Enforce Strict Collector Authentication options post in the Historian Administrator. Then, you will need to a startup task for the ihfixcollector.exe in the iFIX SCU, and then configure your Historian Server in the iFIX WorkSpace.
6. Configure Configuration Hub
Next, enable security in iFIX so that you can use Configuration Hub to create tags. Register Configuration Hub using the client secret and password you entered when you ran the integrated install. Finally, for the default ch_admin user for Proficy Authentication, add access to Configuration Hub with membership to scada.ifix_shared.APPLICATION_DESIGNER group.
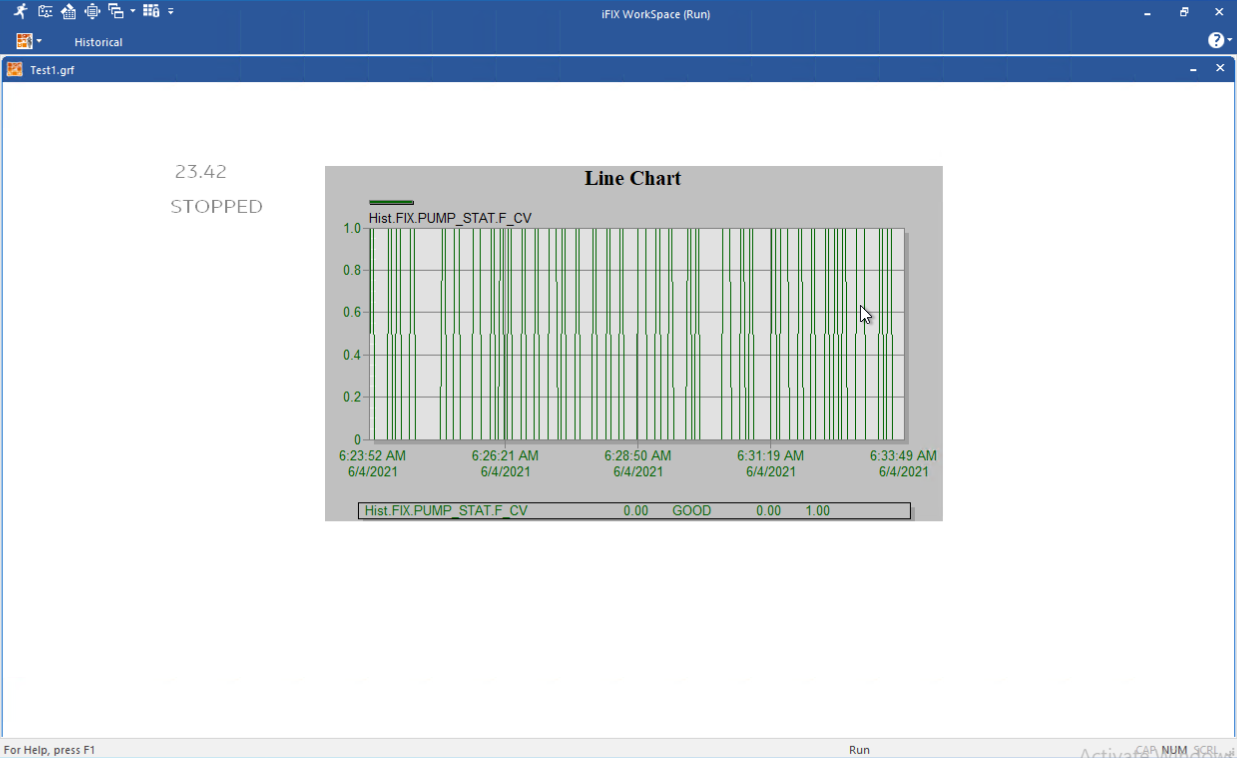
7. Build Your Test Picture
Start iFIX and in the iFIX WorkSpace create a picture, and insert two data links that point to the real-time tags. Next, insert a Line MultiLine Chart to display the historian tag data for both tags. Switch to run mode to confirm that you can view data. Click the following link for more detailed steps: