Steps to Install and Configure Licensing
Overview of License Install and Configuration
Use the following steps to install and configure licensing on the same server that you plan to use with your Proficy applications.
- Run the License Installer.
- Install the Local License Server.
- Install the License Server Tools.
- Install the License Client.
- Download the License Codes on the Server.
- Activate Your Entitlement on the License Client.
- Confirm the License Client Displays Licenses.Important: When you run the installs, you must be logged in as an Administrator. Also, be sure to right-click the installer .exe file, and select Run as Administrator.
Run the License Installer
- Confirm that you are logged in as an Administrator.
- Browse to the folder where you downloaded the installers.
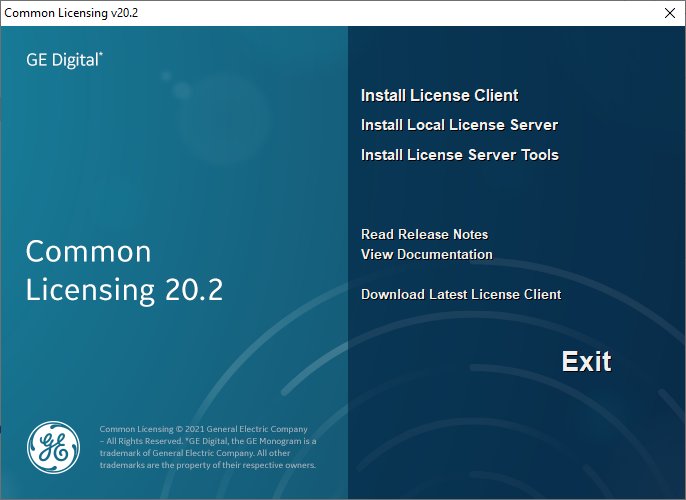
- Right-click the Common Licensing .exe file, and select Run as Administrator. A message appears asking if you want to allow this application to make changes to your device.
- Click Yes. The Common Licensing screen appears, as shown in the following figure.
Install the Local License Server
- From the Common Licensing install screen, click the Install Local License Server link.
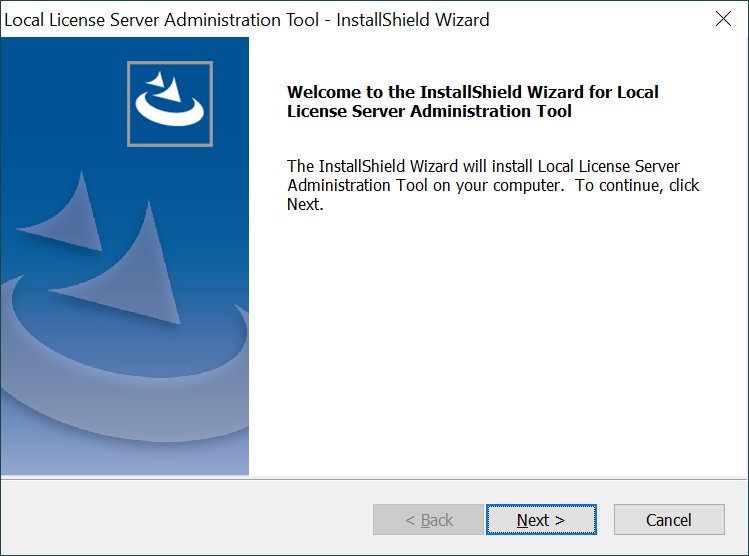
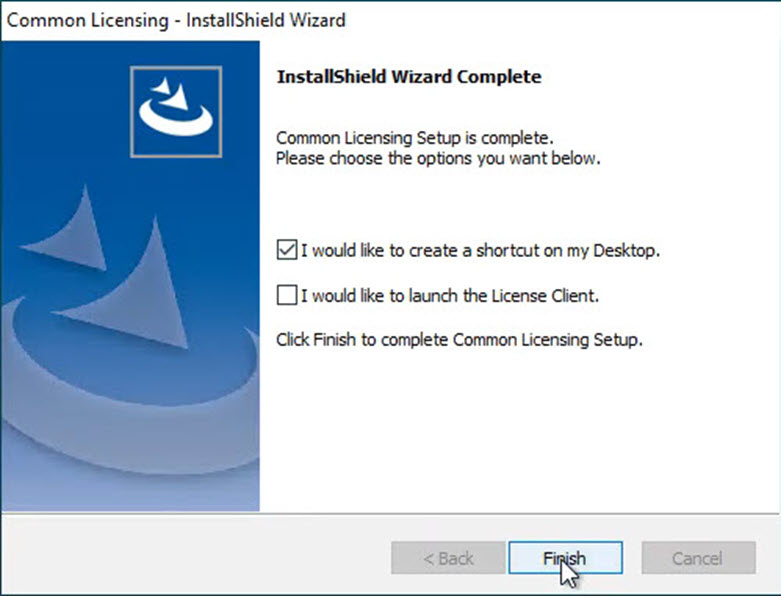
- Wait as the install launches. This may take a few moments, and may require some pre-reqs to finish installing. At the end of the install the following screen appears.

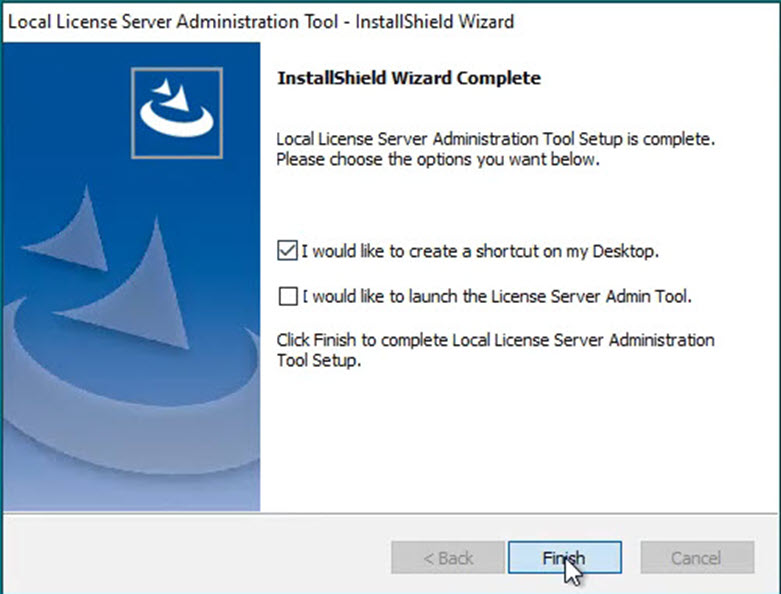
- Select the I would like to create a shortcut on my Desktop option.
- Click Finish to complete the install.
Install the License Server Tools
- From the Common Licensing install screen, click the Install License Server Tools link.
- Wait as the install launches. This may take a few moments, and may require some pre-reqs to install. The welcome screen appears.
- Click Next. The License Agreement appears.
- Select I accept the terms of this license agreement and click Next to continue. The Ready to Install screen appears.
- Click Install. When the install completes, the Installation Wizard Complete screen appears.
- Select the I would like to create a shortcut on my Desktop option.
- Click Finish to complete the install.
Install the License Client
- Go back to the Common Licensing install screen, and click the Install License Client link.
- Wait as the install launches. This may take a few moments, and may require some pre-reqs to install. The following screen appears.
- Click Next. The License Agreement appears.
- Select I accept the terms of this license agreement and click Next to continue.
- If a message to install USB HASP Drivers appears, leave the default (selected), and click Next. Otherwise, the Ready to Install screen appears.
- Click Install. When the install completes, the Installation Wizard Complete screen appears.
- Select the I would like to create a shortcut on my Desktop option.
- Click Finish.
Download the License Codes on the Server
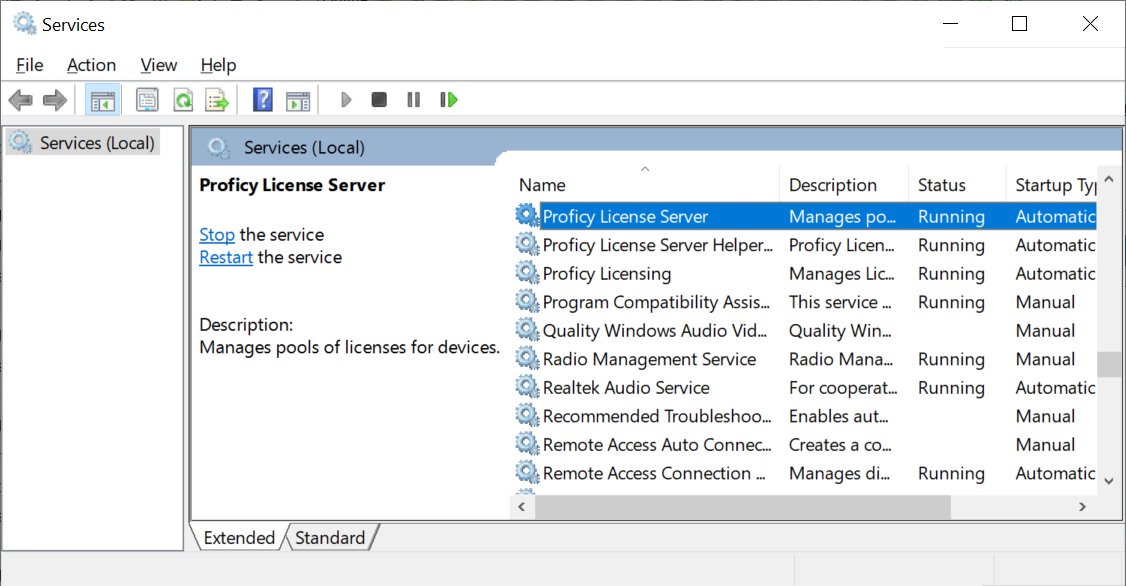
- From the Windows Services console, confirm that the License Server is running.
- On the Start menu, go to General Electric and then Local License Server Administration. A message appears asking if you want to make changes to this device.
- Click Yes to continue. The License Local License Server Administration screen appears, as shown in the following figure.
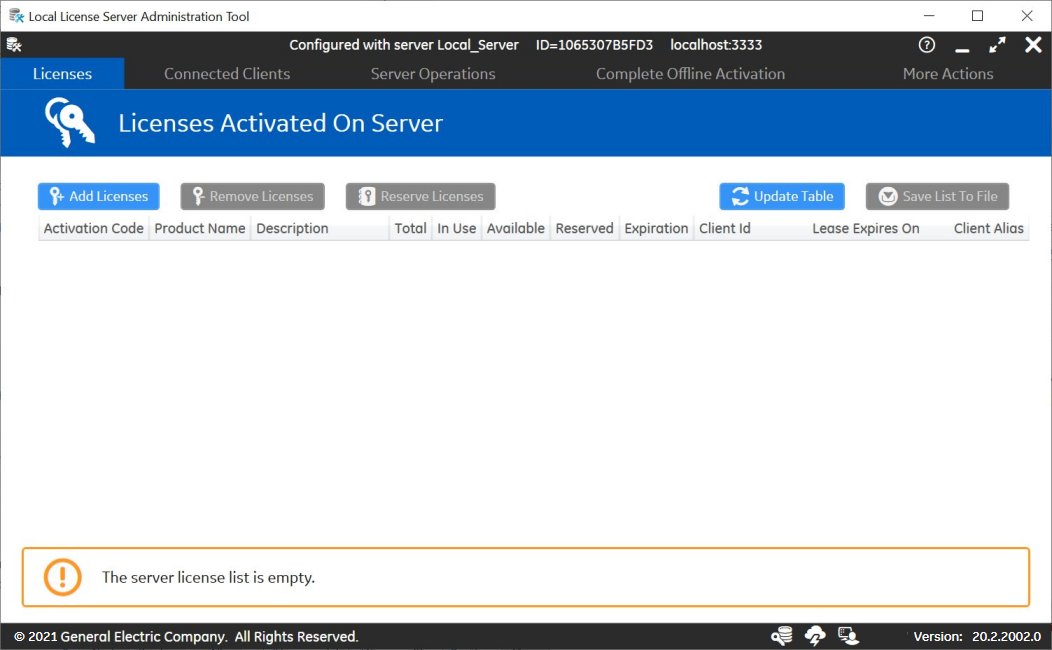
- Click Add Licenses.
- Enter your first activation code, and then click Add Code.
- Repeat the previous step for each license you have.
- Click Activate. The Licenses screen should now display all the licenses activated on the server.
Activate Your Entitlement on the License Client
- On the Start menu, go to General Electric and then License Client. A message appears asking if you want to make changes to this device.
- Click Yes to continue. The License Client screen
appears.
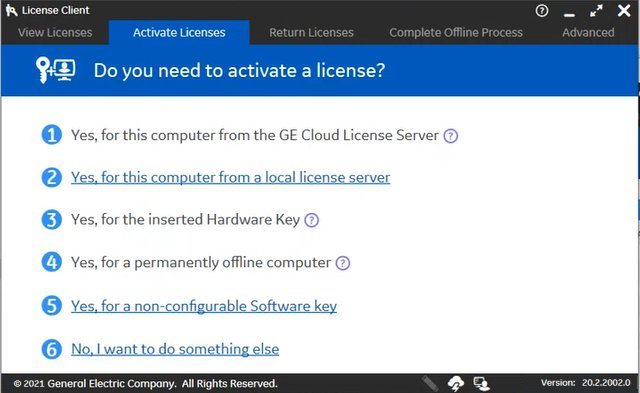
- Since you have the Licensing Server already installed on the same machine, click option
2, the Yes, for this computer from a local license server option.
The Lease Licenses screen appears.
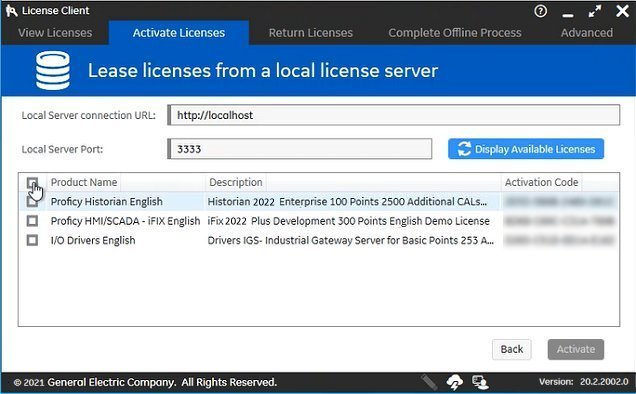
- Select the Historian, iFIX, and IGS licenses you want to activate, and then click Activate.
Confirm the License Client Displays Licenses
- From the License Client, click the View
Licenses tab. The licenses for the selected server appears, similar to the
screen below.
In the Licensed Products area, click Drivers, Historian, or iFIX to view the license information.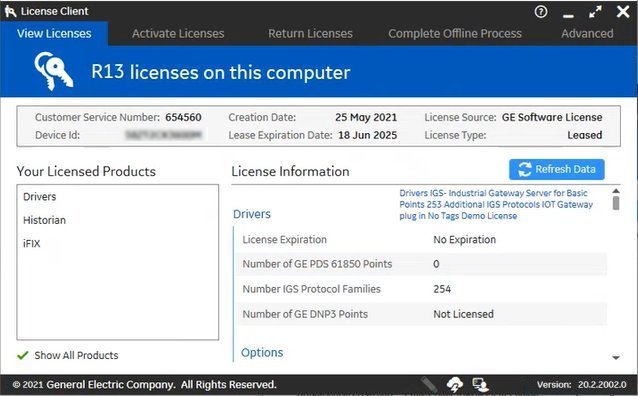
- Confirm that your license information appears correctly for each product you activated.
- Close the application when you are complete.
