Steps to Configure Configuration Hub
Overview
After you configure IGS and Historian, use the following steps to set up Configuration Hub so you can easilly add test tags to the iFIX database. Be sure that you restarted the iFIX WorkSpace after the last set of steps, then you can proceed to:
Enable Security in iFIX
To enable security in iFIX, follow these steps:
-
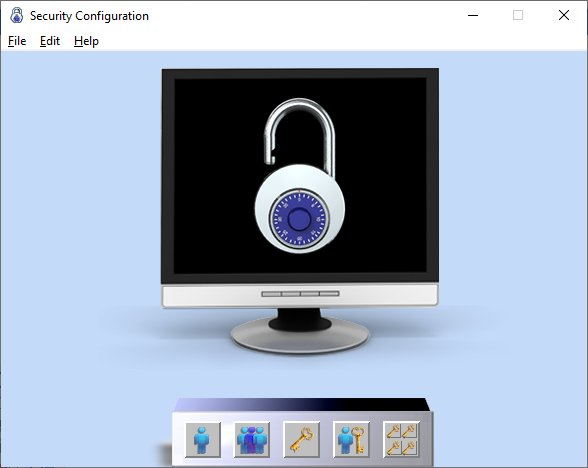
From the iFIX WorkSpace ribbon, on the Applications tab, in the System & Security group, click Security, and then click Security Configuration Utility.

The Security Configuration application appears.
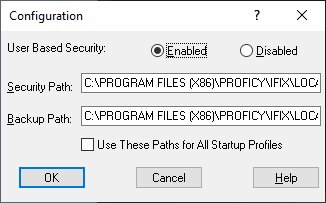
- On the Edit menu, click Configuration. The Configuration dialog box appears.
- Select Enabled.
-
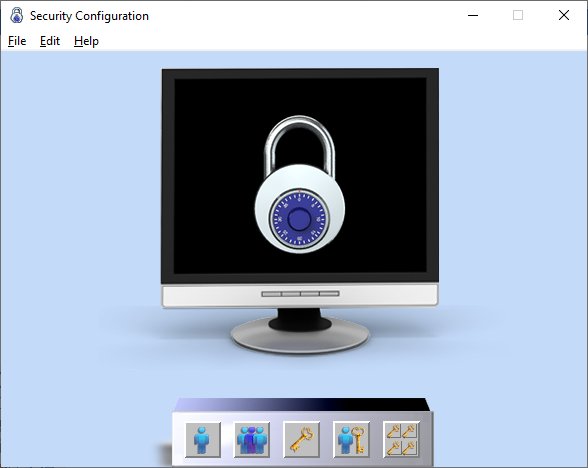
Click OK. You will notice the padlock on screen displays as locked.
-
On the File Menu, select Exit. You will be prompted to save the security changes.
-
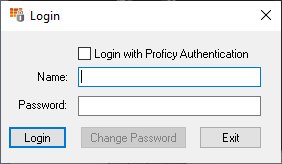
Click Yes. A message appears requesting that you login.
- Click OK. The Login dialog box appears.
-
Enter the default user name and password (admin/admin) for iFIX .
Note: You will want to change this password at a later date after you determine your security strategy. -
Click Login. After a successful login, two more message boxes appear.
-
Click OK.
Register Configuration Hub
To register Configuration Hub for iFIX:
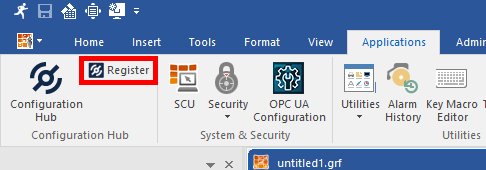
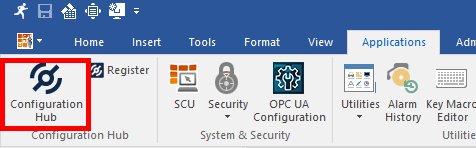
- From the iFIX WorkSpace, on the Applications tab, in the Configuration Hub area, click
Register.
The iFIX Plugin Registration page appears in your Google Chrome browser, with the login screen displaying.
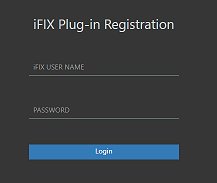
- Enter the default iFIX user name (admin) and password that you used in the previous set
of steps, and click Login. The Configuration Hub Server
Registration page appears. Note: For the following screen, you will need those client names and IDs that you noted when you installed the Common Components with the integrated installer in step 2.
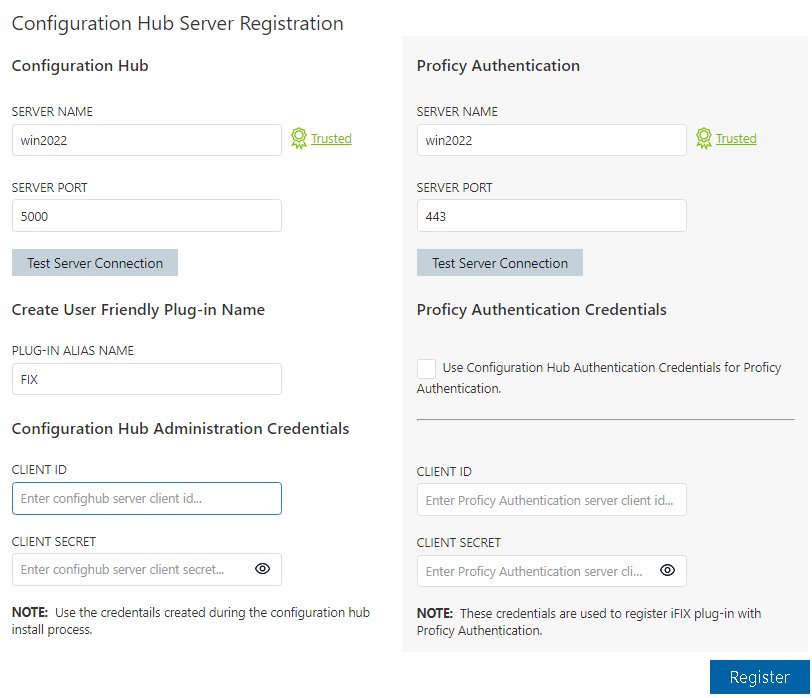
- Since we installed iFIX, Historian, and Configuration Hub all on the same computer, the server names and ports should be auto-detected. Leave the defaults for Server Name and Server Port.
- Make sure that Configuration Hub Server connection is Trusted. If it is not, click Test Connection, and then click the Untrusted icon next to the Server Name to apply the trust.
- Enter the Client ID and Client Secret that you used for Configuration Hub when you ran the integrated installer.
- Repeat steps 4-5 for Proficy Authentication.
- After both servers are trusted, and Client IDs and Secrets have been successfully
entered, click Register.
The Configuration Hub Server Registration dialog box appears with a success message.
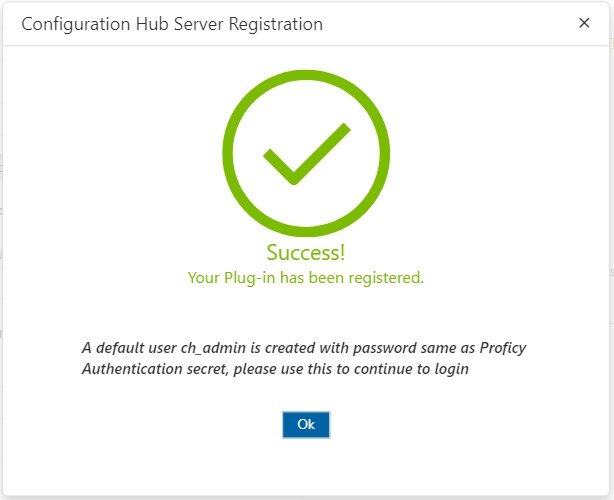
By default, the
ch_adminuser is created with the password same as Proficy Authentication secret. As the next step, you must assign the group membership to this default Proficy Authentication user. - Click OK.
Assign Group Membership for the Default Proficy Authentication User
You must use a Proficy Authentication user to login to Configuration Hub. You will need to configure group membership on this user. The default user is ch_admin and the default password is your client secret entered at install.
- From the iFIX WorkSpace, click the Applications tab, and then
Configuration Hub.
The Chrome browser should open with the Welcome screen displayed, as shown in the following figure.

- For the user name, enter
ch_adminand then the password you entered for the client secret for the Proficy Authentication user when you installed the Common Components with the integrated Proficy installer. - Click Sign in. Configuration Hub appears.
-
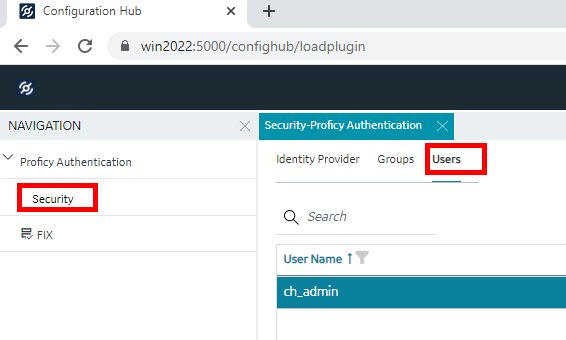
In the Navigation pane, click Security and then click Users to view the ch_admin user.
- For the selected ch_admin user, in the Details pane, click the Group Management
icon.

- To allow for access to Configuration Hub, be sure that the ch_admin user is a member of
the scada.ifix_shared.APPLICATION_DESIGNER group.
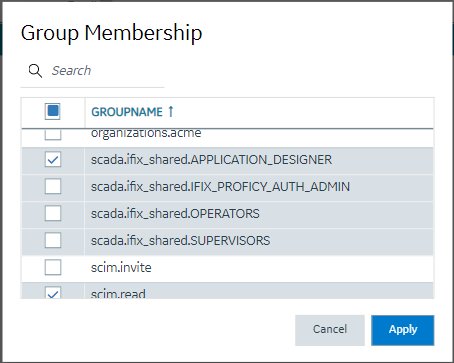
- Optionally, you can apply other group memberships. For instance, the scada.ifix_shared_IFIX_PROFICY_AUTH_ADMIN group membership if you want to provide access to all iFIX application features. Any Proficy Authentication user who is a member of this group will have privileges similar to a native iFIX ADMIN user (except the access to security areas).
- Click Apply.
- Close and restart your web browser.
