Installing the Plant Applications Report Server
After installing IIS roles, you can install the Plant Applications Report Server.
Before you begin
Determine which components to install and complete the required prerequisites.
- Verify that role services have been installed as described in the Setting up IIS Web Services section in the Plant Applications Getting Started Guidein Setting up IIS Web Services.
- If planning to use a web portal (for example, Proficy Portal or SharePoint Services), verify the portal has been installed before installing the Web Server.
- A PDF distiller is installed to generate reports in PDF format. A default printer must be installed on the computer, and the PDF service must start with its own Windows user account (Login As Service policy required) for the report engines to print or produce reports in PDF format. For more information, see Adding a Printer in the Web Server and Web Client section of the Plant Applications Help.
- Microsoft Excel is required to install Plant Applications Web engines.Note: After installing the Plant Applications Web Server, you must start Excel under the same login account used by the Plant Applications Report engine services.
Note: By default, SharePoint Portal Services 3.0 uses port 80, also used by Plant Applications Web Server. You must change SharePoint to use an open port, such as port 81.
About this task
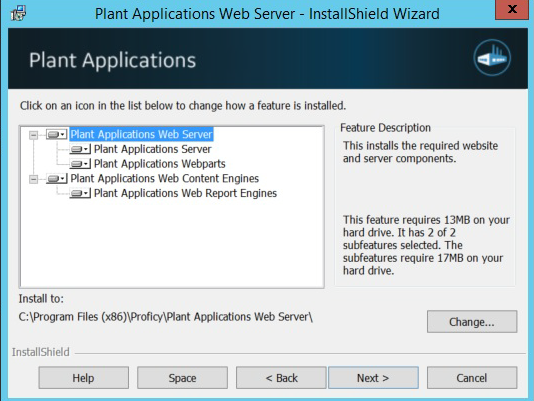
- Plant Applications Server – Interacts with the Web Server and maintains a profile of Web Client users.
- Plant Applications Web Server – Framework to schedule and distribute standard and adhoc web reports by means of the Plant Applications Web Client.
- Plant Applications Web Parts – Customizable web components for use in a portal to view relevant plant information in real time.
- Plant Applications Web Content and Web Report Engines – Generate content data for Web Parts and reports. When report generation time increases or CPU usage is high, you should place another engine into service. Note:
- If you are installing Plant Applications in a production environment, you must install the Plant Applications Web Server, engines, and Plant Applications Server on different computers. You can install all components on a single computer for testing.
- Engine services do not start unless assigned their own Windows user account. Login As Service policy required.
Procedure
- At the Custom Setup screen, select the components to install on this server. Click Next to continue.
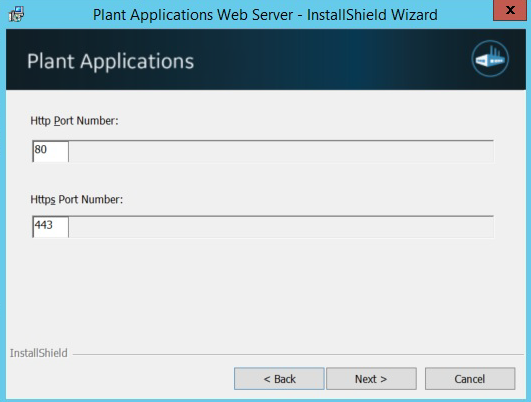
- Accept default port numbers for the HTTPS port, or enter different ports as needed. Click Next.
- Enter the name of the SQL Database server if prompted, and select the authentication method. If using Server authentication, enter the server credentials, then click Next.
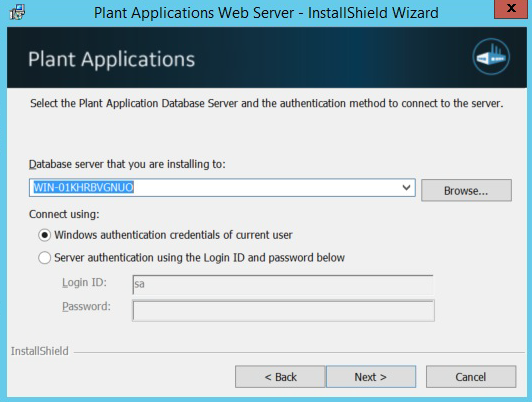 The Web Server installation program checks a specific registry key for an existing SQL Server name.
What to do next
- Log into the computer with the newly installed Report Server using the Windows User Account that was selected during the installation.
- Verify that the DashboardImport.log and ExecuteScripts installation log files contain no errors. By default, the log files are located in C:\Program Files (x86)\Proficy\Plant Applications Web Server\SetupLogs.
- Access the Site Parameters sheet by selecting Administer Site Parameters under Global Settings in the Plant Applications Administrator, and set
UseHttpsin the Client section toTrue.
These additional steps may be required to complete installing the Report Server:
- Follow the steps in Configuring the Plant Applications Report (Web) Server to set up a different user only if the Report Server is installed on a non-local machine.
- Follow the steps in Secure Socket Layer and Certificate Requirements Secure Socket Layer and Certificate Requirements available in Plant Applications Getting Started Guide to support the functionality of secure (HTTPS) URLs.
- Configure Excel as described in Setting Up the Plant Applications Excel Add-InSetting Up the Plant Applications Excel Add-In available in Plant Applications Getting Started Guide.
- Perform the steps for Setting Up for Using and SSO Login, if required.
After installing the Plant Applications Report (Web) Server, return to Installing the Plant Applications Client and Administrator.