You must install the Plant Applications Message Bridge on the Plant Applications server node to access the real-time updates on the applications in the Plant Applications Web Client.
Before you begin
We recommend that the Plant Applications Message Bridge be installed before installing the Plant Applications Web Client. In addition, the Message Bridge configuration file will not be replaced with the new one during the installation. Therefore, we recommend that you delete the existing configuration file located at <Plant Applications installation folder>\Proficy Server\RabbitMQMessageBridgeService\Proficy.PlantApps.MessageBridge.Service.exe.config.
Ensure that you complete the following procedure specific to the Plant Applications Message Bridge:
Uninstall the earlier version of the Plant Applications Message Bridge, RabbitMQ, and Erlang.
The Proficy Server Message Bridge service is disabled.
Install the version of the Plant Applications Message Bridge included in the Plant Applications installer.
Restart the Proficy Server Manager service.
The Proficy Server Message Bridge service is automatically restarted.
Ensure that you create a backup copy of the text file that includes the user-specific settings. The file is created in the directory <tomcat_home>/Apache Software Foundation/Tomcat 9.0/users/<user>, where:
<tomcat_home> is the directory where you installed Apache Tomcat. For example, C:/Program Files.
<user> is the name of a logged-in user.
After you upgrade, you can copy-paste the file to the same location to replicate the user-specific settings. For more information, refer to the Plant Applications Web Client Help.
About this task
The Plant Applications Message Bridge installer installs the following prerequisites:
Erlang OTP
RabbitMQ Server
Kafka
Zookeeper
Note: If the Plant Applications Message Bridge is currently installed, do not reinstall the Message Bridge. You can verify whether the Message Bridge is installed in the Programs and Features list on your computer as shown in the following image.
Procedure
Select the Plant Applications Message Bridge wizard, and, on the welcome screen, select Next to install the Message Bridge.
Select Next.
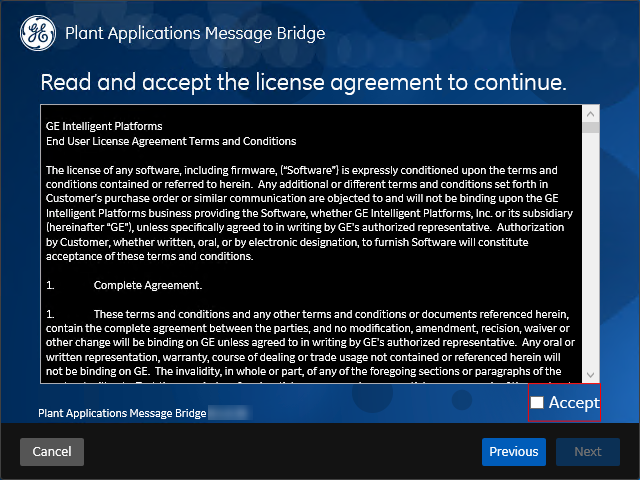
The Read and accept the license agreement to continue screen appears.
Read the license agreement, select Accept, and then select Next to continue the installation.
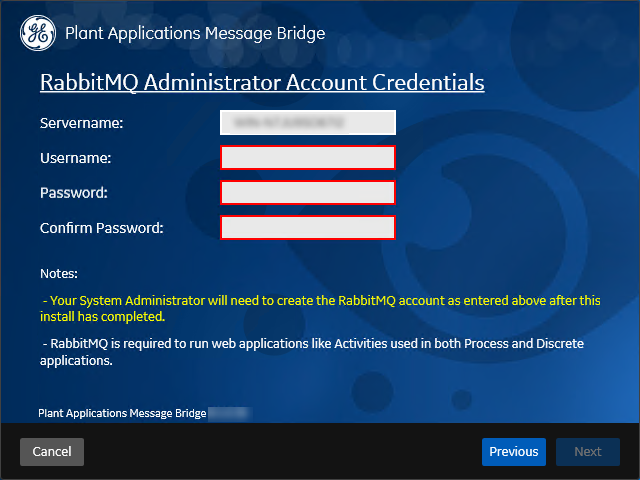
The RabbitMQ Administrator Account Credentials screen appears.
In the RabbitMQ Administrator Account Credentials screen, enter the following credentials:
Credential
Description
Server name
Enter the computer name or IP address that hosts your Plant Applications Message Bridge.
Username
Enter the user name you intend to use as an administrator.
Password
Enter the password for the administrator's user name you entered in the Username box.
Confirm Password
Re-enter the password that you entered in the Password box for confirmation.
Select Next.
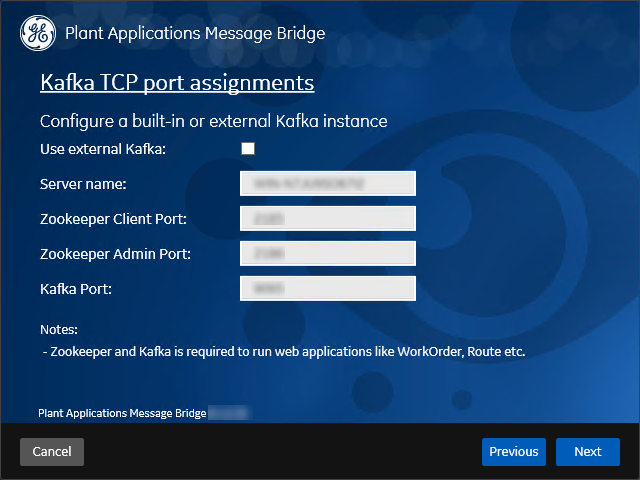
The Kafka TCP port assignments screen appears.
Note: Kafka is installed in a different directory than the default directory to ensure that the kafka service is up and running.
By default, Zookeeper is installed in <Plant Applications installation _directory>\Proficy\Proficy Server\zookeper-3.5.5.
Kafka is installed in C:\Kafka.
In the Kafka TCP port assignments screen, enter the credentials to access the Kafka server as described in the following table.
Credential
Description
Use external Kafka
Select this check box if you want to configure an external Kafka instance.
Server Name
Enter the host name of the Kafka server.
Note: Instead of IP address, it is recommended to use the Kafka host name (computer name).
Zookeeper Client Port
Enter the Zookeeper Client port number.
Note: Ensure that you have entered a valid Zookeeper port number. If you have entered an invalid port number, refer to Changing the Zookeeper Port Number.
Zookeeper Admin Port
Enter the Zookeeper Admin port number.
Kafka Port
Enter the Kafka port number.
If all the options are entered correctly, the Next button is enabled.
Select Next.
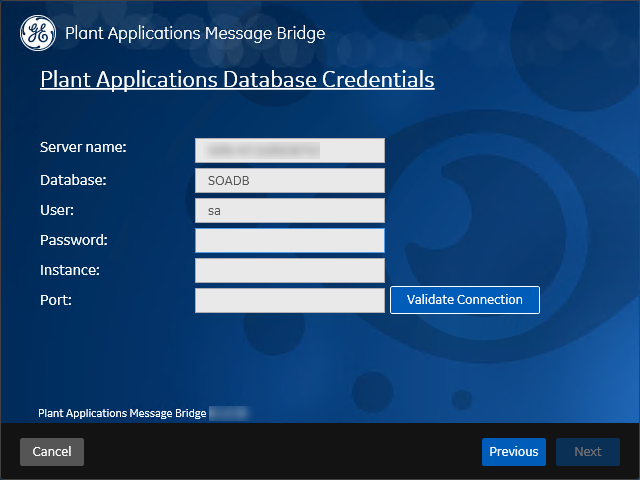
The Plant Applications Database Credentials screen appears.
In the Plant Applications Database Credentials screen, enter the Plant Applications database credentials as described in the following table.
Credential
Description
Server name
Enter the server name where the Plant Applications database is installed in the format HOST_NAME\INSTANCE. Where HOST_NAME is the host name (either a fully qualified domain name or IP address, of the server) and INSTANCE is the instance of the server used by the database.
Note: If there is no instance for the server, you can enter HOSTNAME as the server name. Localhost is not an acceptable value for HOSTNAME.
Database
Enter the name of the Plant Applications database that you want to connect with the Plant Applications Web Client.
User
Enter the user name that has permissions to access the database you entered in the Database box. By default, the user name appears as sa.
Password
Enter the password for the user name you entered in the User box.
Instance
Enter the name of the instance of the SQL server. Entering an instance is optional.
Port
Optional: Enter the number of the port that the instance uses to listen for client connections.
Select Validate Connection to validate the database connection.
If the database connection is successfully validated, the Next button is enabled.
Select Next.
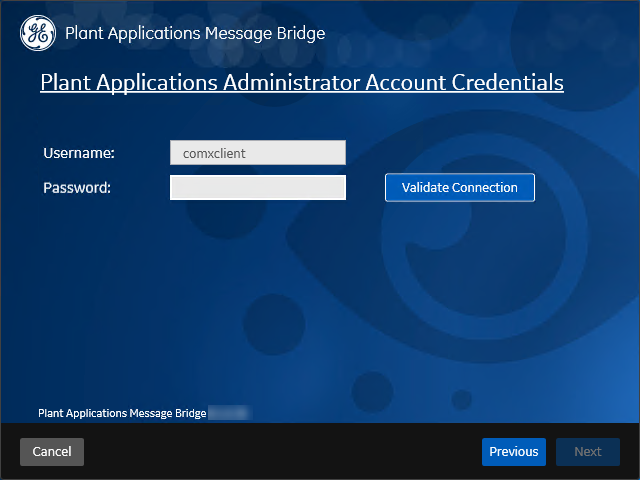
The Plant Applications Administrator Account Credentials screen appears.
In the Plant Applications Administrator Account Credentials screen, enter the user name and password for an administrator account in Plant Applications, and then select Validate Connection to validate the credentials.
If the credentials are successfully validated, the Next button is enabled.
Select Next.
The You are ready to install screen appears.
Select Install to install all the prerequisites and the Message Bridge.
Depending on the options selected, the installation process may take some time. The installer displays the status updates.
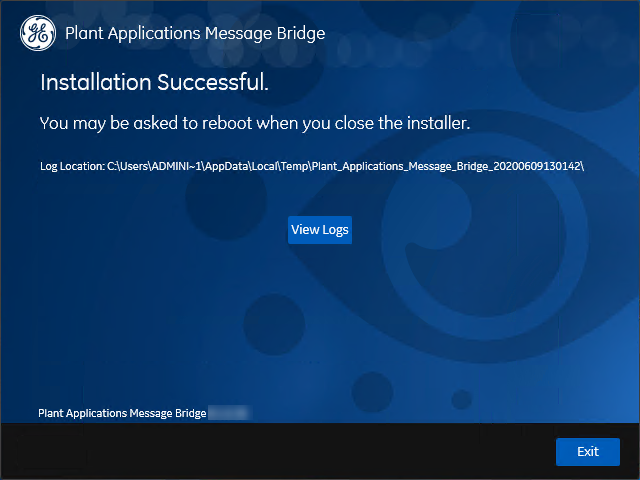
On successful installation, the Installation Successful screen appears.
Optional: Select View Logs to see the installation details.
In the Installation Successful screen, select Exit to close the wizard.
Results
The Message Bridge is successfully installed on your computer.
What to do next
After you install the Message Bridge, complete the following procedure to enable the Proficy Server Manager service to pass messages between the Plant Applications:


 Note: Kafka is installed in a different directory than the default directory to ensure that the kafka service is up and running.