Overview
Overview of Assets
The Assets page in Predix Essentials contains the Asset Hierarchy and Asset Group that provide a dynamic way to interact with and view your assets.
Simply, the Asset Hierarchy displays records in the database and how they relate to one another. It provides a dynamic view of functional locations, equipment, and their associated analyses by navigating through the system based on the assets themselves.
Asset Groups are collections of assets, grouped together for analysis. An Asset Group can be created ad hoc in the Asset Group section or during the associated workflow. An Asset Group can be saved and reused for different types of analyses. For example, if you wanted to perform an ACA and an RBI on the same 20 pieces of equipment, you can create an Asset Group with those 20 equipment, and use the same group for each analysis.
About the Asset Hierarchy
Predix Essentials is built on the premise, within your company, there are multiple functional locations that can be organized in a hierarchy to represent the fact that some locations belong to other locations. These relationships create the Asset Hierarchy.
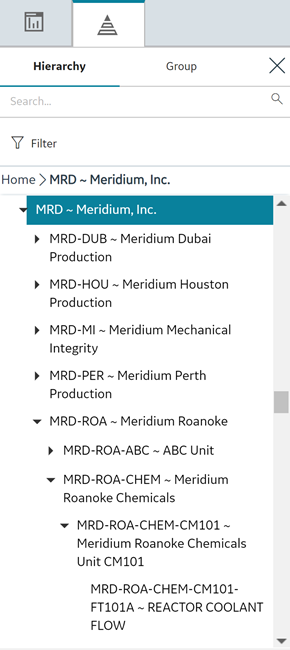
Navigating the Asset Hierarchy
The Asset Hierarchy allows you to browse your assets from the top-level functional location.
- Company (MRD ~ Meridium, Inc.)
- Sites (MRD-ROA ~ Meridium Roanoke)
- Areas (MRD-ROA-REFN ~ Meridium Roanoke Chemicals)
- Units (MRD-ROA-CHEM-CM101 ~ Meridium Roanoke Chemicals Unit CM101)
- Functional Locations (MRD-ROA-CHEM-CM101-FT101A ~ REACTOR COOLANT FLOW)
- Equipment (G0022-065 ~ 000000000001034757 ~ PUMP)
- To navigate to a parent-level or child-level equipment or functional location of an asset that is selected in the hierarchy, select the corresponding breadcrumb link in the breadcrumb path.
- To expand or collapse the Asset Hierarchy panel, select
 or
or  , respectively.
 - To resize the Asset Hierarchy panel, drag the border of the panel to the required width.
- As a standard practice, we assume that your equipment is installed in locations that exist on the lowest level of your location hierarchy.
- The Asset Hierarchy displays:
- A maximum of 500 top-level records in the hierarchy.
- A maximum of 500 child equipment or functional locations for a parent functional location.
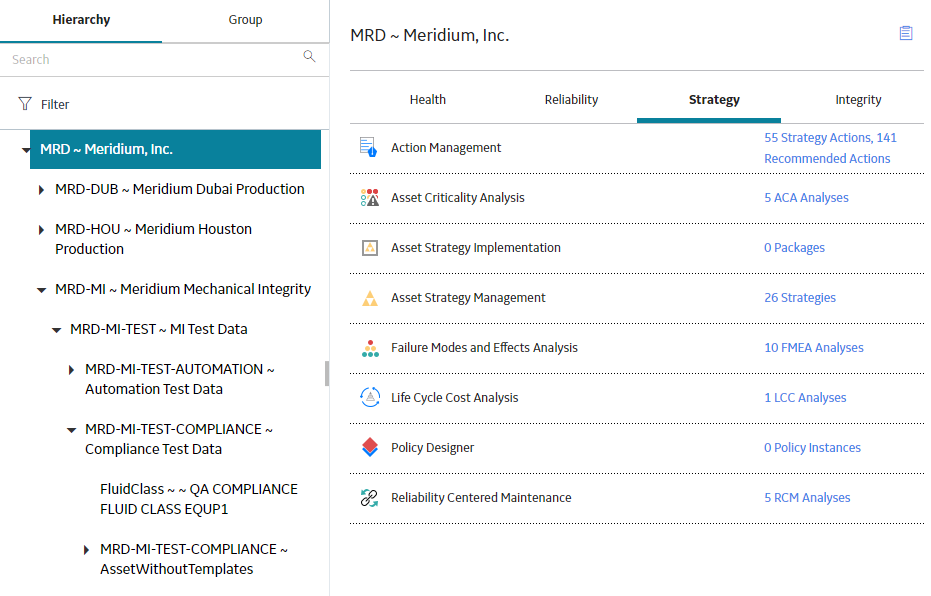
The <Asset Name> Workspace
As you navigate through the Asset Hierarchy, in the <Asset Name> workspace, you can access the information about the Health, Reliability, Strategy, and Integrity for each level of equipment or functional location. The <Asset Name> workspace provides an overview of all the data available in Predix Essentials related to the asset selected in the Asset Hierarchy. For each Health, Reliability, Strategy and Integrity item, a hyperlink is available, displaying the number and type of analysis performed against that asset. When selected, the hyperlinks open the analyses or inspections in a new tab while maintaining the selection in the Asset Hierarchy.
 .
.View the Asset Criticality Analysis for an asset in the Asset Hierarchy
- In the Asset Hierarchy, select MRD ~ Meridium, Inc.
The MRD ~ Meridium, Inc. workspace appears.
- Select the Strategy tab.
In the Strategy section, you can view module-specific data for the asset, such as strategy actions, recommended actions, ACA analyses, strategies, and so on.
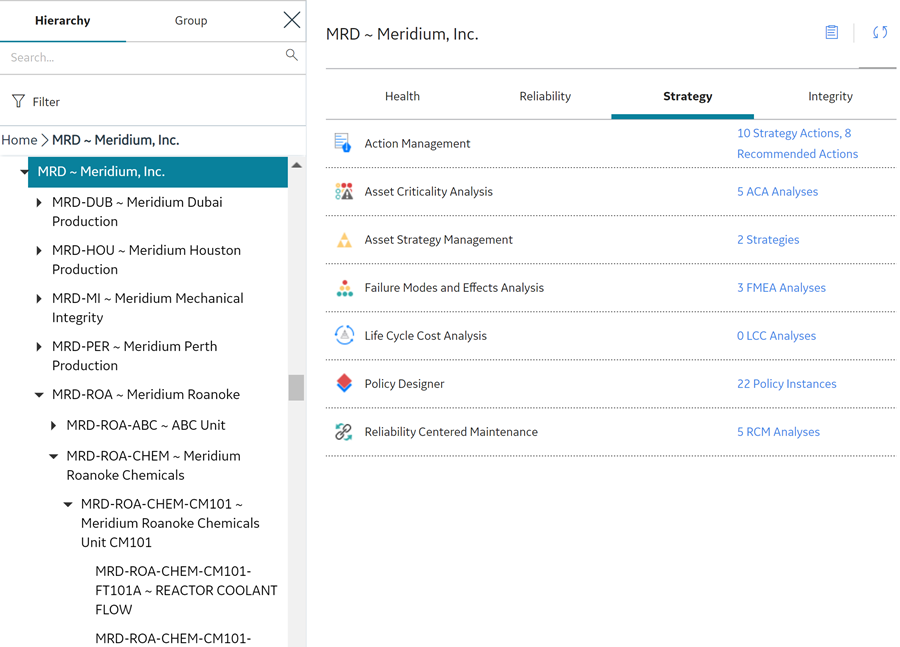
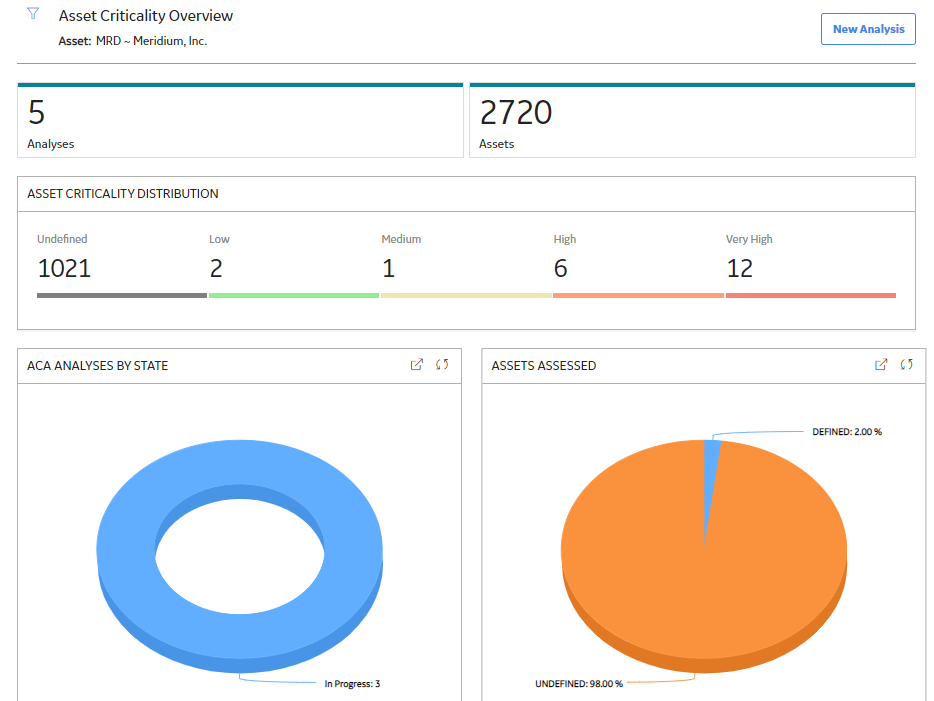
- Select the 5 ACA Analyses link.
The Asset Criticality Overview page appears in a new tab, and you can access the existing analyses for the selected asset.
About Asset Groups Based on Queries
The ability to create an Asset Group based on a query allows a user to apply an analysis to a dynamic group of assets (that is, equipment, functional locations, and RBI components). When a user bases a new Asset Group on a query, the Asset Group is dynamic in that it is subject to change as assets change with respect to the parameters of the query.
Every time you access an Asset Group that is based on a query, the query is freshly run. For example, the day you create an Asset Group using a query, the query it is based on may populate it with 10 assets. If you were to access the same Asset Group a month later, the query would run afresh and may populate the Asset Group with more or fewer than 10, depending on the number of assets that will meet the parameters of the query the second time around.
If you want to run a static query that is populated with specific assets, you need to provide an entity key. The entity key should be provided in the first column of your query, in the ENTY_KEY column.
Additionally, when you apply an analysis to an Asset Group that is based on a query, the Asset Group is no longer dynamic. Instead, the assets returned by the base query at the time when you apply the analysis are the exact assets for which that analysis will always apply.
You cannot use an Asset Group that is based on a query as a filter in a module overview page where asset filtering is available. You must convert the dynamic Asset Group to a static group to use it as a filter.
Lastly, you cannot modify Asset Groups that are based on queries. You must create a new Asset Group.
Access the Assets Page
Procedure
 .
.The page displaying the Asset Hierarchy appears.
Create an Asset Group
Before You Begin
Procedure
- To create an asset group from scratch:
- In the left pane, select Group, and then select
 .
.The New Asset Group workspace appears.
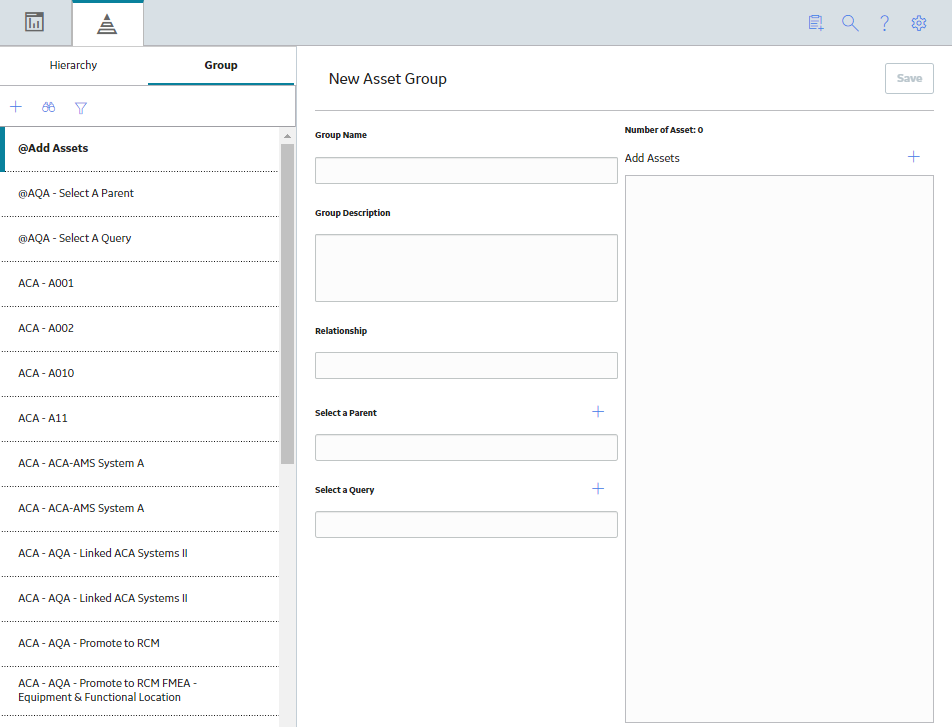
- To add a Parent to the Asset Group, above the Select a Parent box, select . The Asset Finder window appears.
- In the Asset Finder window, use the Asset Hierarchy to select for the level of the hierarchy with which you want to associate the group, and then select Done.
- Above the Add Assets box, select . The Asset Finder window appears.
- In the Asset Finder window, using either the Asset Hierarchy or a preexisting Asset Group, select for the asset(s) that you want to add to the group, and then select Done.
- In the left pane, select Group, and then select
- To create an asset group based on a query:
- In the left pane, select Group, and then select .
The New Asset Group workspace appears.
- To add a Parent to the Asset Group, above the Select a Parent box, select . The Asset Finder window appears.
- Above the Select a Query box, select .The Select a Query from the Catalog window appears.
- In the left pane, select Group, and then select
Filter Assets
About This Task
Steps: Apply a Filter to the Asset Hierarchy
Procedure
- To apply a filter to the Asset Hierarchy:
- In the left pane, in the Hierarchy section, select
 .The Filter menu appears.
- In the left pane, in the Hierarchy section, select
- To apply a filter to asset groups:
- In the left pane, in the Group section, select
 .The Group Filter window appears.
 - In the Asset Hierarchy, in the row for each asset by which you want to filter groups, select .
- In the left pane, in the Group section, select
Search for an Asset
Procedure
- In the left pane, in either the Asset Hierarchy section or the Asset Group section, select
 , and then, in the text box, enter your search criteria. For more information, refer to the Search section of the documentation.The search results appear in a list in the left pane.Note: You can now search for the functional location or the equipment by applying the taxonomy filter.
Copy an Asset Group Based on a Query
Before You Begin
Before you can copy an Asset Group based on a query, the system must contain an Asset Group that is based on a query.